Work in Progress

WW2 - Sd.Kfz. 251/1 Ausf. C (Construction of the base) - DE

Posted by Hellboy on 16 Jun 2016, 19:51

Sd.Kfz. 251/1 Ausf. C (riveted)

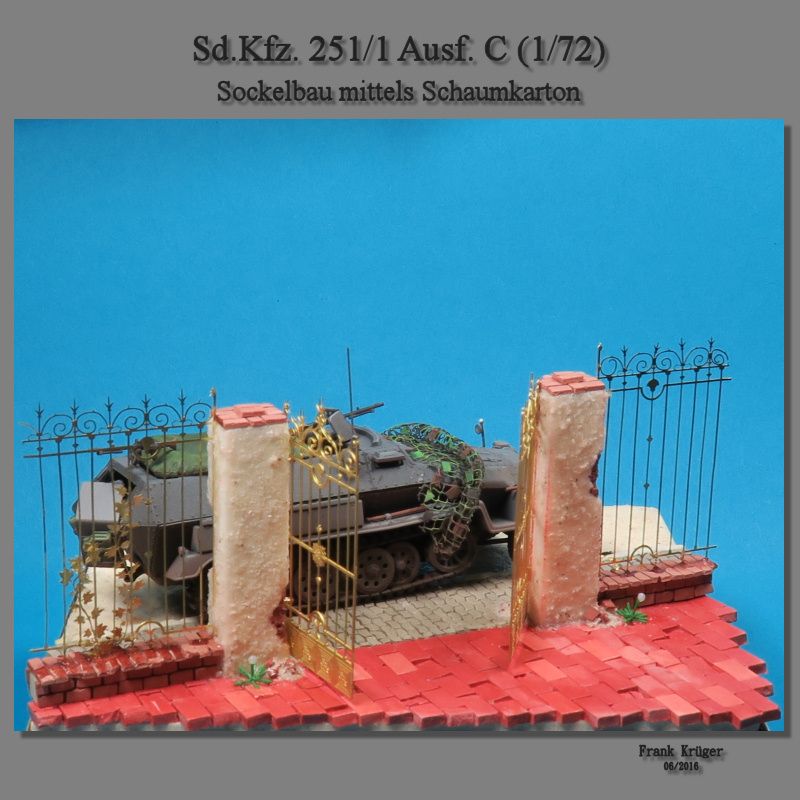
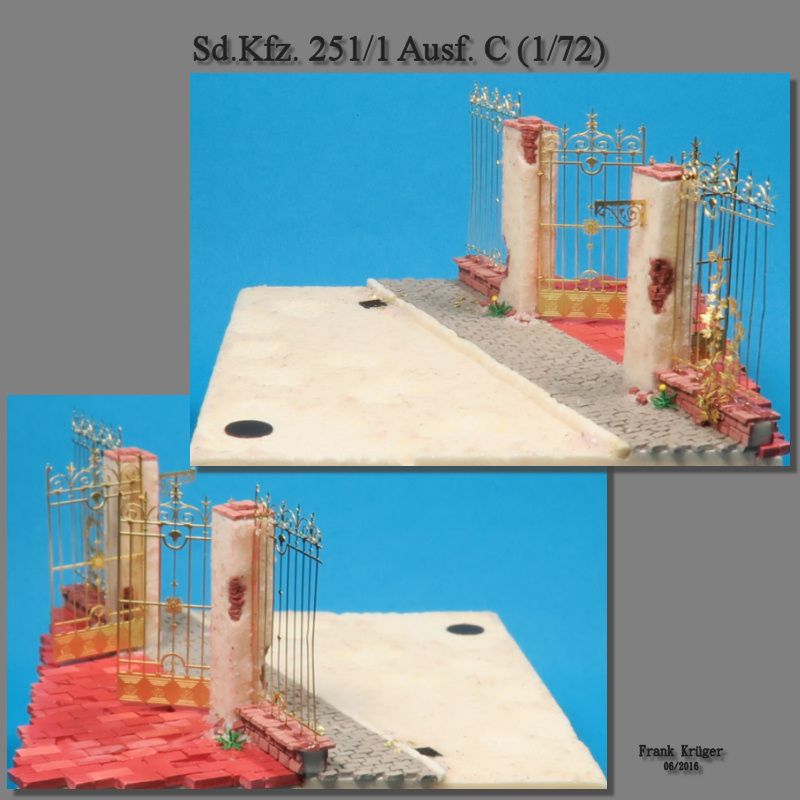
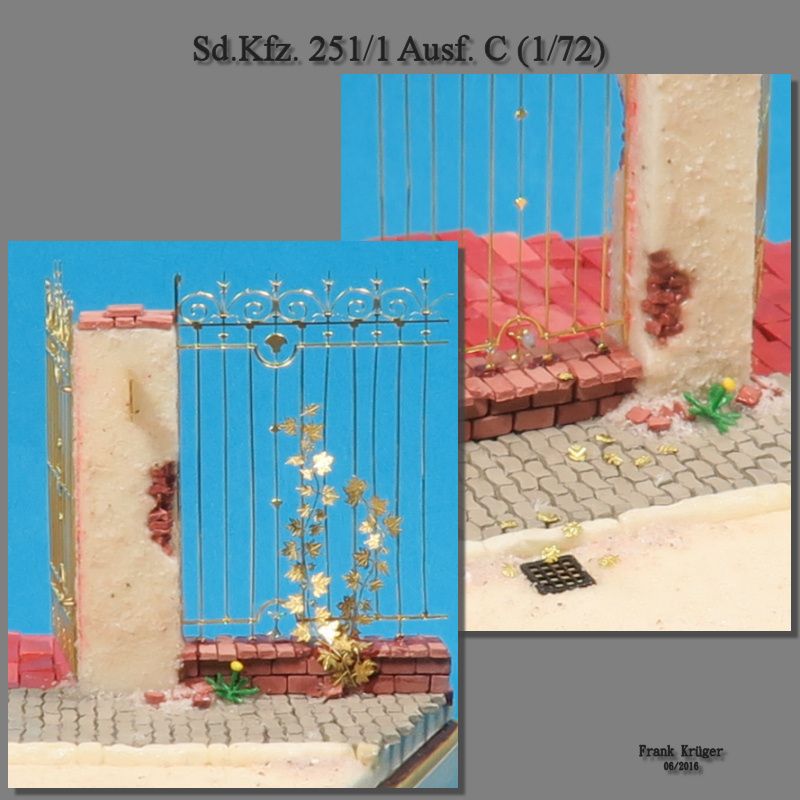
Some pictures of a recent project - construction of a Sd.Kfz. 251/1 Ausf. C of Dragon and the design of the base by means of foam board (Kapa).

Reference images see 'Panzer der Wehrmacht – Rad- und Halbkettenfahrzeuge 1939-1945' page 92-93 (Motorbuch Verlag).

Please click on the picture to view it in full size. Enjoy the photos!

Your Hellboy


Link-Note:

https://en.wikipedia.org/wiki/Sd.Kfz._251

http://www.worldwarphotos.info/gallery/ ... sdkfz-251/

Keywords for search engines: 1/72, Deutschland, WW2, Sd.Kfz. 251/1 Ausf. C, Schaumkarton, Modellbau, Modelling, Frank Krueger, 06/2016, photos were shot with Canon PowerShot G7 X, images were edit with Corel Paint Shop Pro X, picture hosted by Photobucket.com
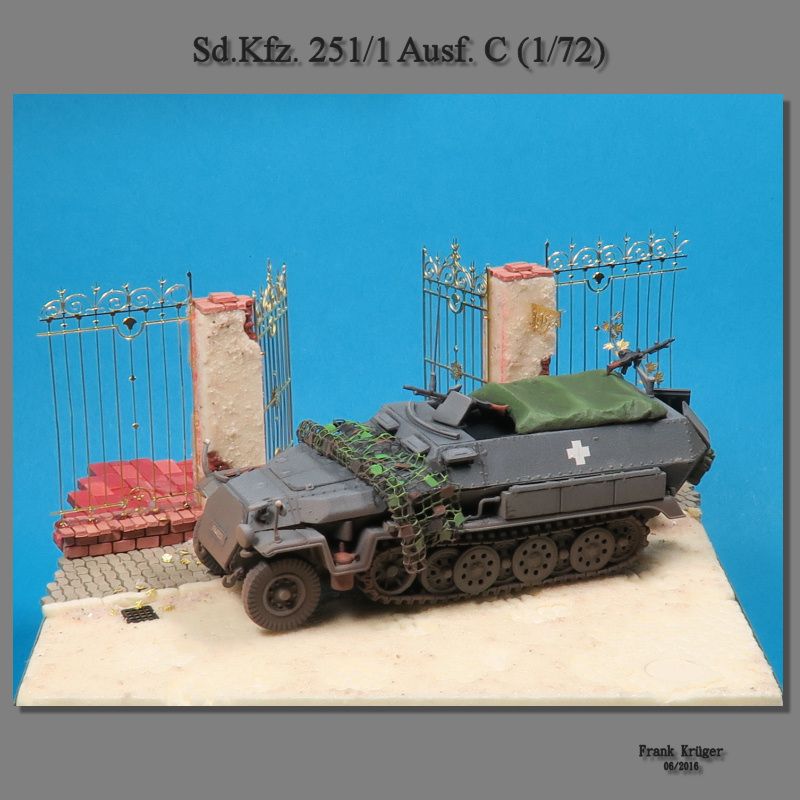
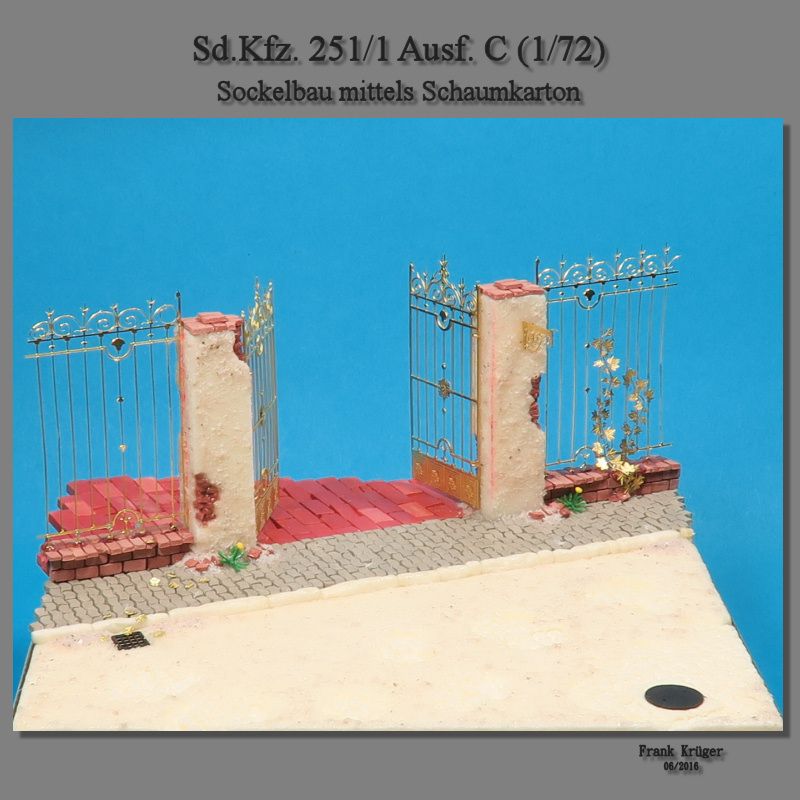
Image

Image

Image

Image

Image

More libraries:

http://s1045.photobucket.com/user/FKrueger/library/
User avatar
Hellboy  Germany
 
Posts: 611
Member since:
10 Feb 2016, 19:34


Posted by Bluefalchion on 16 Jun 2016, 20:35

Fantastic! For Polish campaign of 1939 or French campaign of 1940?
User avatar
Bluefalchion  United States of America
 
Posts: 3575
Member since:
23 Dec 2010, 07:57

Posted by Peter on 16 Jun 2016, 20:37

Wonderfull work again Frank! Fantastic base! :shock: :thumbup:
User avatar
Peter  Belgium

Moderator Moderator
 
Posts: 22751
Member since:
25 Mar 2008, 18:51

Posted by Susofrick on 17 Jun 2016, 07:20

Very nice! And I totally love the dandelion!
User avatar
Susofrick  Sweden
Supporting Member (Gold) Supporting Member (Gold)
 
Posts: 7713
Member since:
19 Feb 2008, 12:10

Posted by Hellboy on 17 Jun 2016, 14:32

Thank you for the Likes and Comments. Am very pleased about it that you like the diorama base. I'm already myself very curious to see how the diorama painted then looks. We'll see... :-D


Peter wrote:Wonderfull work again Frank! Fantastic base! :shock: :thumbup:


Peter, I'm always pleased about a comment from you. This is now the second attempt, with foam board to create a diorama base. After the first not so great experiment you've again encouraged me! :thumbup: Now I'm really glad to have again made a base. The work has now made a lot of fun !!


Susofrick wrote:Very nice! And I totally love the dandelion!


Susofrick, you're right. The dandelion is really great. :yeah: The manufacturer is BUSCH. Here is a link:

http://www.busch-model.com/online/index.php?rubrik=3&sprach_id=de&art_id=1246&sprach_id=de

However, the plastic is very difficult to bond. But the effort is worthwhile.


Bluefalchion wrote:Fantastic! For Polish campaign of 1939 or French campaign of 1940?


Bluefalchion, thanks for your comment! To your question: Planned France was 1940. After your question but I am become somewhat uncertain. The white bars cross could be wrong now. Now that would be stupid and embarrassing. :oops: Can anyone tell me if this white cross has been also used in the Battle of France? For example, on vehicles from the Polish campaign?
User avatar
Hellboy  Germany
 
Posts: 611
Member since:
10 Feb 2016, 19:34

Posted by Bluefalchion on 17 Jun 2016, 14:49

Hellboy--

I think the OKD got rid of the white crosses after the Polish campaign, where facts on the ground made clear that the Poles were using the distinctive marks for aiming their excellent anti-tank rifles. Also, it looks like an MG 42 in the front, which obviously wouldn't be correct for the initial French invasion. But, remember, France was occupied until nearly 1945, so your excellent Sd.Kfz 251/1 Auf C. could be serving in France during any of that span.
User avatar
Bluefalchion  United States of America
 
Posts: 3575
Member since:
23 Dec 2010, 07:57

Help keep the forum online!
or become a supporting member

Posted by Wiking on 17 Jun 2016, 15:43

And another promesing Dio from Hellboy. :-D

As far as I know the white cross is for the Polish campain right.
The crews put often mud at it, because white are so visible so it look sometimes yellowish at pictures.
For the France campain it was not so common but I saw at ebay some pic with this white cross and a german text that indicate the vehicle to the Fall Gelb. Now it is up to you.
The 251 look well done. The Dragon kit is a true improvement to the aged ESCI one.
I could be wrong for the MG but both look to me as MG34. That is Ok for the timeline then.

I like the idea with the brick, pavement (puh, lot of work!).
That some of the big red brick are in different angle is a lifelike aspect. :yeah:

I can only put me in the row of Susofrick with the dandelion.
Wish you a van Gogh hand again during painting as your past Dios.
User avatar
Wiking  Germany
 
Posts: 2834
Member since:
14 Sep 2015, 10:03

Posted by Hellboy on 20 Jun 2016, 05:55

Bluefalchion wrote:I think the OKD got rid of the white crosses after the Polish campaign.....


Bluefalchion, thank you for your help and lots of useful information. Then I do it as planned! Soothes can now start working ... Anticipation!!! :-D
User avatar
Hellboy  Germany
 
Posts: 611
Member since:
10 Feb 2016, 19:34

Posted by Hellboy on 20 Jun 2016, 06:10

Wiking wrote:And another promesing Dio from Hellboy.


Wiking, thank you for your detailed and kind comment! :-D Also you Thanks for the useful information. The idea with the mud on the white cross I find very interesting. :thumbup: With pigments should not be a lot of work. Does the vehicle still more lifelike.

Wiking wrote:Wish you a van Gogh hand again during painting as your past Dios.


Many thanks for the good wishes! I hope that it succeeds! I'll do my best .... promised !! :-D
User avatar
Hellboy  Germany
 
Posts: 611
Member since:
10 Feb 2016, 19:34

Posted by Beano Boy on 20 Jun 2016, 12:21

The whole base is highly improved to the eye by that simple angle across the board. :thumbup:
Well done on showing good detail work too. :thumbup:
i guess Gunnar loves dandylions as much as I do. :-D
Take the WW2 time period piece away and any number of differing model figures could be staged upon that pathway. After all buildings and iron gateways tend to have been up and bright smiling long before certain people arrived upon the scene they overlook in their own shadows.
Love it All! :-D BB
Beano Boy  England
Supporting Member (Gold) Supporting Member (Gold)
 
Posts: 8125
Member since:
03 Sep 2013, 14:45

Posted by Hellboy on 20 Jun 2016, 13:48

Beano Boy wrote:The whole base is highly improved to the eye by that simple angle across the board. :thumbup: Well done on showing good detail work too. :thumbup: ....


Beano Boy, thank you for your kind comment. Am happy that you Likes the Driorama basis. :-D
The construction of the base has really given me a lot of fun. What I have always the most fun, the many small details are to be installed.
Especially the possibilities offered by the Photo Etched Parts, I find fantastic both in the vehicle as well as the construction of the diorama base. :yeah: :yeah:
I admit that this work always makes me the most pleasure. Addictiveness .... ;-)
User avatar
Hellboy  Germany
 
Posts: 611
Member since:
10 Feb 2016, 19:34

Posted by panzerman on 28 Jun 2016, 02:33

Miniature masterpieces. Well done.
Bill.
User avatar
panzerman  United States of America
 
Posts: 1119
Member since:
27 Jan 2012, 15:25

Posted by Hellboy on 28 Jun 2016, 13:22

panzerman wrote:Miniature masterpieces. Well done. Bill.


Bill, thank you for your kind comment. I am glad that you like my diorama base. :-D Now, however, the painting has yet to succeed ... hope it works!
User avatar
Hellboy  Germany
 
Posts: 611
Member since:
10 Feb 2016, 19:34

Posted by ADM on 30 Jun 2016, 00:44

Super ! :yeah: :-D :-)
User avatar
ADM  
 
Posts: 731
Member since:
11 Jul 2012, 12:42

Posted by Hellboy on 23 Apr 2017, 16:47

This comes from making too many projects parallel. :oops: But now revived. :-D

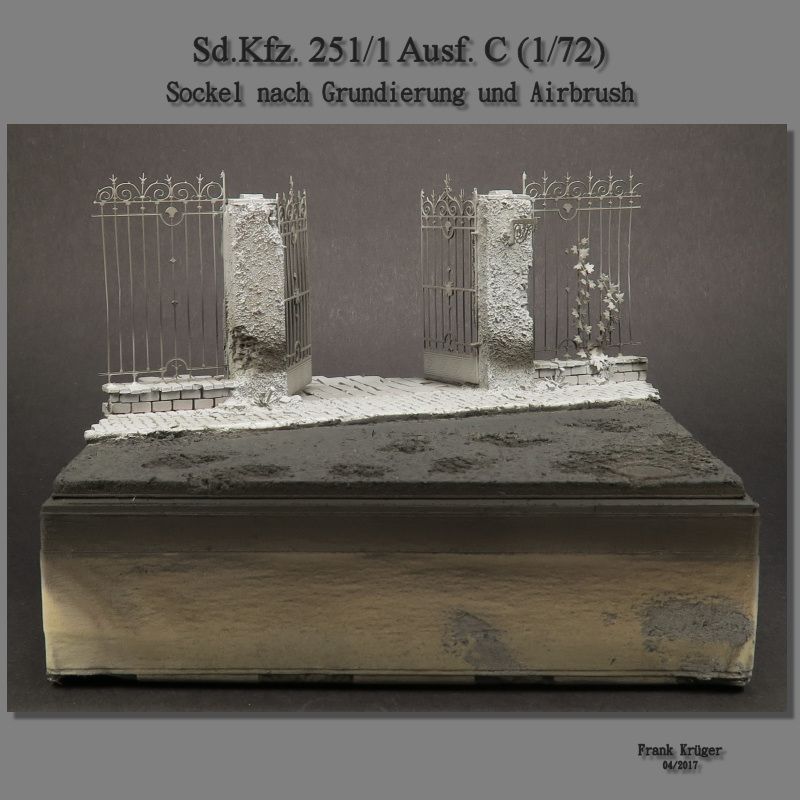
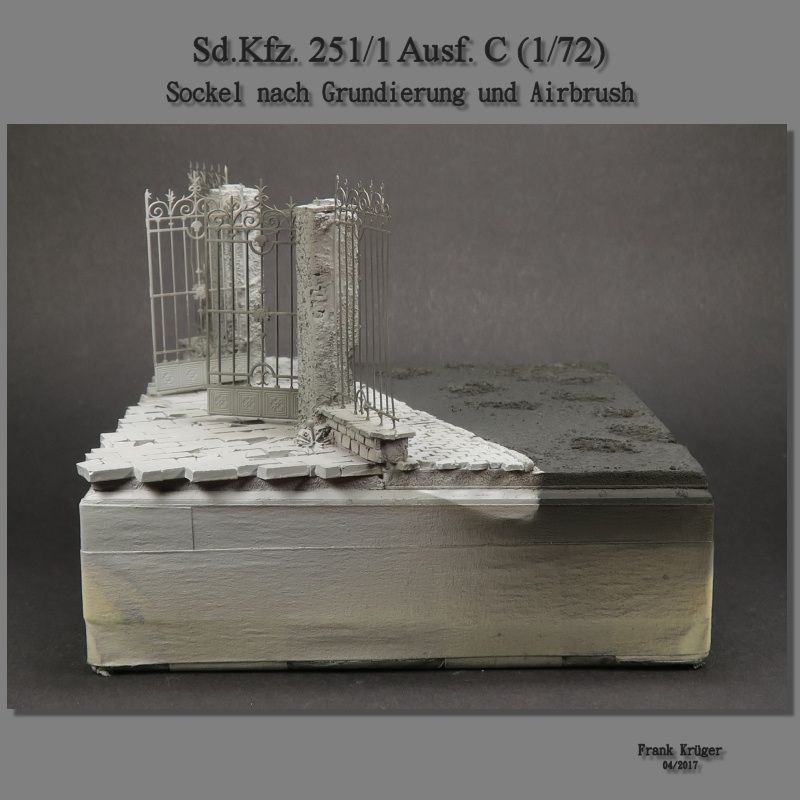
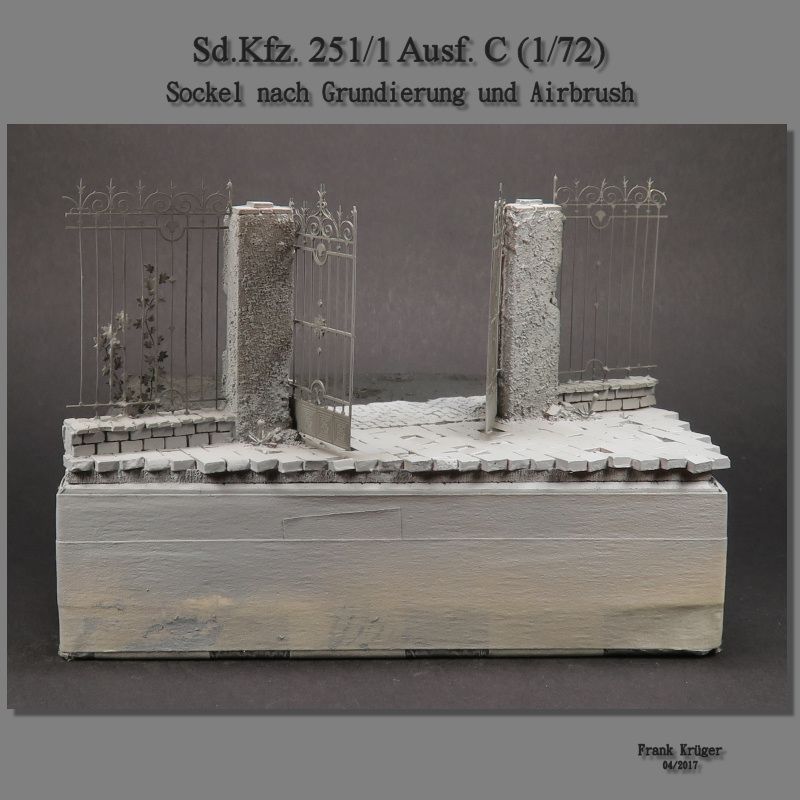
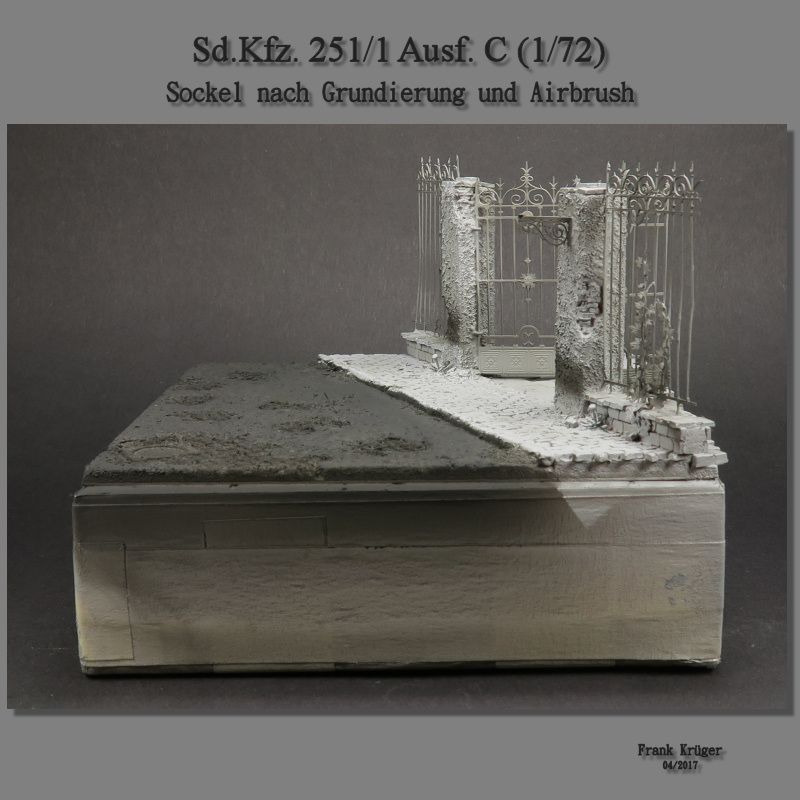
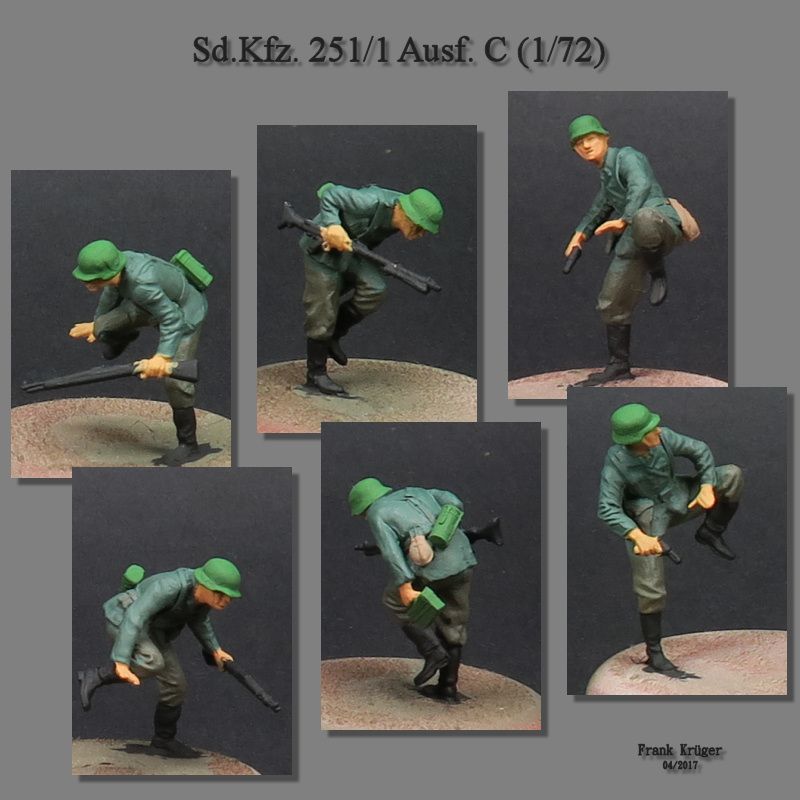
After a very long break, a small update follows for this project. The base as well as the figure was primed with Primer by Vallejo.

https://www.dersockelshop.de/grundierungsspray-vallejo-primer-premium-grey-400ml_vallejo_va28011.html

The first colors were applied to the base using the airbrush. Now follow the painting with the brush.

The basic colors were applied to the figures with the brush. Here I used acyl colors. The next step is the painting of the metal parts as well as the skin parts with oil colors. Later, the painting of the clothing (light and shadow) with acyl colors follows. Let's see if it succeeds.

By the way, the figures come from the manufacturer Preiser from the set 72501 'Absitzende Panzergrenadiere'.

http://www.plasticsoldierreview.com/Review.aspx?id=865

The figures in the photo are only a small selection. There will probably be about 8 figures. We'll see ...

Have fun. :-D

Hellboy


Image

Image

Image

Image

Image
User avatar
Hellboy  Germany
 
Posts: 611
Member since:
10 Feb 2016, 19:34

Posted by Kostis Ornerakis on 23 Apr 2017, 23:08

Very promising! :yeah: :-D
User avatar
Kostis Ornerakis  Greece

In memoriam
 
Posts: 1280
Member since:
14 Feb 2016, 18:16

Help keep the forum online!
or become a supporting member

Posted by Wiking on 24 Apr 2017, 16:49

Green Steelhelmets seams to be your Markenzeichen (trade mark).
Look in the gallery other scales 1/35 Tamiya Flak 37 Dio for instance.
The helmet should be more Panzergrau. Revell color 7024. Or Geschützgrau 36174
with a thin black wash. Or every other middle (more black wash) to dark grey.

Image

As an example you can see grey, grey with light brown double cross, with brown, grey steel helmets.


But finally if you prefer green steel helmets than choose green.
Because to build and like your own Dio is the important side of the medal.
User avatar
Wiking  Germany
 
Posts: 2834
Member since:
14 Sep 2015, 10:03

Posted by Hellboy on 25 Apr 2017, 06:04

Kostis Ornerakis and Wiking, thank you very much for your comment.

Wiking wrote:Green Steelhelmets seams to be your Markenzeichen (trade mark)....The helmet should be more Panzergrau.....


I had expected it ;-) ...... we had the theme of helmet paint already. I have not forgot about that. And you're totally right with your comment! But I can already betray so much. This time it will be Panzergrau. It does not look like this yet but is promised thing! The three guys are still remnants of my 'green period'. :-D The basic color is once again painted over. Then follow different gray oil paints for light and shadow. Finished! Hope you will like the result later.

Thank you very much for the picture. Very beautiful. Do we know the diorama already????
User avatar
Hellboy  Germany
 
Posts: 611
Member since:
10 Feb 2016, 19:34

Posted by Wiking on 25 Apr 2017, 16:58

Hellboy wrote.
.... we had the theme of helmet paint already. I have not forgot about that.
The three guys are still remnants of my 'green period'. :-D

Ahhh! OK.


Do we know the diorama already????

No.
User avatar
Wiking  Germany
 
Posts: 2834
Member since:
14 Sep 2015, 10:03

Posted by mickey mouse on 25 Apr 2017, 17:20

Hellboy and wiking, you are both right. Usuall the helmets were panzergrey or greygreen, but some soldiers did painted their helmet in camo colors to improve camouflage. and especially in the later years of the war. So any grey and green can be added on the helmet. as long as it blends in in the terrain a bit.
User avatar
mickey mouse  Netherlands
Supporting Member (Gold) Supporting Member (Gold)
 
Posts: 1434
Member since:
24 May 2012, 19:42

Next page

Return to Work in Progress