Work in Progress

Spanish Royal Guard Music Unit

Posted by Santi Pérez on 22 Aug 2024, 19:54

Susofrick wrote:...I was thinking SEK and wrote € . A little small difference...

Don't worry, Gunnar. In Spanish we have a saying: ‘Hasta el mejor escribano echa un borrón’ (Even the best scribe throws a blot). By the way, in my collection I have some SEK coins and banknotes from my now distant and brief visit to Stockholm in 2010. :mrgreen:

At the same time as I'm shortening the top end of the drum major's staff, I have also started the following figure. This is the band's officer conductor. ;-)

Santi.
User avatar
Santi Pérez  Spain
 
Posts: 2043
Member since:
28 Aug 2016, 19:42


Posted by Ben90 on 22 Aug 2024, 22:10

Yes, the staff is too long, compared to the photo. But overall it is a wonderful conversion!
User avatar
Ben90  Germany
Golden Brush Winner
 
Posts: 1517
Member since:
28 Apr 2011, 23:32

Posted by Santi Pérez on 24 Aug 2024, 19:12

Ben90 wrote:Yes, the staff is too long, compared to the photo. But overall it is a wonderful conversion!

Thank you, Ben. :-)

I think it looks much better now:

ImageImage Image
Image

Santi.
User avatar
Santi Pérez  Spain
 
Posts: 2043
Member since:
28 Aug 2016, 19:42

Posted by Peter on 24 Aug 2024, 22:49

You're doing nice on these figures! Very nice conversions and I'm looking forward to see them painted in your own special style! :thumbup:

I could have helped you with some of those first version Africa Corps figures. I believe I had some damaged ones (not the head of course) that you could have used. ;-)
User avatar
Peter  Belgium

Moderator Moderator
 
Posts: 22737
Member since:
25 Mar 2008, 18:51

Posted by Santi Pérez on 25 Aug 2024, 19:29

Peter wrote:You're doing nice on these figures! Very nice conversions and I'm looking forward to see them painted in your own special style!...

Well, considering that the whole unit will have 24 figures and I'm still on the fifth one, I think you'll have to be patient to see the whole set painted. :mrgreen:

Besides, I'm not forgetting that I still have to finish the diorama of the Swiss Guard, Pope and Cardinals. As soon as we can solve the problems of our new house and go to live in it, I will try to make progress in the painting of the figures I still have pending. :neutral:

Peter wrote:...I could have helped you with some of those first version Africa Corps figures. I believe I had some damaged ones (not the head of course) that you could have used...

Thank you very much for such a generous offer, Peter. However, as I love conversions, I'm enjoying these immensely, including the making of the ros kepis on the heads. ;-)

Santi.
User avatar
Santi Pérez  Spain
 
Posts: 2043
Member since:
28 Aug 2016, 19:42

Posted by Challenger77 on 26 Aug 2024, 06:28

Very nice and different Project Santi !
User avatar
Challenger77  Austria
 
Posts: 286
Member since:
18 May 2010, 12:50

Help keep the forum online!
or become a supporting member

Posted by Santi Pérez on 29 Aug 2024, 19:53

Thanks so much, Challenger77. ;-)

Santi.
User avatar
Santi Pérez  Spain
 
Posts: 2043
Member since:
28 Aug 2016, 19:42

Posted by Chris on 30 Aug 2024, 10:01

Great conversions ! Santi, could you give us more informations about the way you're using wood glue for headgears ?
User avatar
Chris  France
 
Posts: 815
Member since:
13 Oct 2009, 17:52

Posted by Santi Pérez on 02 Sep 2024, 20:20

Chris wrote:Great conversions ! Santi, could you give us more informations about the way you're using wood glue for headgears ?

Thank you, Chris.

In addition to other conversion techniques (repositioning parts on a figure, ‘transplanting’ parts from one figure to another, carving parts, creating new parts from paper, wood or plastic, etc.), my favourite is to use white wood glue as a modelling material, similar to different commercial putties sold for the same purpose.

The way I work with it is by using a toothpick, with the tip of which I take a small amount of glue, apply it to the right place and give it the desired shape while it's still wet.

The two main uses of this technique are to fill gaps in the figure (e.g. the space between the body and a head, arm or leg that has been added) and to create new, not too large, parts missing in the original figure, such as ears, buttons, straps, etc.

Why can't the pieces modelled with white glue be very large? Because the main problem with this technique is that the thickness of each layer of glue applied, once dry, is very small, so to obtain a large structure, many superimposed layers are necessary to achieve the desired thickness. This takes a lot of time and patience. However, the final result is totally worth it from my humble point of view, due to its consistency and ease of painting.

In case you haven't seen them in the corresponding thread, I leave you a couple of examples of converted figures, so you can compare and evaluate the results.

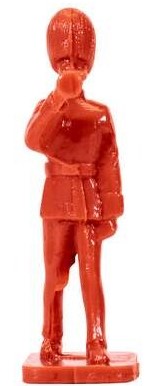
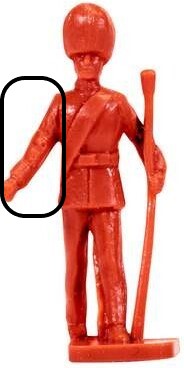
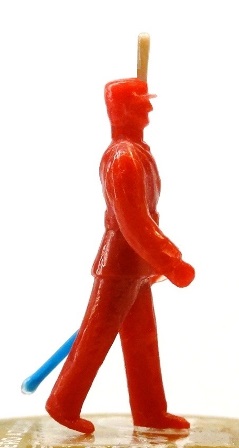
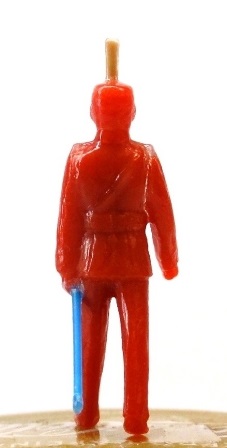
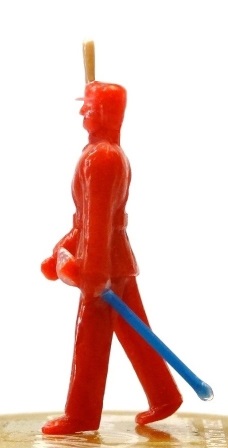
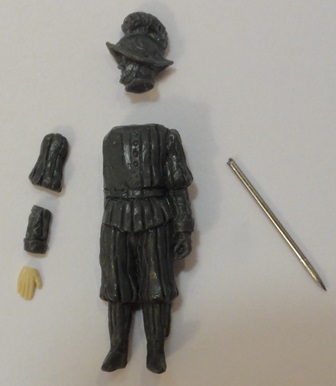
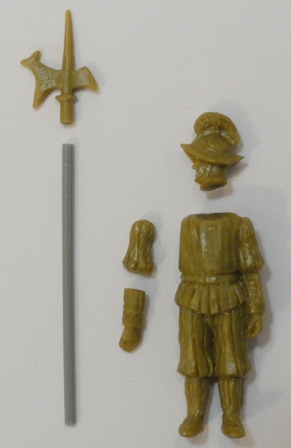
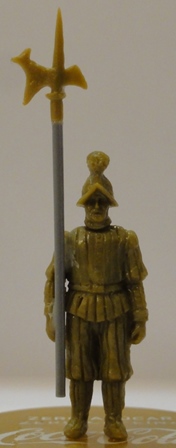
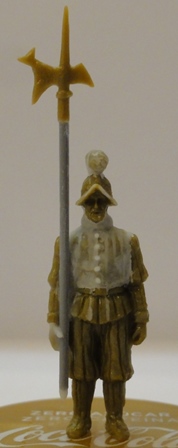
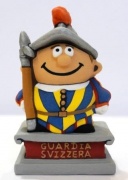
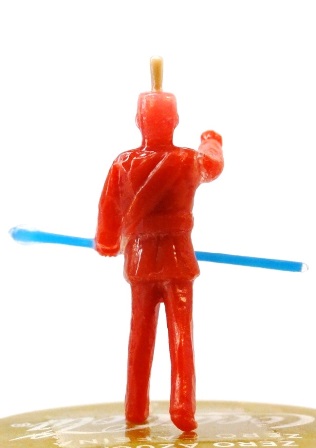
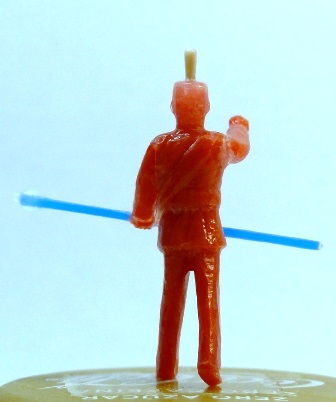
Swiss Guard Sergeant: the separate pieces and the figure before and after white glue application:

Image
Image Image

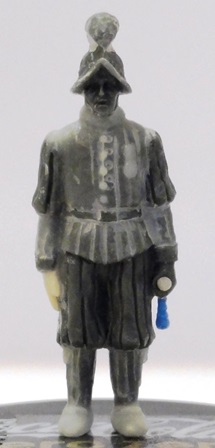
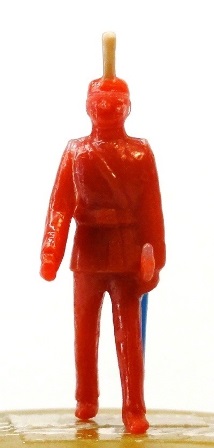
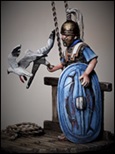
And the same for a Swiss Guard halberdier:

Image
Image Image

I hope you find my explanation useful. Thank you. :-D

Santi.
User avatar
Santi Pérez  Spain
 
Posts: 2043
Member since:
28 Aug 2016, 19:42

Posted by Ochoin on 03 Sep 2024, 04:38

Do you pin as well, Santi? I use cut-up staples, driven into the plastic using pliers. Then I wood glue.

Whilst it gives considerable strength, I'm not sure your dio figures need this as much as 'rough & tumble' wargames' figures.

donald
User avatar
Ochoin  Scotland
 
Posts: 2468
Member since:
16 Jan 2010, 04:00

Posted by C M Dodson on 07 Sep 2024, 10:31

Very good work indeed.

What white do you use please.

I have been using superglue but even that has proved fragile on occasion, depending on the plastic .

Best wishes,

Chris
C M Dodson  United Kingdom
 
Posts: 2658
Member since:
01 May 2015, 18:48

Posted by Santi Pérez on 07 Sep 2024, 22:18

Thanks so much, Donald and Chris. :-)

The first thing I have to clarify, in case I have been misunderstood, is that I never use the white wood glue to join the pieces of the figures, only to model on them. For the former I always use contact glue, usually Ceys brand. :winky:

Ochoin wrote:Do you pin as well, Santi? I use cut-up staples, driven into the plastic using pliers. Then I wood glue.
Whilst it gives considerable strength, I'm not sure your dio figures need this as much as 'rough & tumble' wargames' figures.
donald

No, Donald, I don't use any kind of pins to join the different pieces of the figures together. One of the reasons is that they are usually so small and narrow that pinning them together would be quite difficult. The other is that with the contact glue I use, they are held together well, plus, as you point out, the figures in a diorama are not exposed to such dangerous manipulations as those in wargames. :mrgreen:

C M Dodson wrote:Very good work indeed.
What white do you use please.
I have been using superglue but even that has proved fragile on occasion, depending on the plastic.
Best wishes,
Chris

Chris, I understand you are asking about the contact glue I use to join the different pieces of the figures together.

The truth is that, depending on the type of plastic, I use two different ones. With relatively compact plastics, Ceys ‘Ultra Unick’ works quite well.

However, for softer plastics (as Caesar Miniatures figures, my favourite for dioramas) I use another glue also from Ceys, ‘special for difficult plastics’, which consists of two elements: a primer that is applied first on the two surfaces to be joined and the adhesive itself, which is applied afterwards and ensures a very strong fixation. :thumbup:

I hope I have answered your questions satisfactorily. ;-)

Santi.
User avatar
Santi Pérez  Spain
 
Posts: 2043
Member since:
28 Aug 2016, 19:42

Posted by Santi Pérez on 14 Sep 2024, 17:23

The next figure in the band is now ready. It's its officer conductor. :lol:

As this figure is missing in the Airfix set, I had to use one of the available ones. I chose one of the trumpeters, as there are many of them and his pose is similar to the one I wanted to get. The only thing I had to do was to remove his right arm together with the trumpet and replace it with another one I got from the drum major figure. :mrgreen:

Image Image

I made the sabre sheath with a broom bristle. Once the new pieces were glued in place, the rest of the elements were modelled, as usual, with white wood glue. And this was the result:

Image Image Image Image

I hope you like it. Thanks for watching. :-D

Santi.
User avatar
Santi Pérez  Spain
 
Posts: 2043
Member since:
28 Aug 2016, 19:42

Previous page

Return to Work in Progress