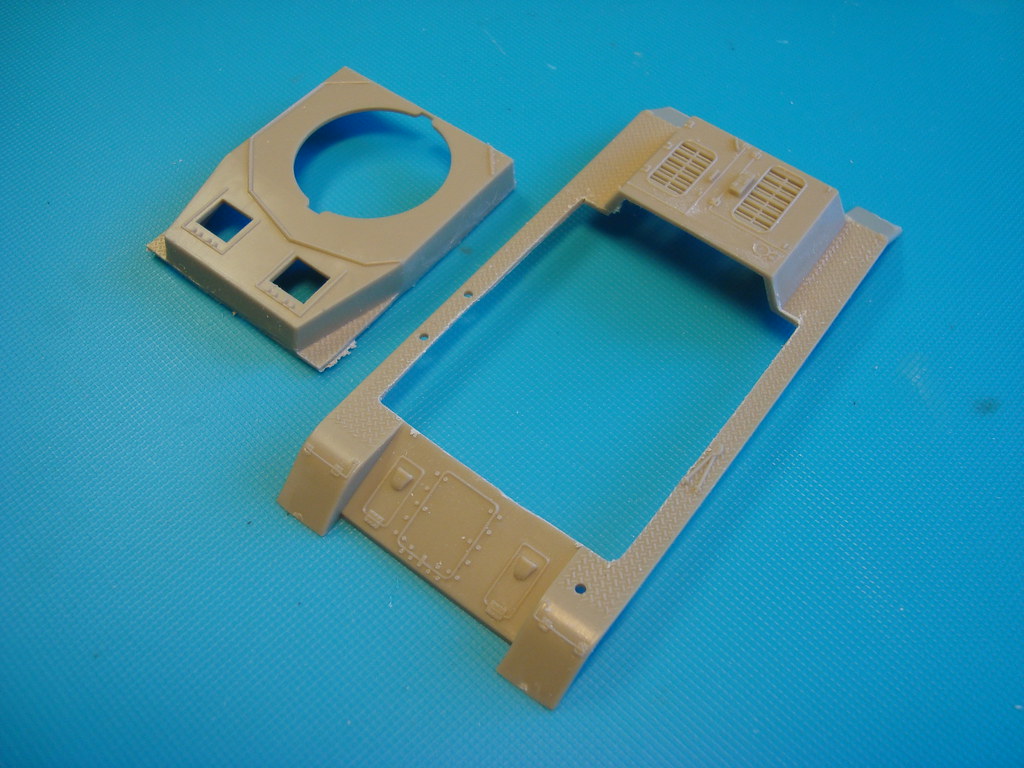
Work in Progress
Flakpanzer IV Möbelwagen (Conversion from Esci Wirbelwind)
35 posts
• Page 1 of 2 • 1, 2
Flakpanzer IV Möbelwagen
Halfway the Second World War the German air superiority on the battlefields was rapidly declining, exposing the ground forces increasingly to allied fighter bombers and attack aircraft. The existing anti-aircraft artillery had not sufficient mobility to move along with the tanks, and did not offer sufficient protection to the crew in combat situations. The solution was found in placing anti-aircaft guns on existing tank hulls and thus creating anti-aircraft tanks. The first true German anti-aircraft tank was the Flakpanzer 38(t), a combination of a 20mm Flak 38 on a Panzer 38(t) hull. But this vehicle did not offer sufficient firepower. A better solution was found by placing a four barrelled 20mm Flak 38 on a Panzer IV hull. A prototype was developed which was presented to Hitler in December 1943. This was the first Flakpanzer IV model, nicknamed Möbelwagen.
Möbelwagen Prototype
The fighting compartment had four foldable sides, that when up offered some protection to the crew, and when down offered a full 360 degrees field of fire. The box-like exterior of the fighting compartment caused the vehicle soon to be nicknamed Möbelwagen (furniture van). However also the 20mm four barrelled gun was considered too light after testing. As a result the prototype was changed by replacing the gun for a 37mm Flak 43. And this would become the production model.
So, from the prototype Möbelwagen with the four barreled 20mm gun only one existed and only for a few weeks or months as it was soon adapted for a heavier gun. I am going to build this first prototype. It will be a conversion of the Esci 1/72 Wirbelwind kit.
-

huib
- Posts: 1014
- Member since:
12 Dec 2015, 15:57
The kit
I use the Esci 1/72 Wirbelwind kit as a starting point for my conversion to Möbelwagen. It is the same kit as my first build in this sequence, only an older issue in a differrent box.
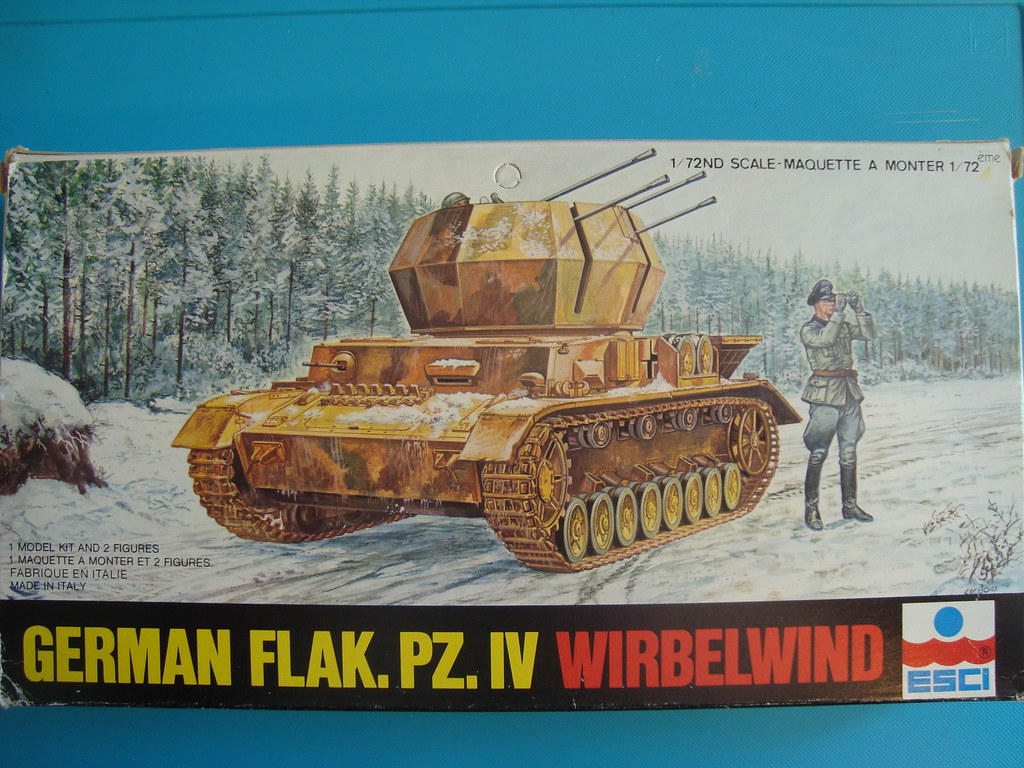
Nice boxart from 1980. The first release of this kit.
The sprues:
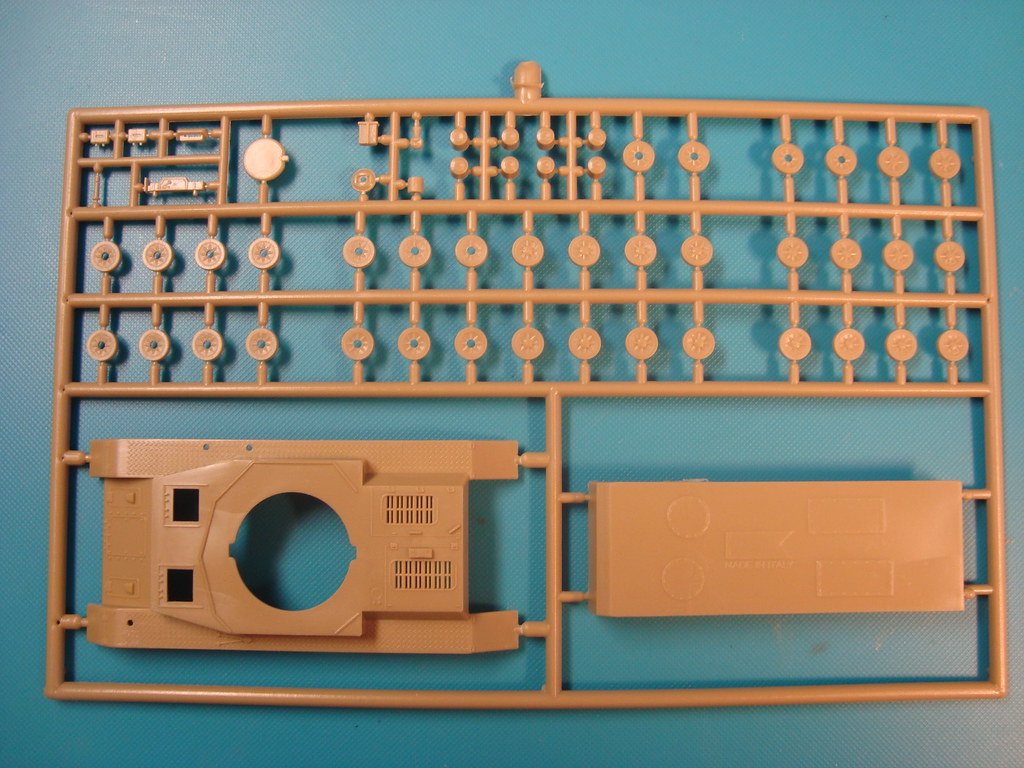
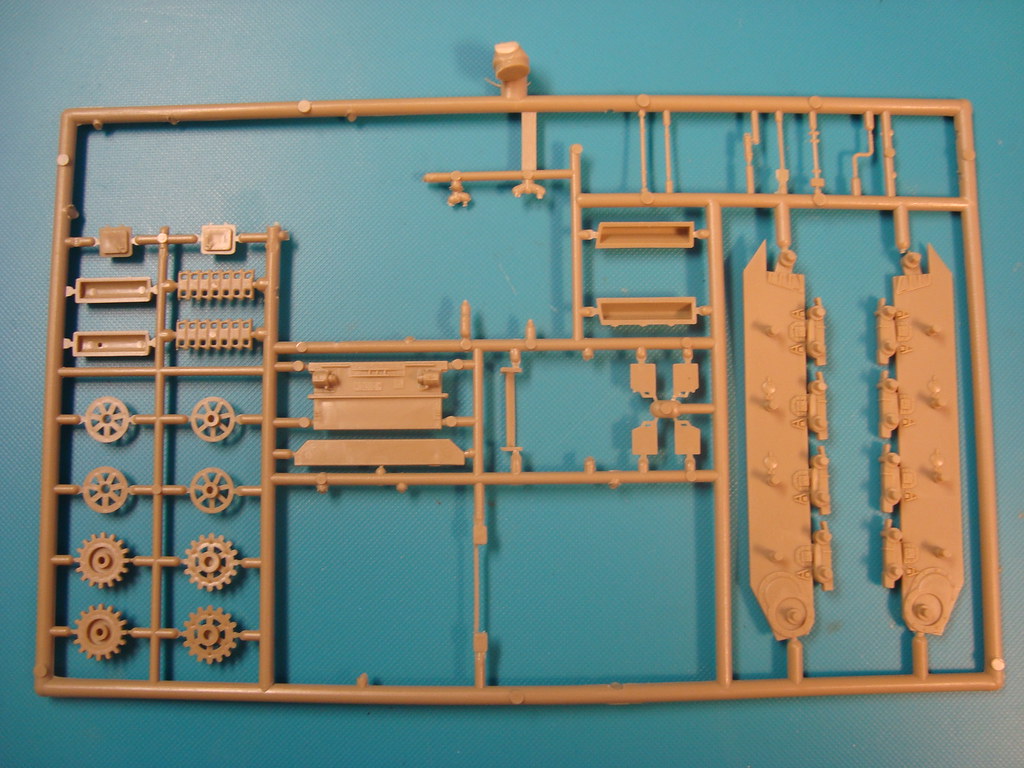
From this sprue the turret parts of the Panzer IV, on which kit this one is based, are removed at the factory.
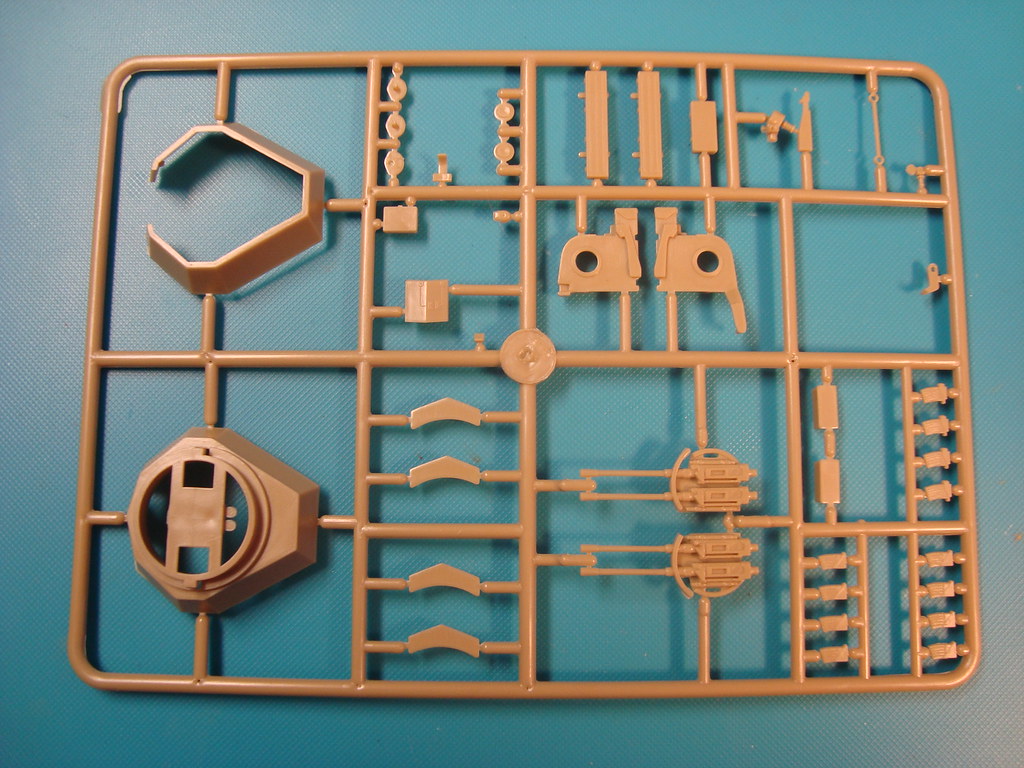
I won't use the turret of the Wirbelwind, but I will use the four barrelled gun for the Möbelwagen.
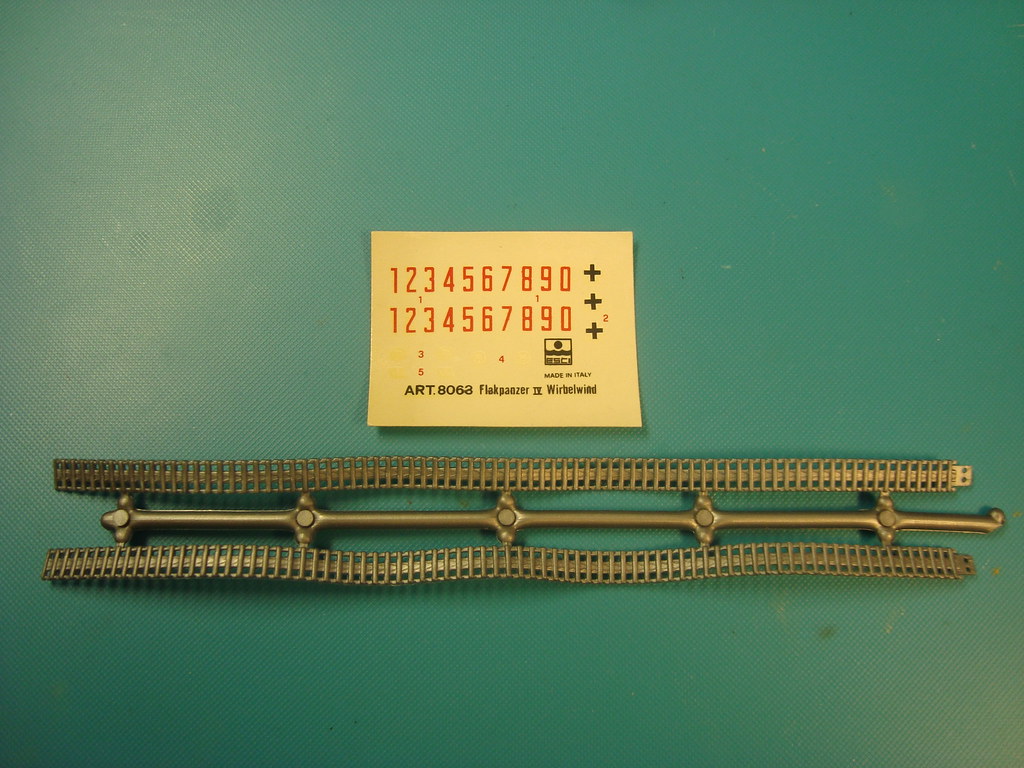
A simple decalsheet, which I won't use, as the prototype had no markings. And the plastic band tracks from Esci. Not bad in detail, but notorious for their inflexibility. I will try to use them, but if I am not happy I have some aftermarket tracks in the sparebox.
And now let's start.
I use the Esci 1/72 Wirbelwind kit as a starting point for my conversion to Möbelwagen. It is the same kit as my first build in this sequence, only an older issue in a differrent box.

Nice boxart from 1980. The first release of this kit.
The sprues:


From this sprue the turret parts of the Panzer IV, on which kit this one is based, are removed at the factory.

I won't use the turret of the Wirbelwind, but I will use the four barrelled gun for the Möbelwagen.

A simple decalsheet, which I won't use, as the prototype had no markings. And the plastic band tracks from Esci. Not bad in detail, but notorious for their inflexibility. I will try to use them, but if I am not happy I have some aftermarket tracks in the sparebox.
And now let's start.
-

huib
- Posts: 1014
- Member since:
12 Dec 2015, 15:57
Good luck and a calm hand for your project to such and old kit.
An idea for the inflexible track.
Can`t remember which model it was. But I get in the past no good option or replacement for such hard rubber track.
Use a new sharp blade on the knife and do a small cut where the track link is. Only the section there the track entangled the running gear and the tension wheel.
You do not need to do a deep cut.
The trick is to stay cool and do cut for cut carefully.
Once too much force and you cut the track.
So a sharp blase is an advantage to work always with the feeling of the same force in your hand.
Hard to explain in English for me but if you try you will understand what I will to tell.
Worked very well for me. Can`t remember a bad result. But remember that I do very high concentration to this work.
-

Wiking
- Posts: 2834
- Member since:
14 Sep 2015, 10:03
Thanks, Bluefalchion and Wiking. And thanks for the advice on the tracks!
The base
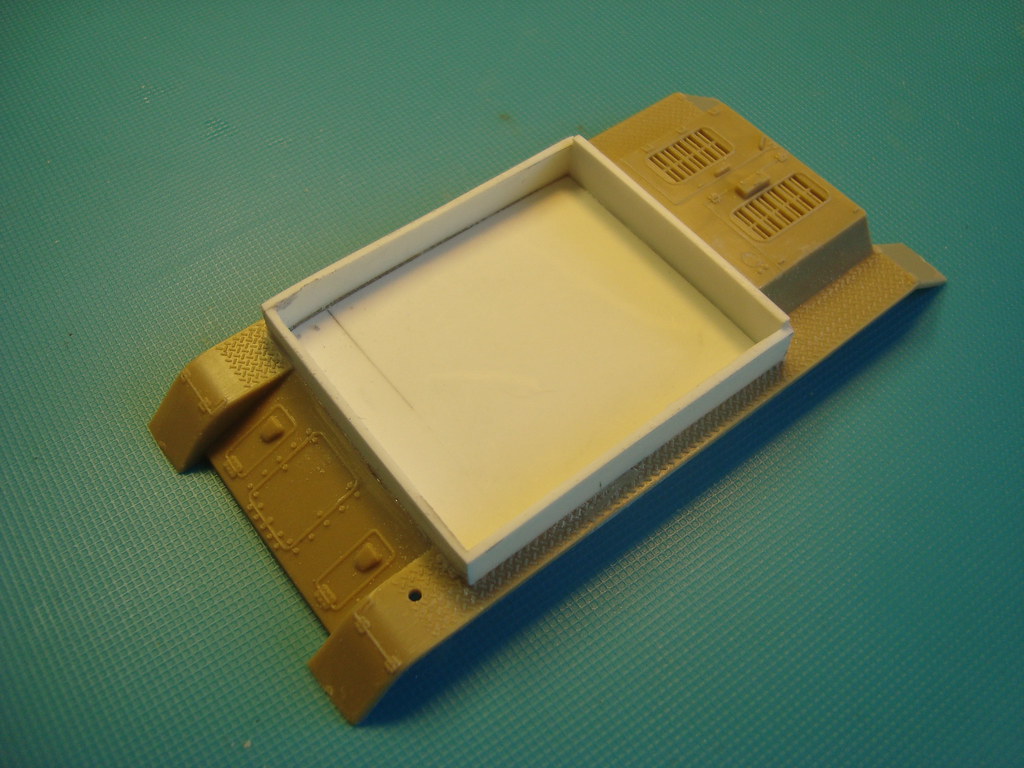
The base of the fighting compartment, made of 1mm plastic card. The backside is a bit higher than the sides. It should be like that.
Now for some more detail.
The base

The base of the fighting compartment, made of 1mm plastic card. The backside is a bit higher than the sides. It should be like that.
Now for some more detail.
-

huib
- Posts: 1014
- Member since:
12 Dec 2015, 15:57
Help keep the forum online!
or become a supporting member
Missed you at FIGZ this year Huib, the workshop was something you could use in this project!
Keep up the good work my friend!
Keep up the good work my friend!
-

Dad's Army
 Moderator
- Posts: 5306
- Member since:
18 Nov 2007, 22:53
Detailing the hull
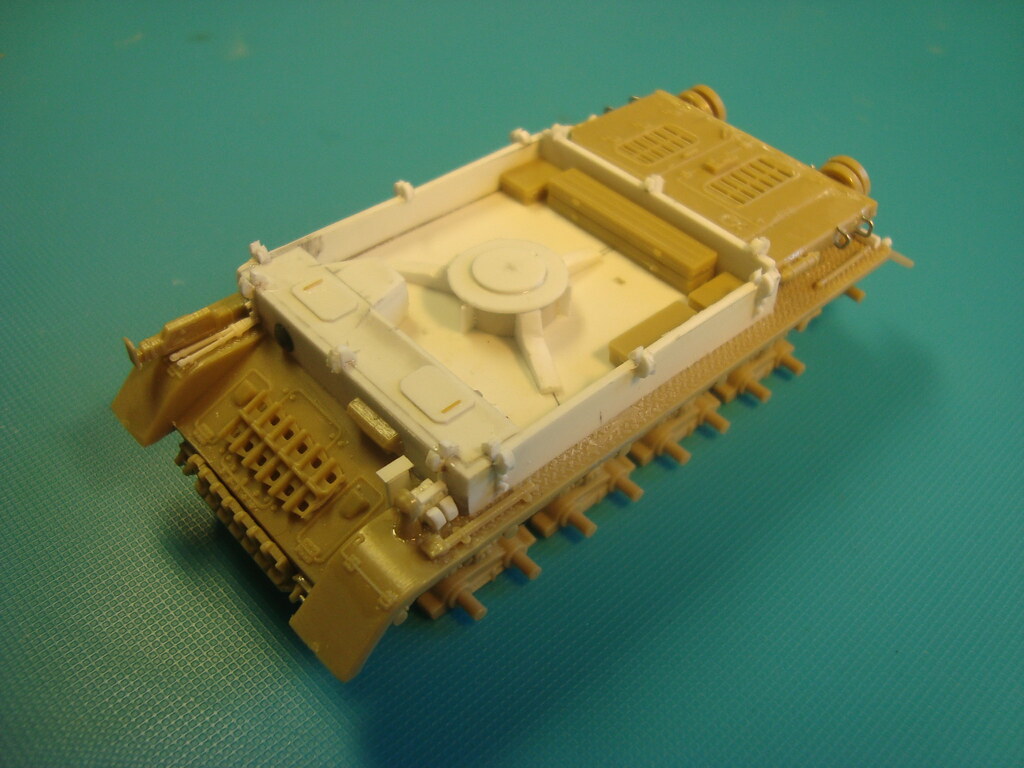
Finished the hull now. The gun pedestal was made from a piece of a ball-point with more or less the right diameter, and further enhanced with plastic card.
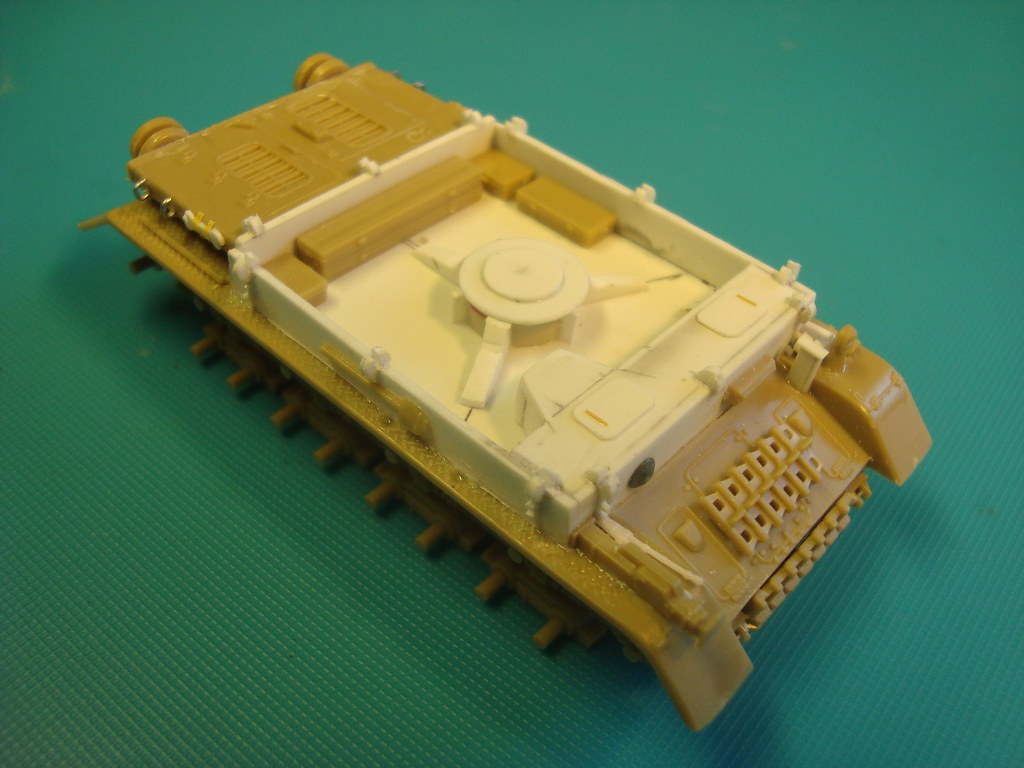
The boxes against the back wall are included in the kit and contain spare parts and barrels.
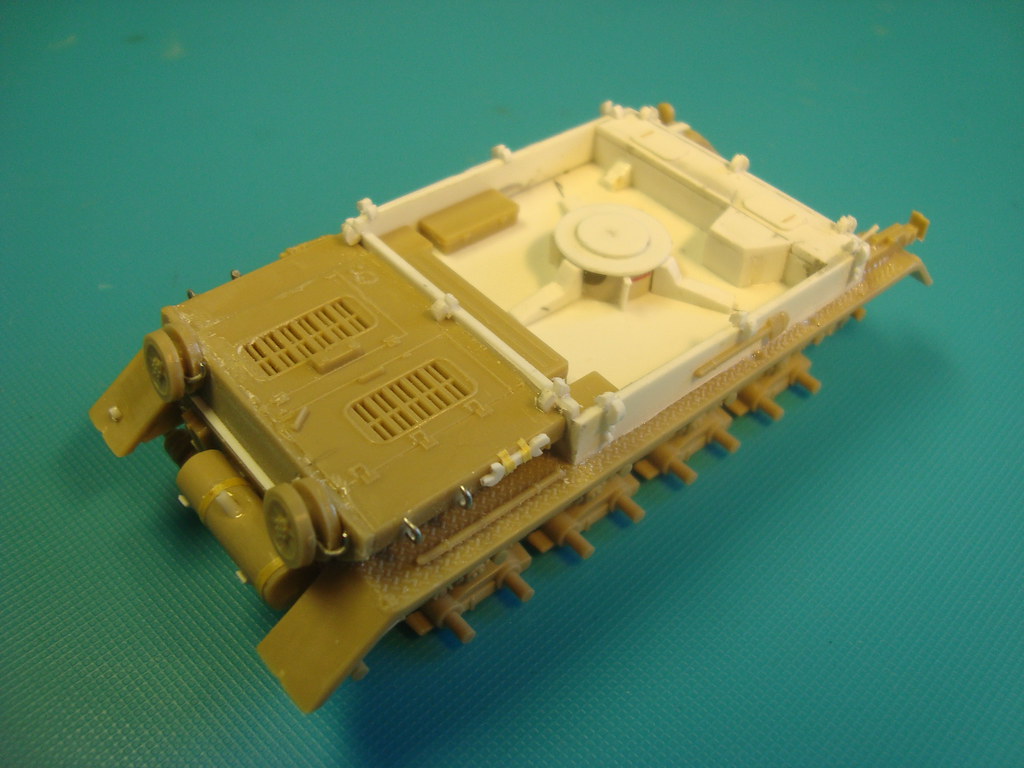
I modified the exhaust a bit, and repositioned the sparewheels to the back of the hull, with brackets from iron wire. A mixture of tools from the kit, the sparebox and scratchbuilt were used.
Now to continue with the gun.

Finished the hull now. The gun pedestal was made from a piece of a ball-point with more or less the right diameter, and further enhanced with plastic card.

The boxes against the back wall are included in the kit and contain spare parts and barrels.

I modified the exhaust a bit, and repositioned the sparewheels to the back of the hull, with brackets from iron wire. A mixture of tools from the kit, the sparebox and scratchbuilt were used.
Now to continue with the gun.
-

huib
- Posts: 1014
- Member since:
12 Dec 2015, 15:57
Thanks, Wiking!
Quadrupel Flak 38
Now to continue with the gun.
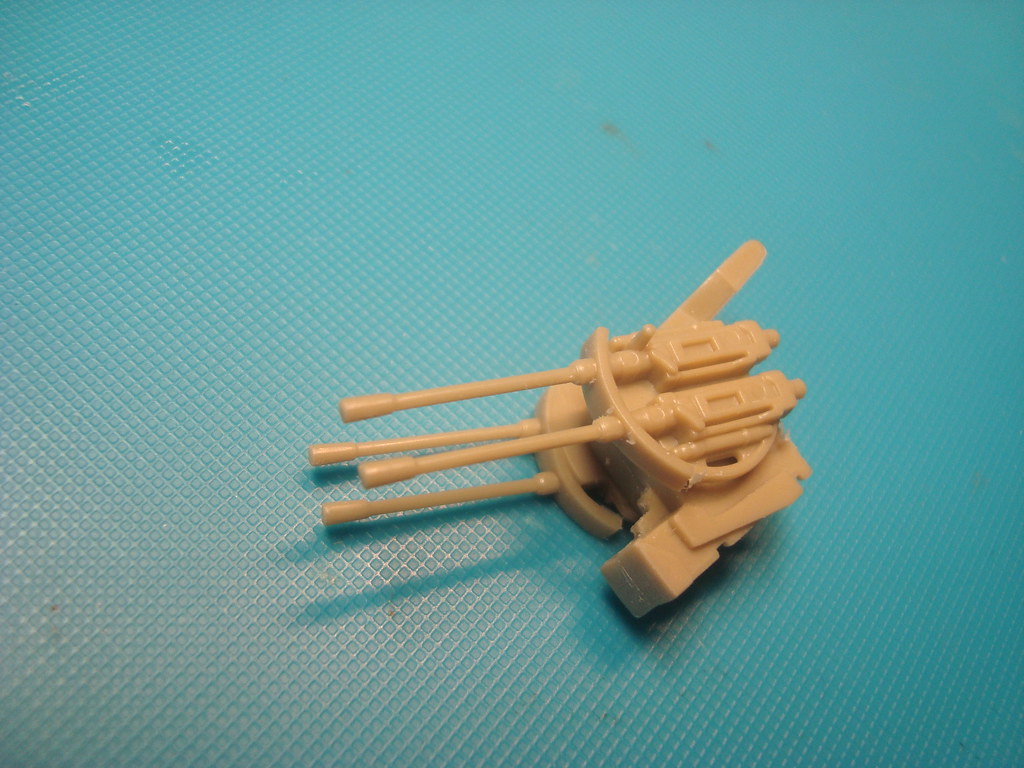
This is the Esci quadruple gun of the Flakpanzer Wirbelwind kit. For the configuration on the open topped Möbelwagen it misses a lot of parts, which have to be scratchbuilt.
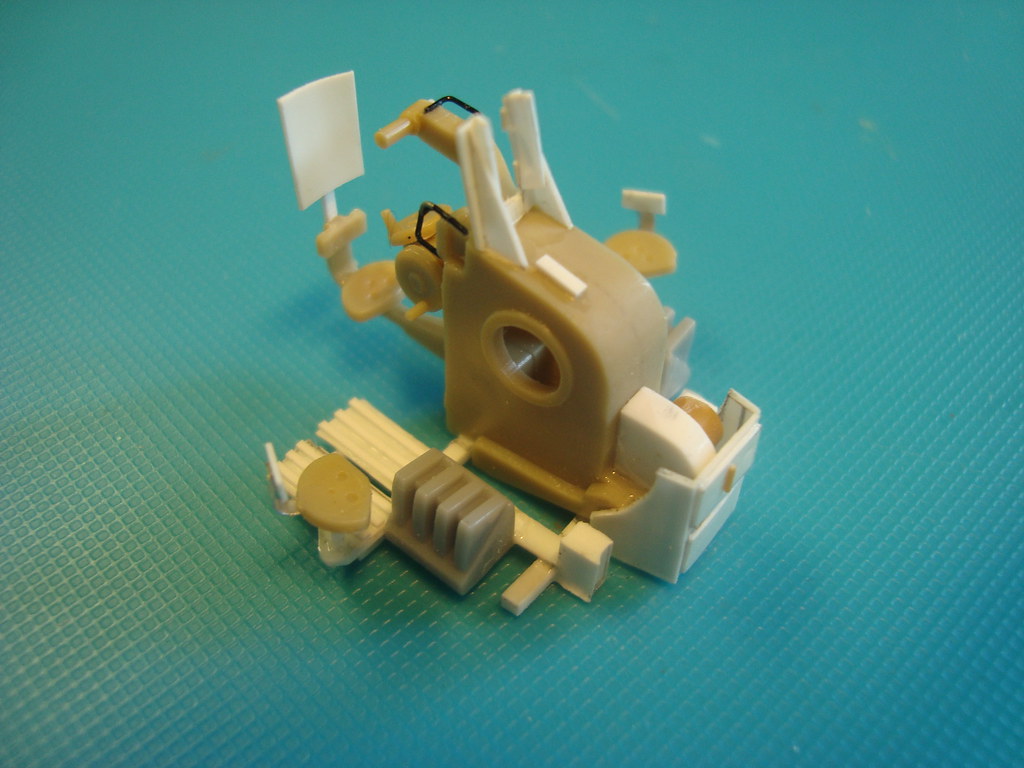
I added lots of details, of which the most important are the platforms with the loader seats. The spare magazine holders are leftovers from an Hasegawa Flakpanzer Ostwind kit.
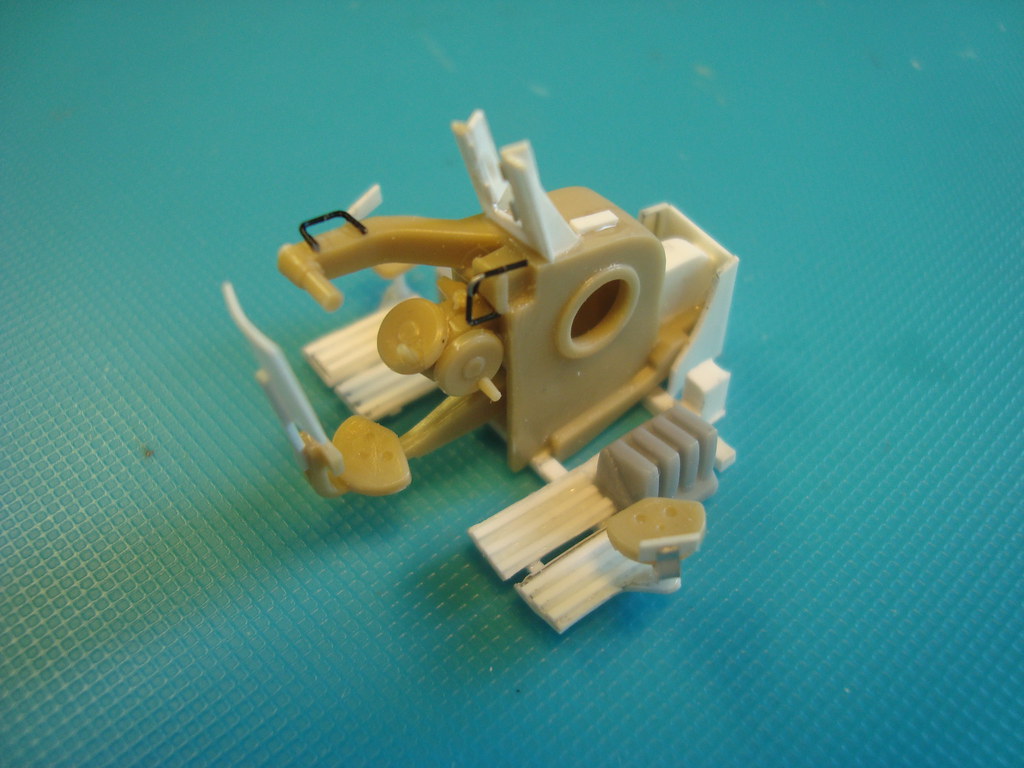
From another perspective.
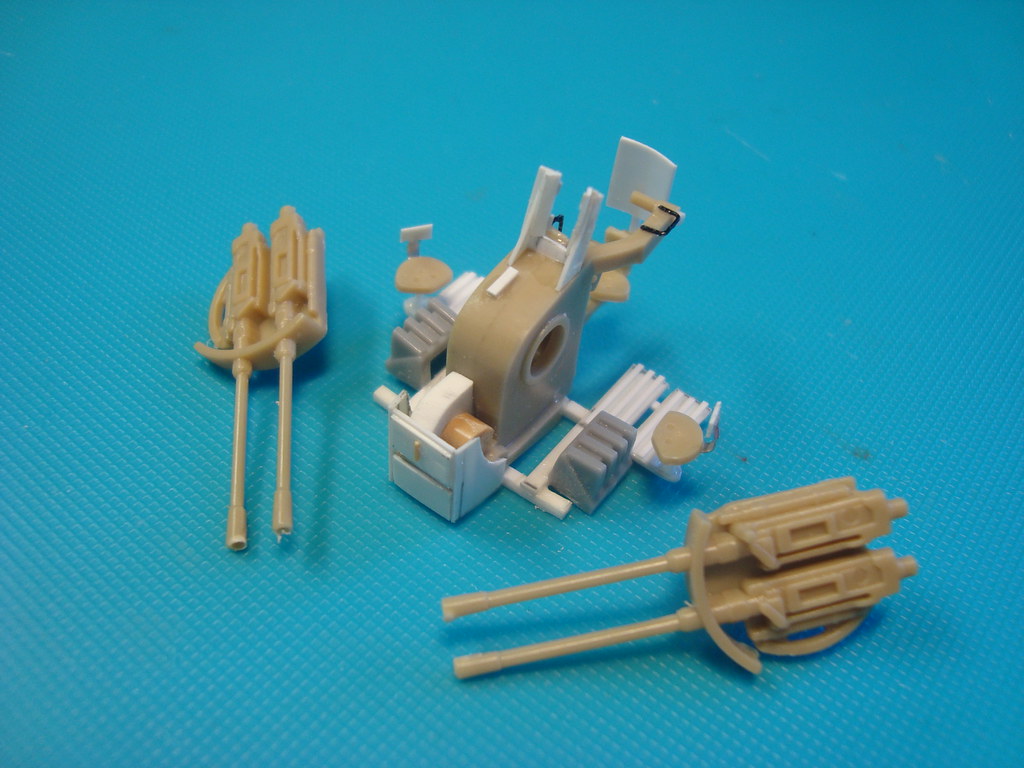
The gun barrels drilled out.
And now this gun needs some shields.
Quadrupel Flak 38
Now to continue with the gun.

This is the Esci quadruple gun of the Flakpanzer Wirbelwind kit. For the configuration on the open topped Möbelwagen it misses a lot of parts, which have to be scratchbuilt.

I added lots of details, of which the most important are the platforms with the loader seats. The spare magazine holders are leftovers from an Hasegawa Flakpanzer Ostwind kit.

From another perspective.

The gun barrels drilled out.
And now this gun needs some shields.
-

huib
- Posts: 1014
- Member since:
12 Dec 2015, 15:57
Gun shields
The Flak 38 has two gun shields to protect the crew. For placement on the Möbelwagen these shields were cut to shape. As there are no shields included in the kit, I have to scratch them.
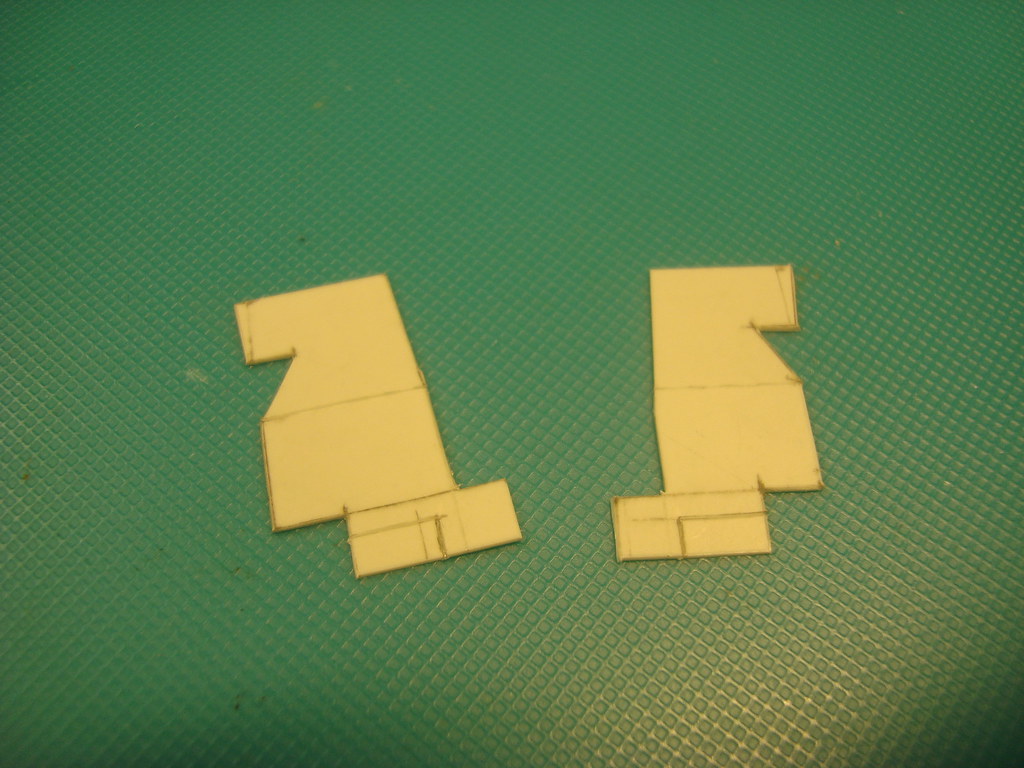
Two pieces of 0,3mm plastic card, cut to shape
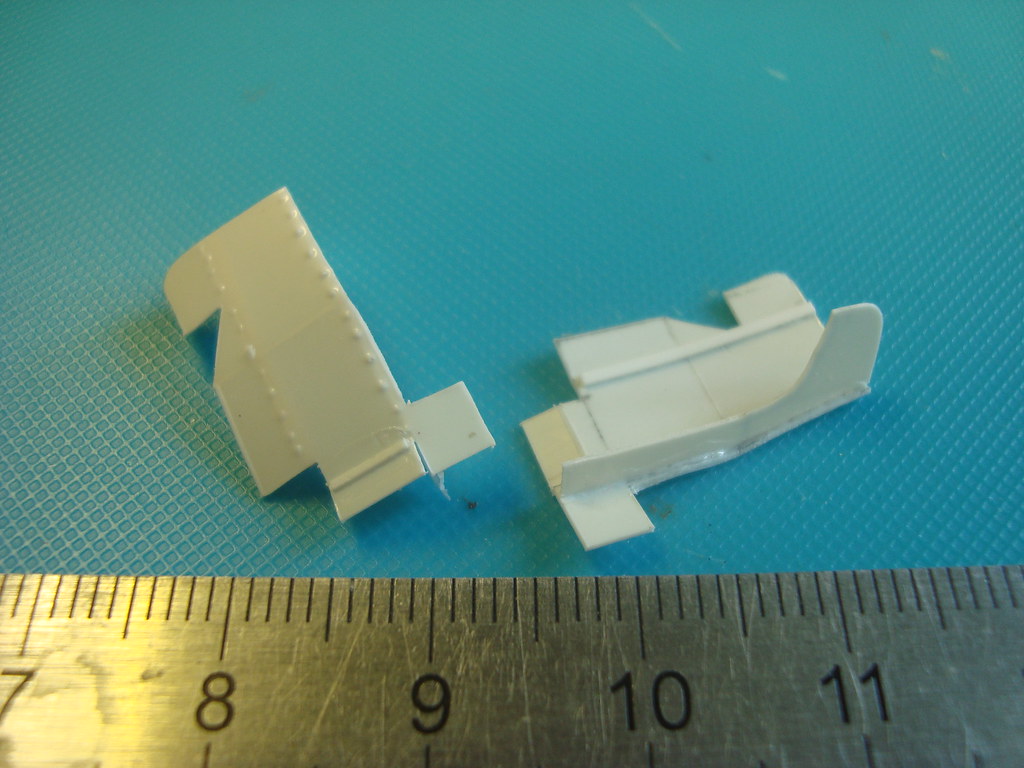
The shields after adding all the details. The rivets are made by making impressums at the back of the shields with a pin vise.
And now to continue with the foldable armour plates of the fighting compartment.
The Flak 38 has two gun shields to protect the crew. For placement on the Möbelwagen these shields were cut to shape. As there are no shields included in the kit, I have to scratch them.

Two pieces of 0,3mm plastic card, cut to shape

The shields after adding all the details. The rivets are made by making impressums at the back of the shields with a pin vise.
And now to continue with the foldable armour plates of the fighting compartment.
-

huib
- Posts: 1014
- Member since:
12 Dec 2015, 15:57
Sidewalls
The last parts missing on my Möbelwagen are the foldable sidewalls of the gun platform.
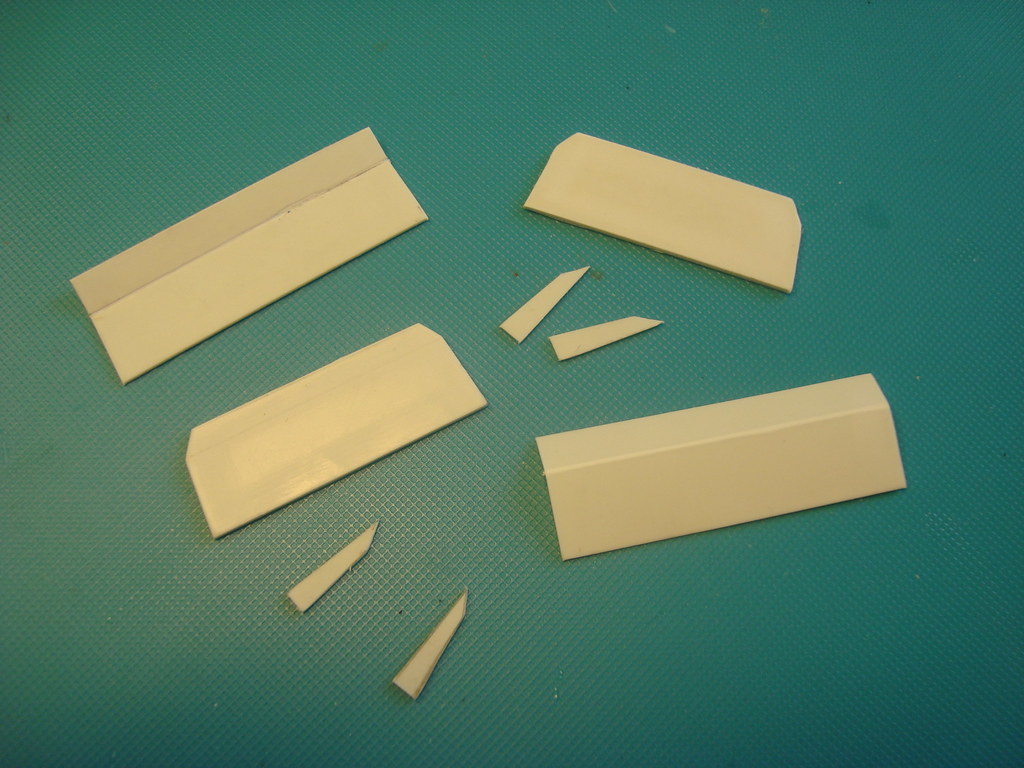
The main parts. The sidewalls are made from 0,5mm plastic card. The bend was made by cutting halfway through the card and bending it along the cut. The front and back walls were double walled in reality and made of 1mm card.
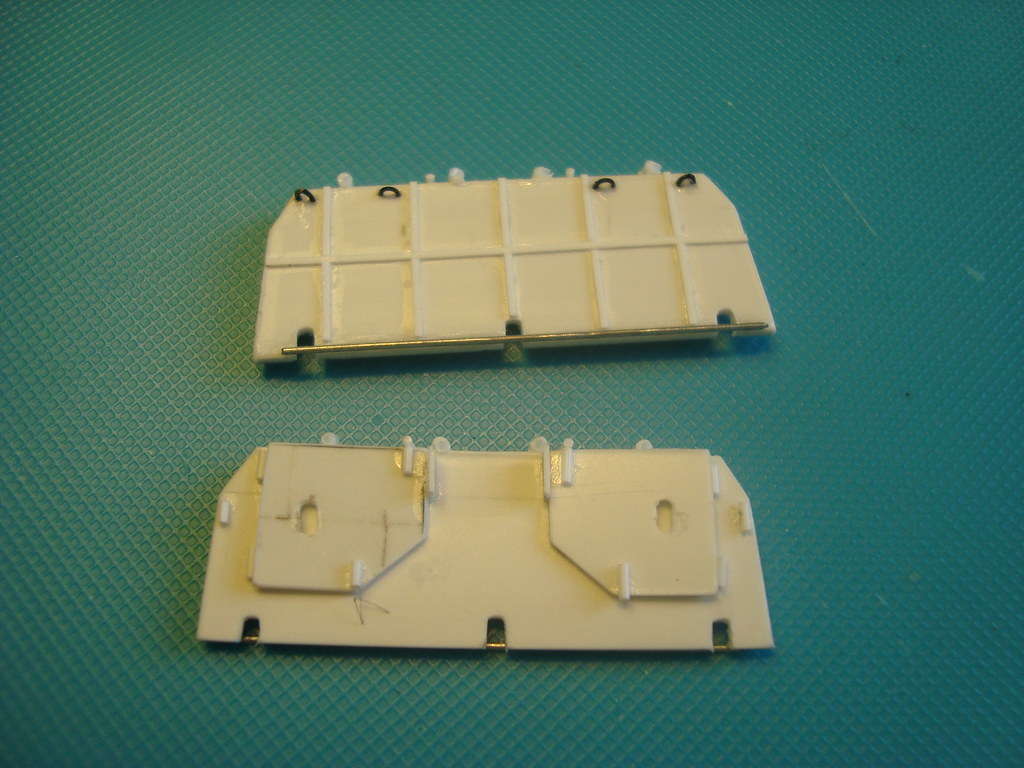
Front and back wall fully detailed. The black eyelets on the inside were used to hook the front and back to the sidewalls. The hinged plates on the outside were used to position the walls half open.

The sidewalls detailed.
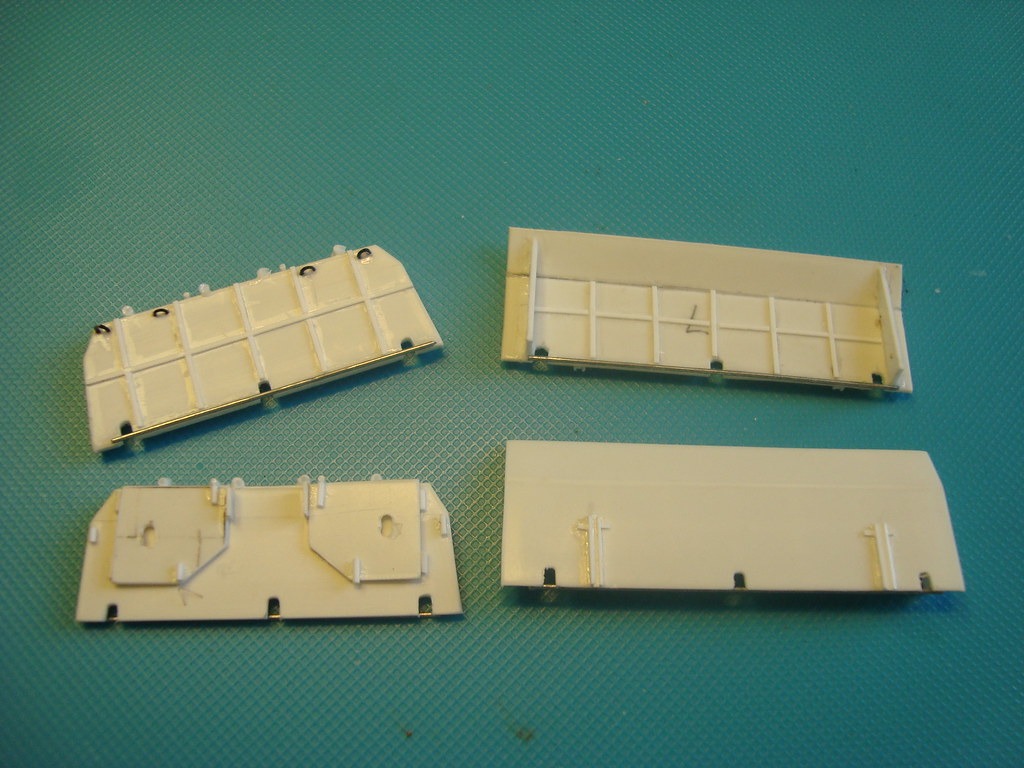
The complete set.
And now let's see if it fits all together....
The last parts missing on my Möbelwagen are the foldable sidewalls of the gun platform.

The main parts. The sidewalls are made from 0,5mm plastic card. The bend was made by cutting halfway through the card and bending it along the cut. The front and back walls were double walled in reality and made of 1mm card.

Front and back wall fully detailed. The black eyelets on the inside were used to hook the front and back to the sidewalls. The hinged plates on the outside were used to position the walls half open.

The sidewalls detailed.

The complete set.
And now let's see if it fits all together....
-

huib
- Posts: 1014
- Member since:
12 Dec 2015, 15:57
Thanks Arkoudaki! I hardly use aftermarket stuff. Not so much as a matter of principle, but because I prefer to solve issues myself using the kit parts, some scratchbuilding and some creativity, above buying the perfect solution. So I think I will first try to work with the original tracks. If it doesn't work out I have some plastic and resin link & length tracks in the sparebox. Of course the gun barrels are too thick, but for 1/72 plastic injection mouldings they are not that bad.
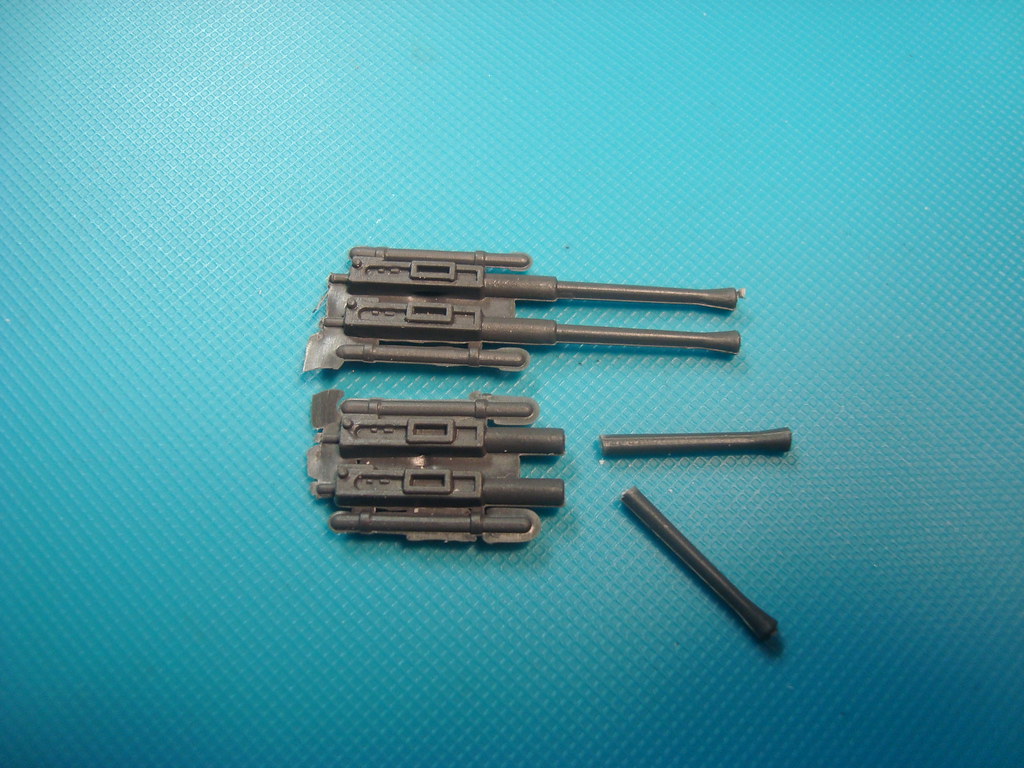
Compare for example the barrels of the much more primitive Esci Flak from the German guns set. These barrels are really much too thick!!!! Like 75mm calibre instead of 20mm.

Compare for example the barrels of the much more primitive Esci Flak from the German guns set. These barrels are really much too thick!!!! Like 75mm calibre instead of 20mm.
-

huib
- Posts: 1014
- Member since:
12 Dec 2015, 15:57
The big Dryfit
I dryfitted all the different parts together, with the help of a bit of Blue Tac, to see what the final result would look like, and identify any problems.
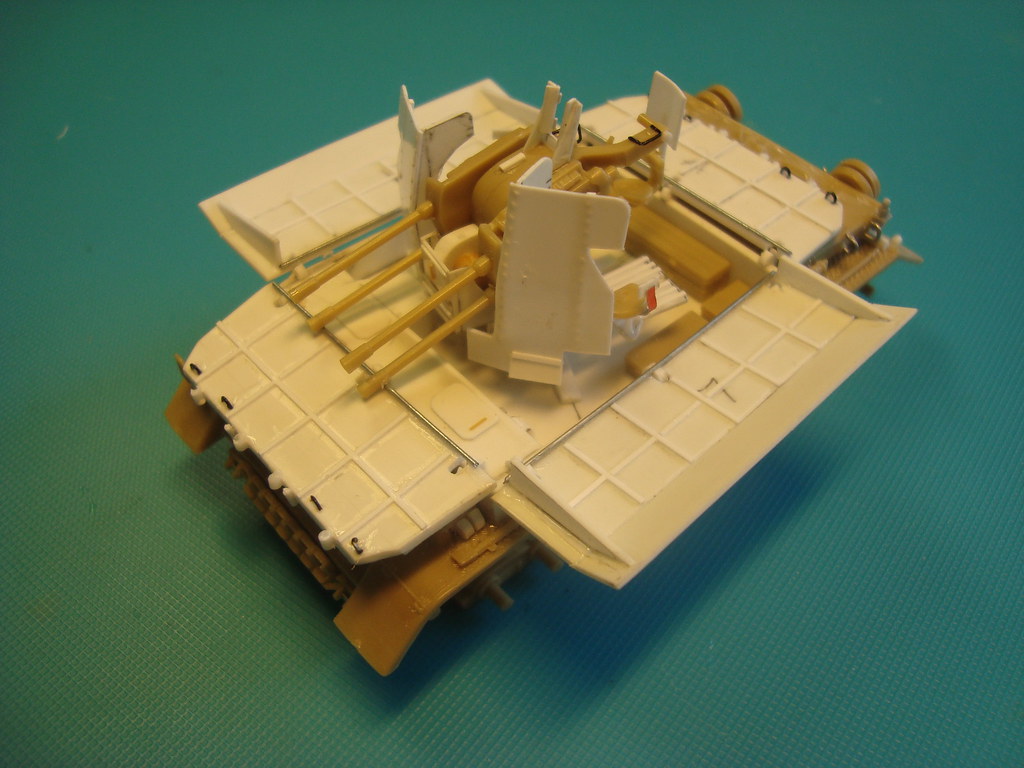
The gun barrels are pointing downwards now because of gravity. I expect some layers of paint will solve this issue.
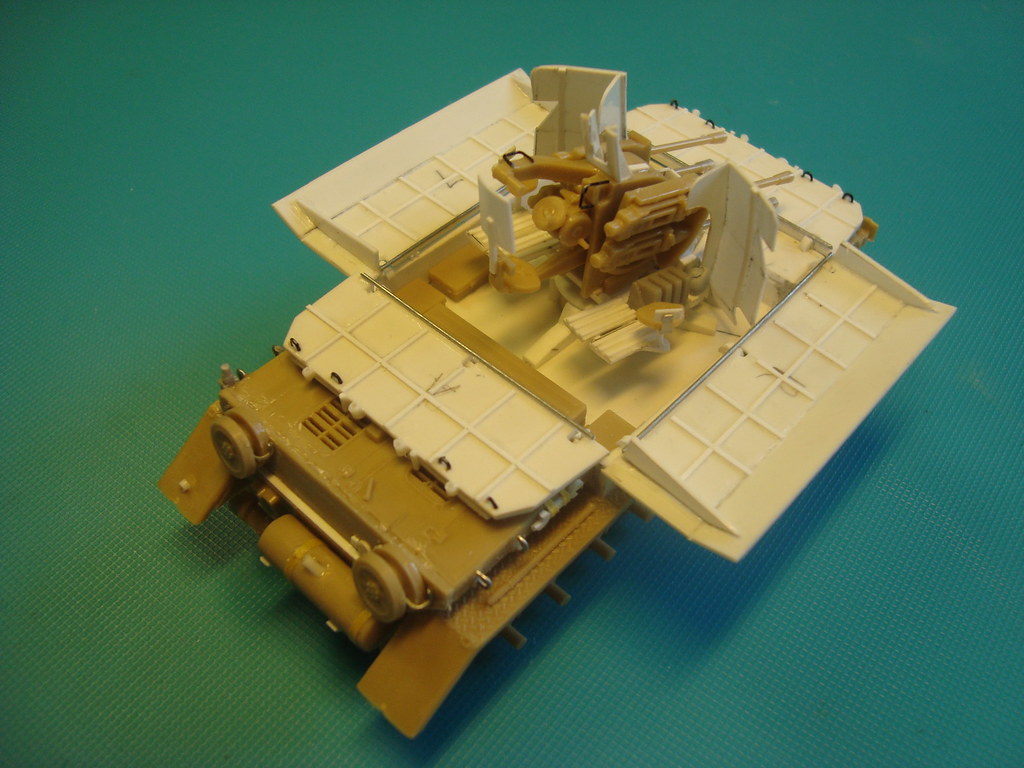
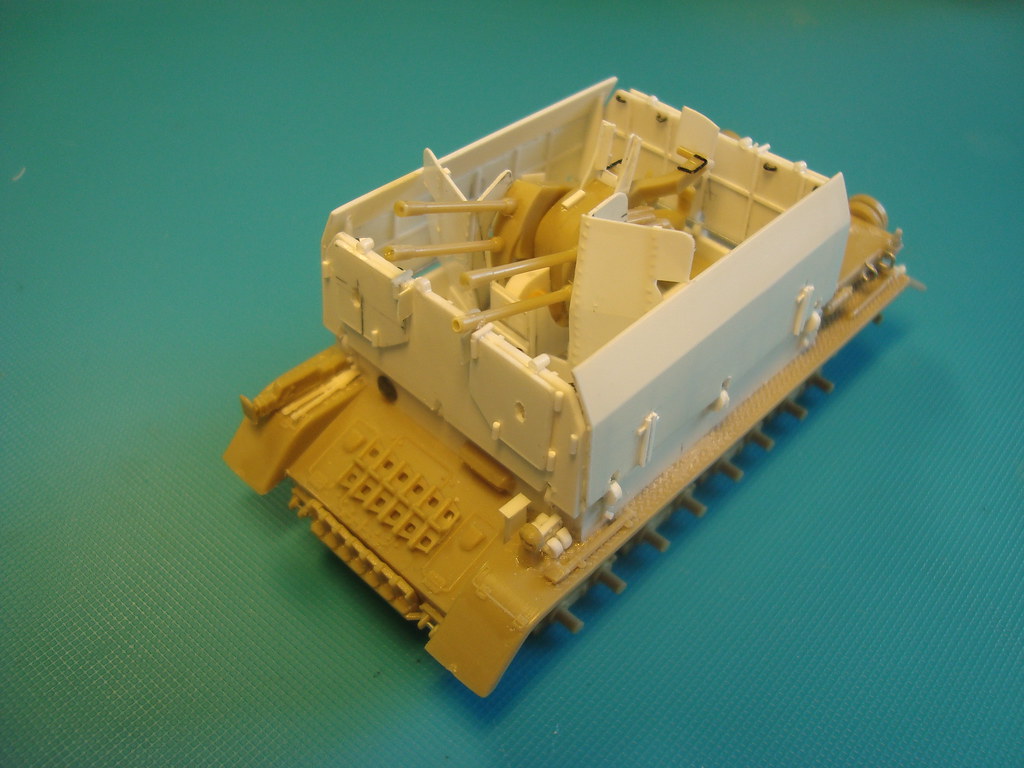
The foldable front armour plate sits a bit (0,5mm) too far to the front. Maybe I can diminish this issue with a bit of filing on the hinges. Furthermore the gun shields sit askew on the picture because of their very fiddly fixation with small blobs of Blue Tac. That will be fixed with some glue in the end.
Ready for paint now!
I dryfitted all the different parts together, with the help of a bit of Blue Tac, to see what the final result would look like, and identify any problems.

The gun barrels are pointing downwards now because of gravity. I expect some layers of paint will solve this issue.


The foldable front armour plate sits a bit (0,5mm) too far to the front. Maybe I can diminish this issue with a bit of filing on the hinges. Furthermore the gun shields sit askew on the picture because of their very fiddly fixation with small blobs of Blue Tac. That will be fixed with some glue in the end.
Ready for paint now!
-

huib
- Posts: 1014
- Member since:
12 Dec 2015, 15:57
Help keep the forum online!
or become a supporting member
-

Bluefalchion
- Posts: 3575
- Member since:
23 Dec 2010, 07:57
Huib wrote:
... I prefer to solve issues myself using the kit parts, some scratchbuilding and some creativity, above buying the perfect solution.
Different ways.
I search for the best available kit and or do not a kit bash. Sometimes with after market parts.
Aftermarket parts are in question. Are they useful? Improve it my work? Is a scratch better, easier, cheaper with a minimum of quality lost?
Is as an example a gun barrel of an other kit in plastic good or do I need a metal one?
Very often I go for better tracks. Some kits (especially short run) include quality.
Respect for your way of modelling.
And you do that very effective and well.
And thank you for your pic in the past of the Stug IV from Monogram in 1/32.
After some search it is for me clear that the figures of ESCI in 1/72 are exact copy of the Monogram 1/32 ones. So I count it for Monogram.
... I prefer to solve issues myself using the kit parts, some scratchbuilding and some creativity, above buying the perfect solution.
Different ways.
I search for the best available kit and or do not a kit bash. Sometimes with after market parts.
Aftermarket parts are in question. Are they useful? Improve it my work? Is a scratch better, easier, cheaper with a minimum of quality lost?
Is as an example a gun barrel of an other kit in plastic good or do I need a metal one?
Very often I go for better tracks. Some kits (especially short run) include
Respect for your way of modelling.
And you do that very effective and well.

And thank you for your pic in the past of the Stug IV from Monogram in 1/32.
After some search it is for me clear that the figures of ESCI in 1/72 are exact copy of the Monogram 1/32 ones. So I count it for Monogram.
-

Wiking
- Posts: 2834
- Member since:
14 Sep 2015, 10:03
Thank you very much, guys!
Yes, I had this question more often. I like a kit as a starting point to work from. It gives at least the basic structure from which I can further elaborate a model in an almost organic way. Not too much measuring, planning and drawing in advance, but just building one part after the other, making it fit on the existing base formed by the model kit.
Also some parts of these vehicles are very difficult to scratchbuilt in an acceptable way, like wheels, some radiator grilles and multifaceted hulls and turrets, Then the kit parts are nice to fall back on.
I prefer classic kits (Airfix, Matchbox, Esci, Frog, etc.). There is a lot to improve on them and a lot of difficulties to struggle with. I like that and I have lots of them in my stash. In fact I hardly ever buy the more perfect new tool kits. Of course they are often much better models, but it's not my style of modelling.
Nostalgia also plays a role. In fact I rebuild many of the kits from my youth, but now in a more sophisticated way.
Peter wrote: Why in heavens name do you buy a model box? You do everything in scratchbuilt! :
Yes, I had this question more often. I like a kit as a starting point to work from. It gives at least the basic structure from which I can further elaborate a model in an almost organic way. Not too much measuring, planning and drawing in advance, but just building one part after the other, making it fit on the existing base formed by the model kit.
Also some parts of these vehicles are very difficult to scratchbuilt in an acceptable way, like wheels, some radiator grilles and multifaceted hulls and turrets, Then the kit parts are nice to fall back on.
I prefer classic kits (Airfix, Matchbox, Esci, Frog, etc.). There is a lot to improve on them and a lot of difficulties to struggle with. I like that and I have lots of them in my stash. In fact I hardly ever buy the more perfect new tool kits. Of course they are often much better models, but it's not my style of modelling.
Nostalgia also plays a role. In fact I rebuild many of the kits from my youth, but now in a more sophisticated way.
-

huib
- Posts: 1014
- Member since:
12 Dec 2015, 15:57
35 posts
• Page 1 of 2 • 1, 2


