Work in Progress

Huibs T34 tank project

Posted by huib on 24 May 2021, 14:39

Thanks, Peter!

Figures
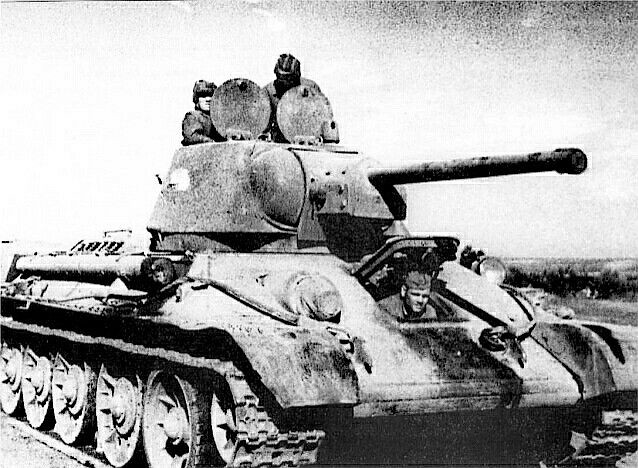
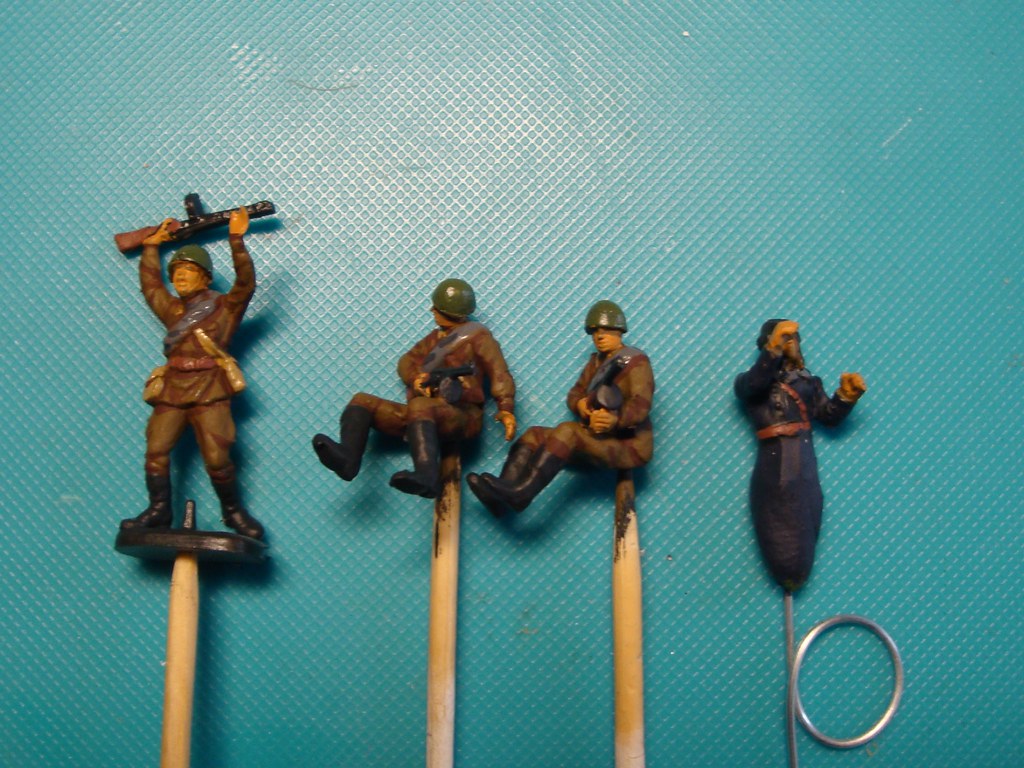
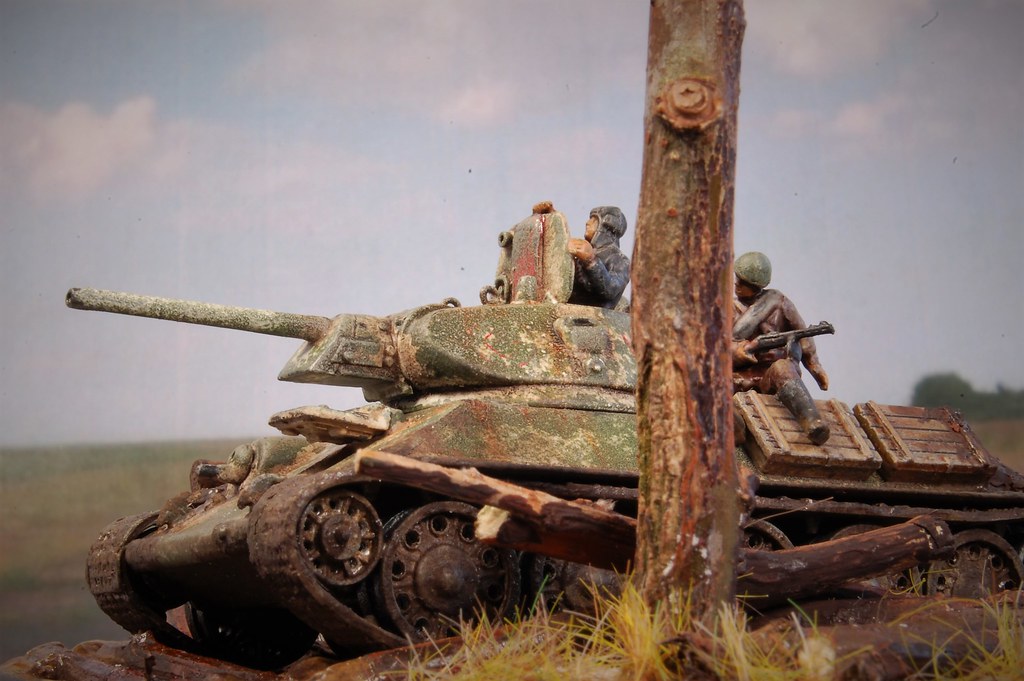
There are two figures included in the Esci tank kit: a tank commander and an infantry man, sitting Soviet style on the engine deck of the tank.

Image
I took the sitting figures from both of my Esci kits, and did some modifications to their arms and legs to give them a better fit and create two different poses. The tank commander also needed some modification to let him have a good grip on the turret hatch.

Image
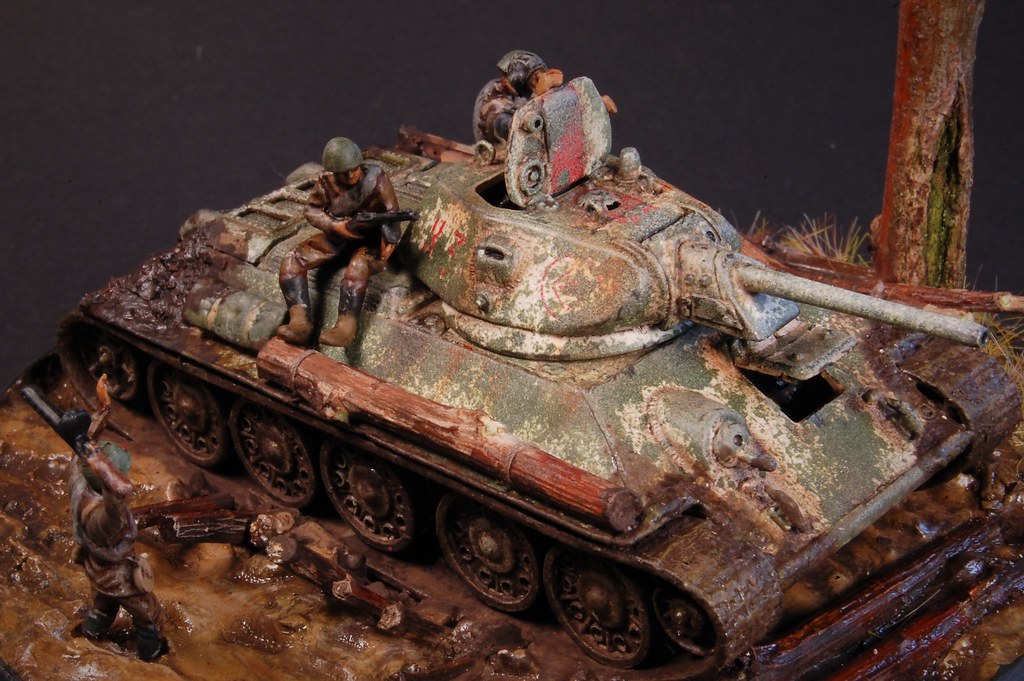
In the end I added a fourth figure: a soviet infantry men from an Esci set. The tank commander received a lower abdomen from greenstuff. All figures in black primer.

Image
Painted and shadowed.

Image
A dark brown wash all over. The excess wash was later removed with a cotton tip.

Image
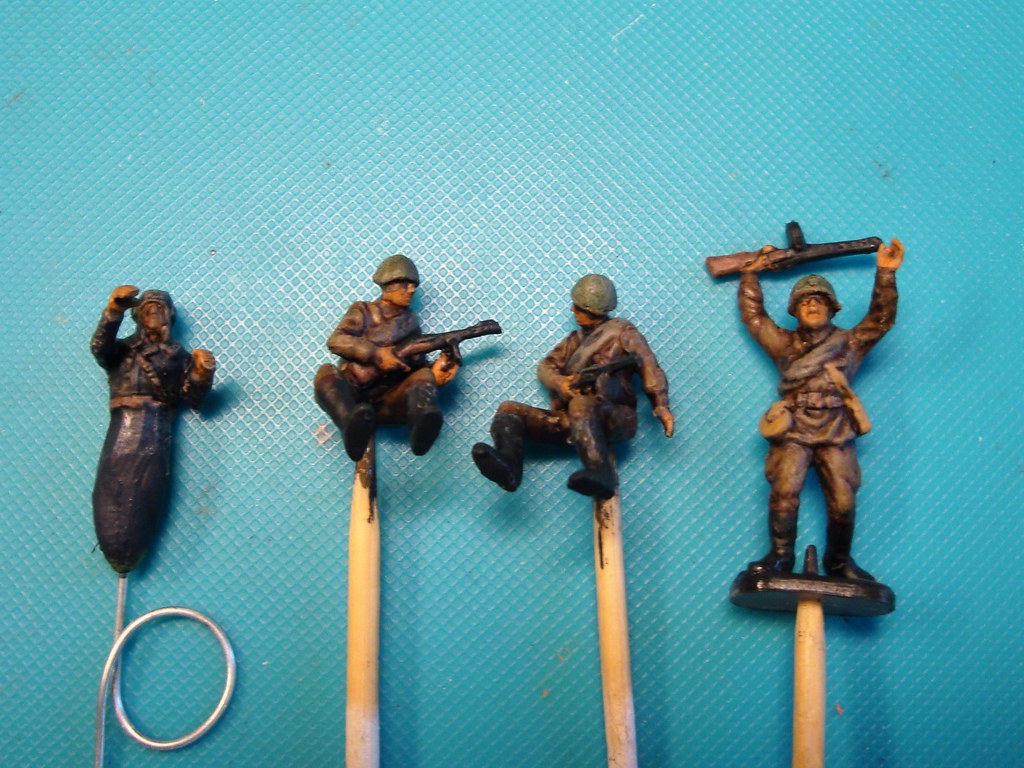
After some highlighting, the figures are finished using matte varnish.

Image
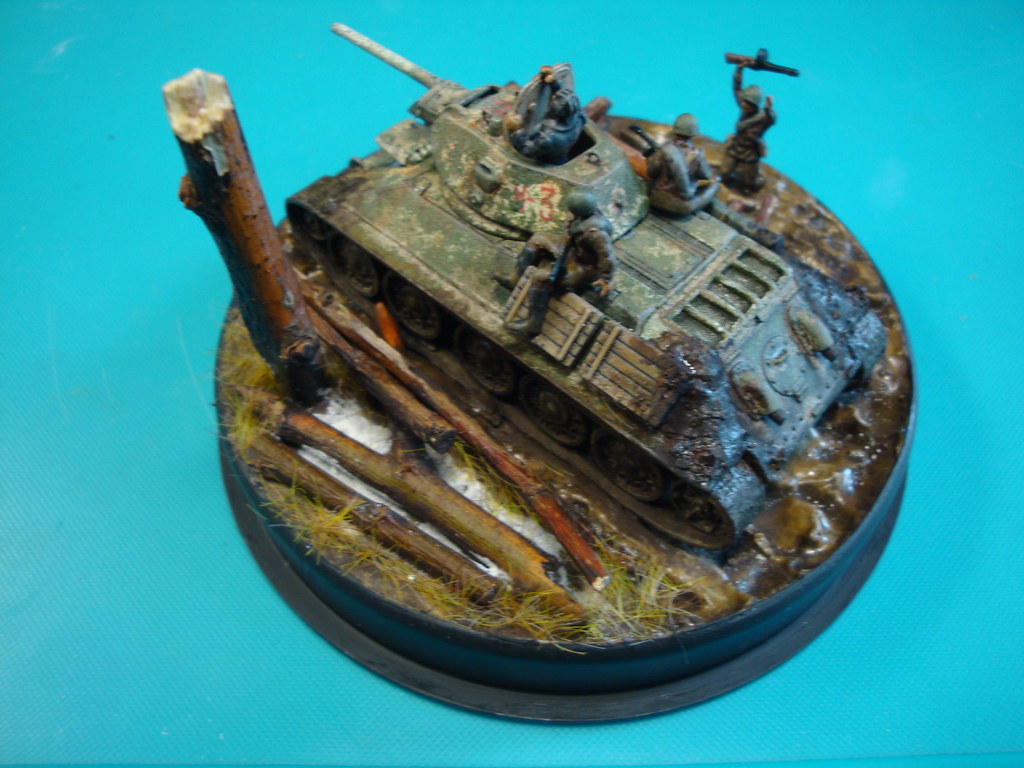
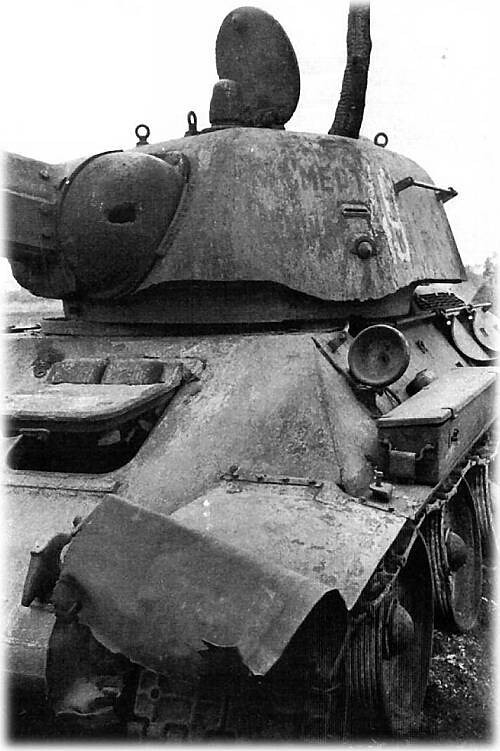
All separate parts combined: tank, base and figures. I splashed quite some wet mud on the back of the tank as a result of the misssing mud guards.
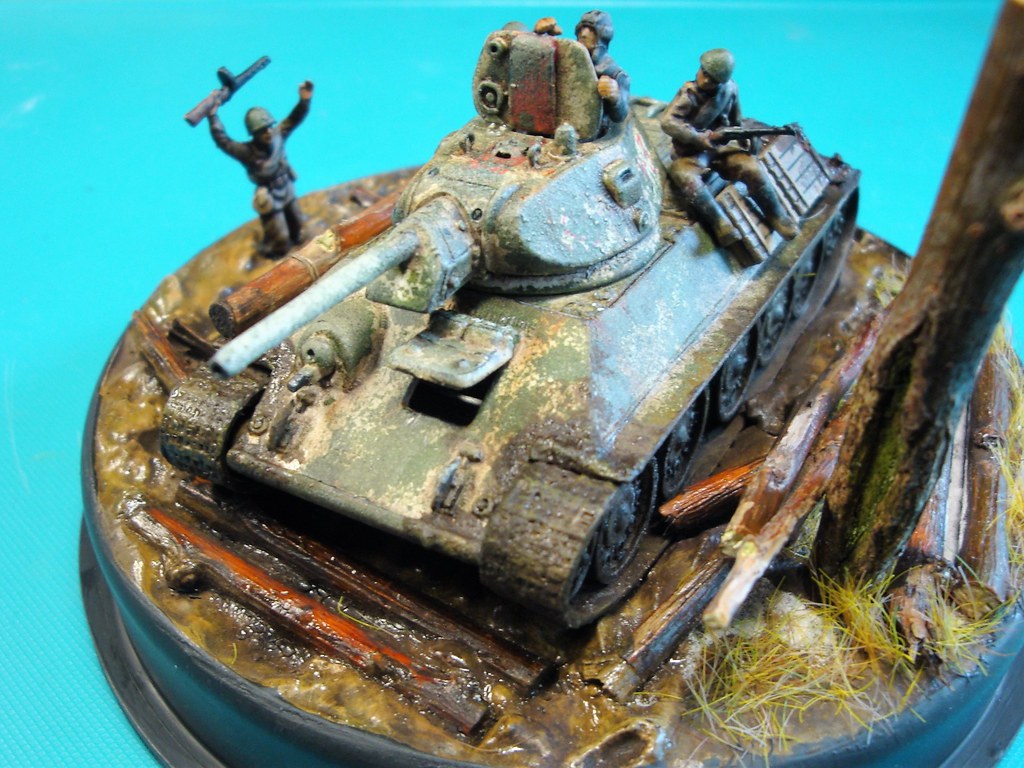
Image
Dirty, isn't it? :drool:

Final pictures, soon!
User avatar
huib  Netherlands
 
Posts: 962
Member since:
12 Dec 2015, 15:57


Posted by Peter on 24 May 2021, 18:02

It is dirty indeed! :-D

But it is a fantastic final result! :notworthy: :thumbup:
User avatar
Peter  Belgium

Moderator Moderator
 
Posts: 22510
Member since:
25 Mar 2008, 18:51

Posted by Wiking on 24 May 2021, 19:06

If a also simple SOLDIER rise his arms in the air: "How dirty is that tank" !
So it is time to / for ...
User avatar
Wiking  Germany
 
Posts: 2825
Member since:
14 Sep 2015, 10:03

Posted by huib on 25 May 2021, 15:30

Hmm yes, maybe too dirty. Then it is time for washing:

https://www.youtube.com/watch?v=DLY-JBeOLY0
User avatar
huib  Netherlands
 
Posts: 962
Member since:
12 Dec 2015, 15:57

Posted by Peter on 25 May 2021, 16:59

huib wrote:Hmm yes, maybe too dirty. Then it is time for washing:

https://www.youtube.com/watch?v=DLY-JBeOLY0

Very funny Huib! :-D
User avatar
Peter  Belgium

Moderator Moderator
 
Posts: 22510
Member since:
25 Mar 2008, 18:51

Posted by Bluefalchion on 25 May 2021, 17:22

I thought they were going to wash the tank WITH their undergarments. That would have been a very different video.

And much better.
User avatar
Bluefalchion  United States of America
 
Posts: 3575
Member since:
23 Dec 2010, 07:57

Help keep the forum online!
or become a supporting member

Posted by huib on 07 Jun 2021, 15:59

Bluefalchion wrote:I thought they were going to wash the tank WITH their undergarments. That would have been a very different video.

I'm afraid then our mod would have interfered. ;-)
User avatar
huib  Netherlands
 
Posts: 962
Member since:
12 Dec 2015, 15:57

Posted by huib on 07 Jun 2021, 16:03

Final pictures

Image

Image

More pics in the Gallery
User avatar
huib  Netherlands
 
Posts: 962
Member since:
12 Dec 2015, 15:57

Posted by C M Dodson on 07 Jun 2021, 18:19

Super stuff.

Nice and filthy, the proper campaign look.

Best wishes,

Chris
C M Dodson  United Kingdom
 
Posts: 2572
Member since:
01 May 2015, 18:48

Posted by Kekso on 12 Jul 2021, 10:48

I always enjoy your WIP pictures.
User avatar
Kekso  Croatia

Moderator Moderator
Supporting Member (Bronze) Supporting Member (Bronze)
 
Posts: 6840
Member since:
19 Oct 2011, 18:32

Posted by huib on 14 Jul 2021, 13:00

T34-76 model 1943

And next one! I'm workin' on it for a while already, but didn't post yet.
When during the summer of 1942 the translocation of the Soviet war industry to the Ural region was finished and production swiftly increased there was room again for technical innovation

Image
In the autumn of 1942, for the first time since the German invasion, an improved model of the T34 was produced. The improvement mainly consisted of a newly designed turret with more internal space and separate hatches for the gunner and the commander. When opened both these hatches looked like ears, so this model of the T34 was nicknamed Mickey Mouse by the Germans.

Image
As it became soon clear that the full metal roadwheels caused quick wear on the tracks, many Soviet tanks of this period have a mixed set of roadwheels, with the ones with rubber tires on the first and last positions.

Image
Several factories started to produce this type of T34, each including its own peculiarities. This model with a more rounded turret with characteristic bulb on the lower rim was only built by the Chelyabinsk Tractor Factory.

Image
During 1943 the new turrets wre equipped with a commanders cupola. This innovation was inspired by German tank design, and enabled the tank commander to keep an overview of the battlefield, while staying safely under armour.
It is this model of T34-76 model 1943 I am building now.

Image
These girls look forward to my results already. (I feel shy already)
User avatar
huib  Netherlands
 
Posts: 962
Member since:
12 Dec 2015, 15:57

Posted by huib on 14 Jul 2021, 13:15

Italeri T34-76 Model 1943

For this model I use the Italeri T34-76 model 1943. In fact it is just the Esci kit in a new box with new decals.

Image
I showed it before.

Image
This kit differs from the Esci kit in so far that it contains two sprues with different wheelsets and turrets, so it is a combination of the Esci model 1942 en model 1943 T34 kits. This enables you to make different combinations of roadwheels.

Image
The sprue containing the hull parts is identical for both kits.

Image
Ah, much better! Contrary to the oldest Esci kits, this kit contains link & length tracks of good looking quality.

Image
And a colourful decalsheet for some surprising variants:

Image
A Czech, a Polish, a German and two Soviet versions.

So, let's start!
User avatar
huib  Netherlands
 
Posts: 962
Member since:
12 Dec 2015, 15:57

Posted by huib on 14 Jul 2021, 13:27

Building the hull

Image
The nicely detailed upper hull. Of course some improvements can be made.

Image
A few holes were filled that are not used, and one front fender was cut of for a more lively model. The towing eyes on the hull front are also removed.

Image
Some work on extractor marks.

Image
Lower hull constructed.

Image
Lower and upper hull glued together. The big gaps above the tracks filled with plastic card. A bit of filler for the reduction boxes.

Image
Then some detail was added. Most conspicious and fiddly are the hand rails for hitchhiking infantry.

Image
The rest of the parts added, including some leftovers from the Matchbox and Esci kits I built earlier, like a toolbox and spare track links. Headlight and machinegun were drilled. The characteristic big saw was scratchbuilt.

Image
From behind. Most conspicious are the long range additional fuel tanks in mid-war style on the glacis. Also the exhaust pipes are drilled open.

Now on with the turret.
User avatar
huib  Netherlands
 
Posts: 962
Member since:
12 Dec 2015, 15:57

Posted by Peter on 14 Jul 2021, 22:26

Can't we skip this part and go on to the girls on the tank? :-D

Great start on this model Huib! And thank you for the historical information! :thumbup: :thumbup:
User avatar
Peter  Belgium

Moderator Moderator
 
Posts: 22510
Member since:
25 Mar 2008, 18:51

Posted by huib on 21 Jul 2021, 22:14

Turret

To continue with the turret.

Image
The kit parts.

Image
On the underside of the turret is an ugly seam. Although there was a casting seam in this position in reality, it didn't look good, so I started filling it.

Image
The surface of the turret was roughened using liquid glue to imitate the cast iron. Periscope slits were melted using a hot screwdriver of the right size. Grab rails and pistol ports were added.

Image
The turret roof out of the box.

Image
First some detail was removed (periscopes and lifting eyes).

Image
And then reconstructed again. The most difficult was to melt in the four slits in the ventilation dome. The commanders cupola received vision slits. New lifting eyes were made from thin iron wire and the periscopes rebuilt with a bit more detail. Hatches glued in place, although they might probably fall off again during painting. (Especially drybrushing is tough for small and fiddly parts.)

Image
The gun constructed.

Image
Turret constructed.

Image
From the other side.
A few odd things and then painting!
User avatar
huib  Netherlands
 
Posts: 962
Member since:
12 Dec 2015, 15:57

Posted by Peter on 22 Jul 2021, 17:47

Lovely next episode in this story of Russian tanks! :thumbup:
User avatar
Peter  Belgium

Moderator Moderator
 
Posts: 22510
Member since:
25 Mar 2008, 18:51

Help keep the forum online!
or become a supporting member

Posted by huib on 11 Aug 2021, 13:17

Thanks, Peter!

Ventilation cover

Some work to do on the ventilation vover:

Image
Straight from the box. The detail is quite nice in fact.

Image
Full of holes.

Image
Cut out using a sharp knife.

Image
Carefully filed to shape. Together with the drivers hatch on the picture.

And now on with the wheels.
User avatar
huib  Netherlands
 
Posts: 962
Member since:
12 Dec 2015, 15:57

Posted by Peter on 12 Aug 2021, 08:04

Three weeks for a new post? You have been lazy I think? And I missed you Huib! My favorite Russian tank commander! :-D ;-) :thumbup:
User avatar
Peter  Belgium

Moderator Moderator
 
Posts: 22510
Member since:
25 Mar 2008, 18:51

Posted by huib on 20 Aug 2021, 21:39

Thanks, Peter!

Wheels
The last construction phase before painting.

Image
This T34 receives two different types of road wheels. On the left the all wetal wheels. The round holes in them were all drilled wider. The left row has been done, the other row still has to. The inside of the rubber rimmed wheels shows ugly extractor pin marks, but as no one will ever see them, I'll leave them as they are.

Image
The sprocket wheels and the tension wheels are equipped with hub covers.

Image
The wheels are finished. Now for some painting.
User avatar
huib  Netherlands
 
Posts: 962
Member since:
12 Dec 2015, 15:57

Posted by Peter on 25 Aug 2021, 11:01

Looking forward to the paint phase! ;-)
User avatar
Peter  Belgium

Moderator Moderator
 
Posts: 22510
Member since:
25 Mar 2008, 18:51

Previous pageNext page

Return to Work in Progress