Work in Progress

Italy before the Romans

Posted by sberry on 12 Aug 2016, 17:10

I’ve started a new project, and duly I present here the first WIP pics.
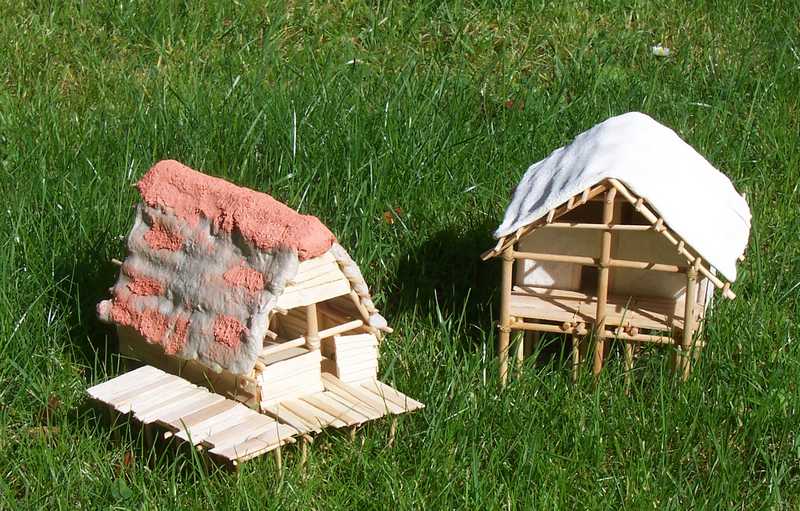
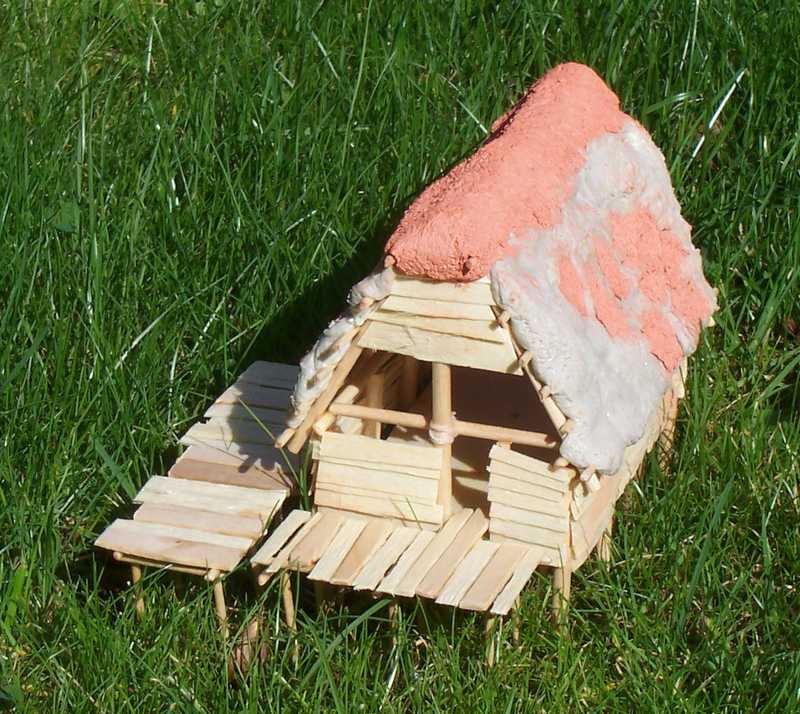
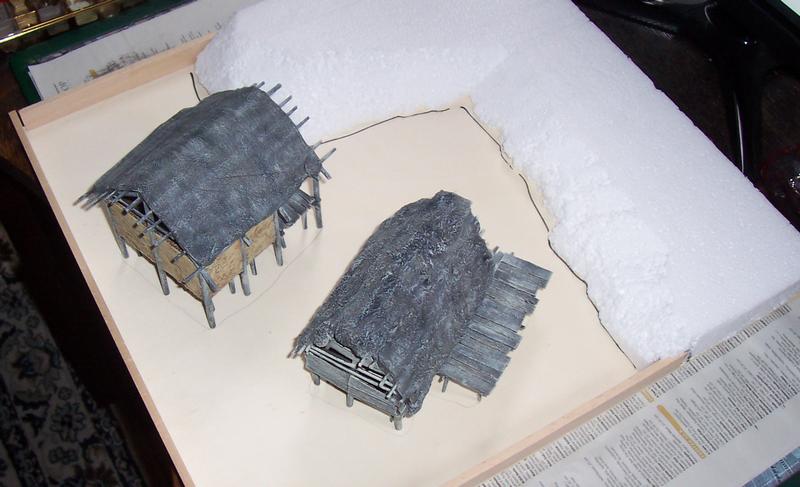
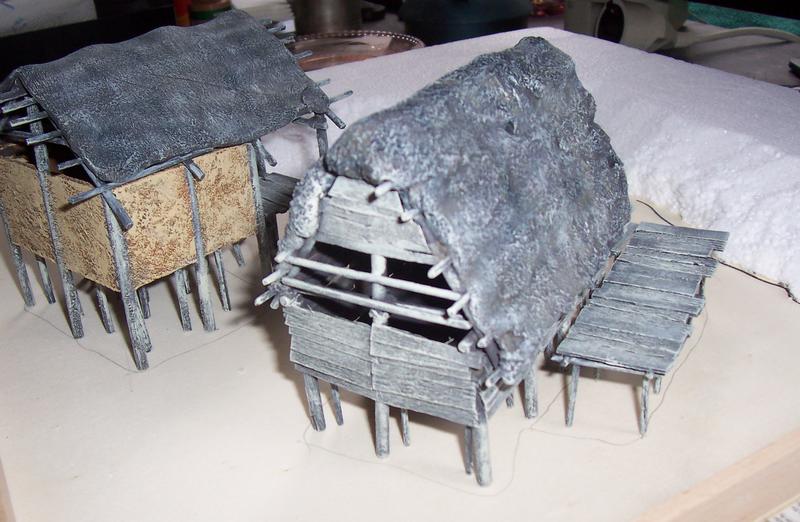
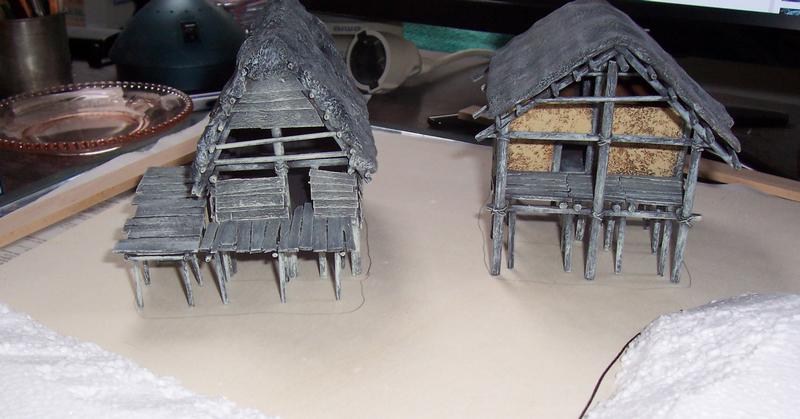
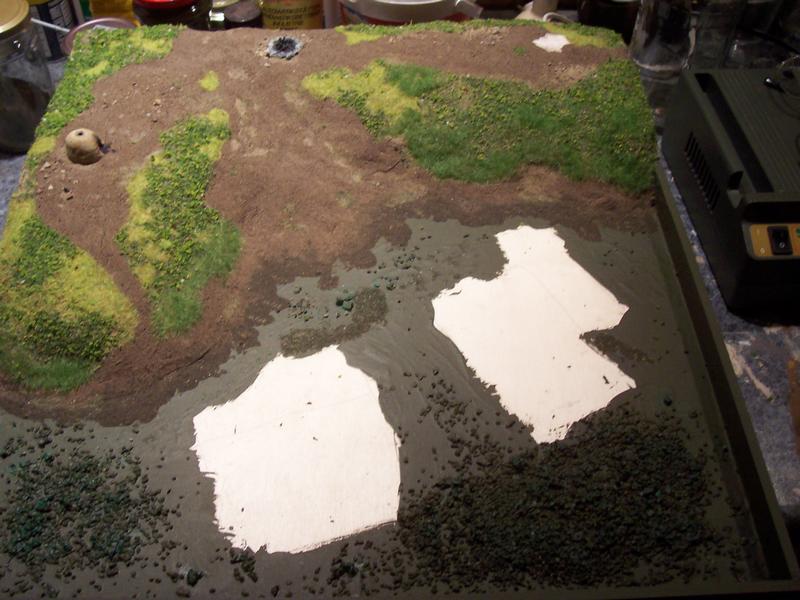
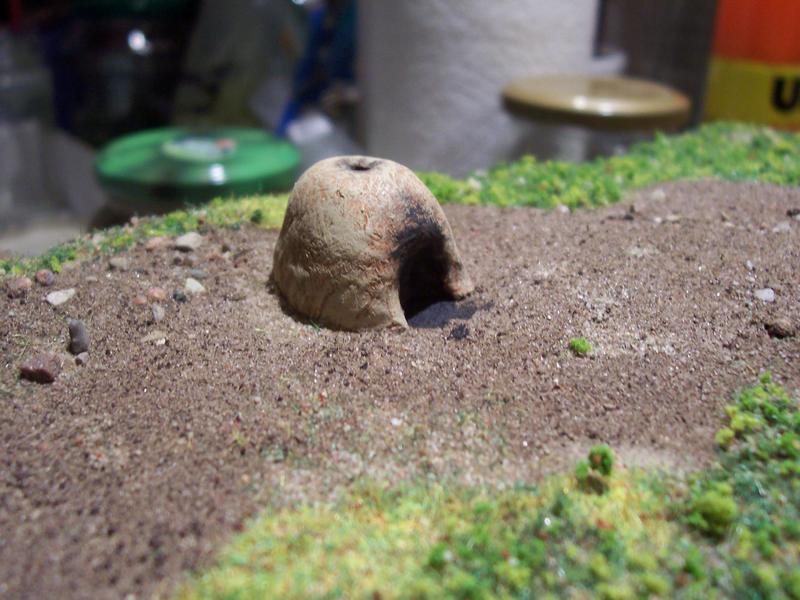
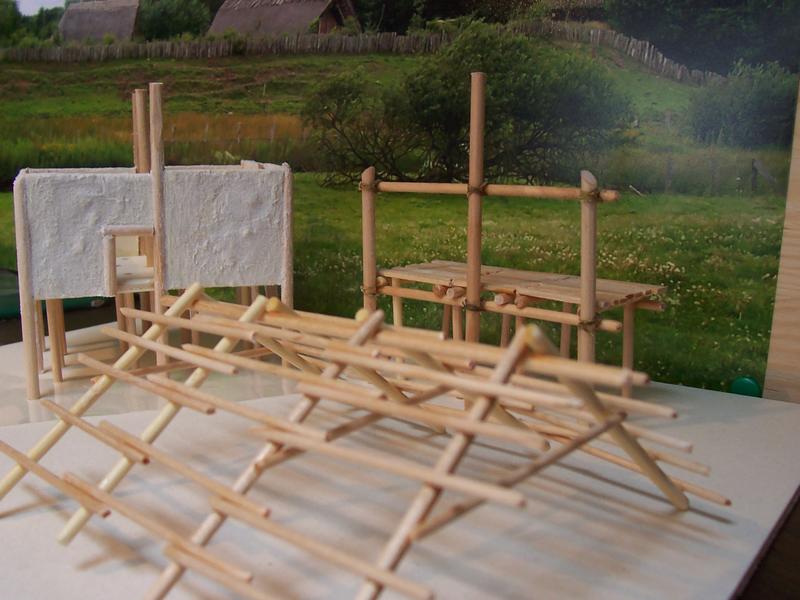
It is a little Neolithic scene involving the pile dwellings that were common around the Alps for several millennia, spanning the Neolithic, Copper, Bronze and early Iron Ages.
So it’s a historical topic – no aliens or space ships this time!
While a large number of such sites have been discovered north of the Alps (in particular around Lake Constance), there are also numerous finds from the regions on the southern fringe of the Alps. A famous one, which I visited as a schoolboy during a holiday trip, is at the Lago di Ledro.

Image

Image

Image

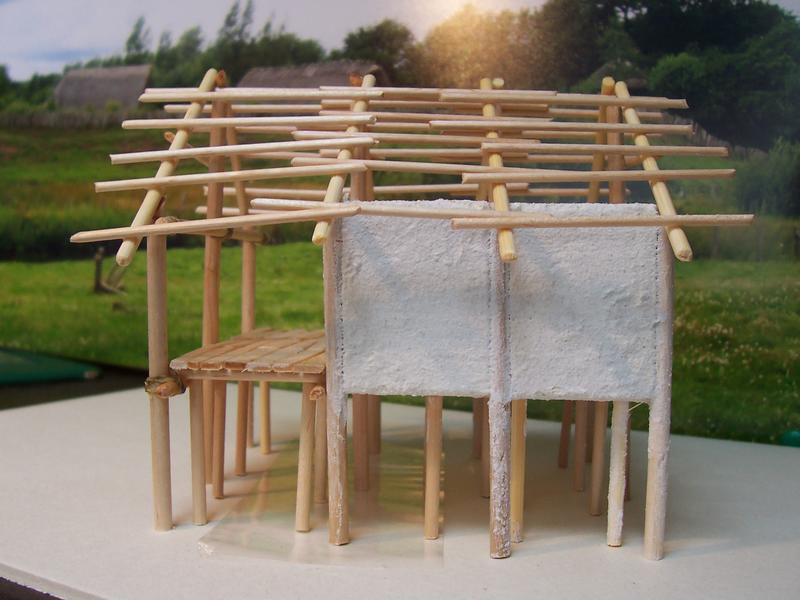
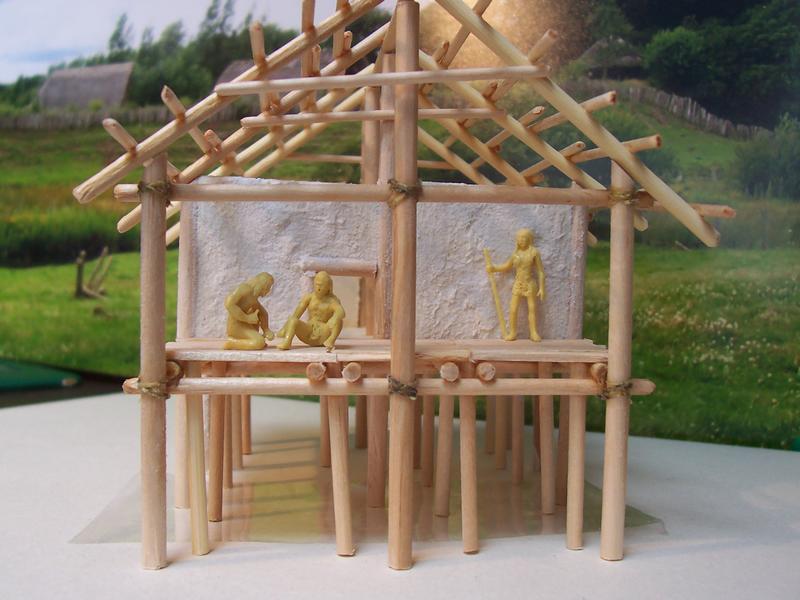
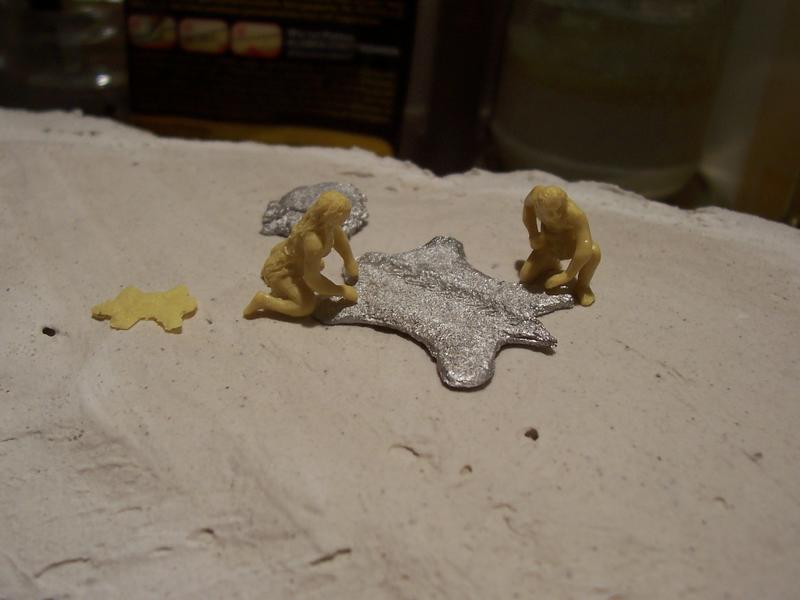
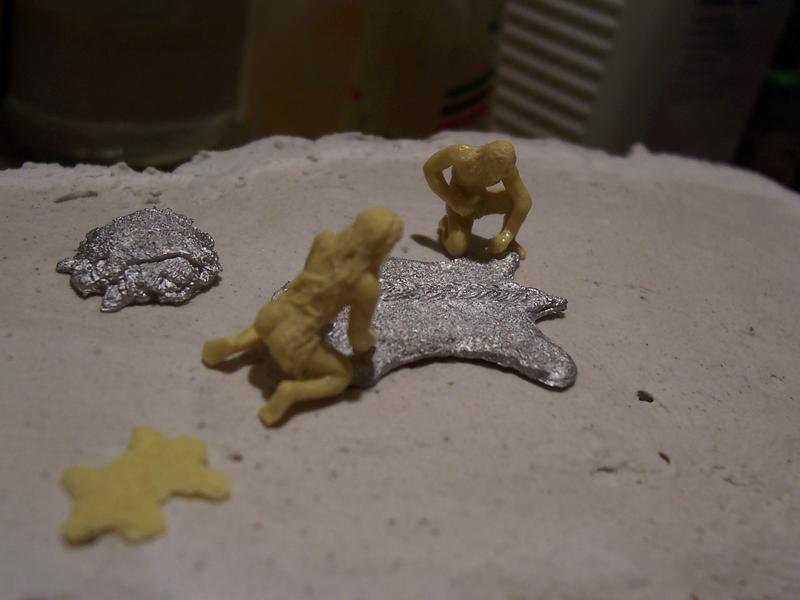
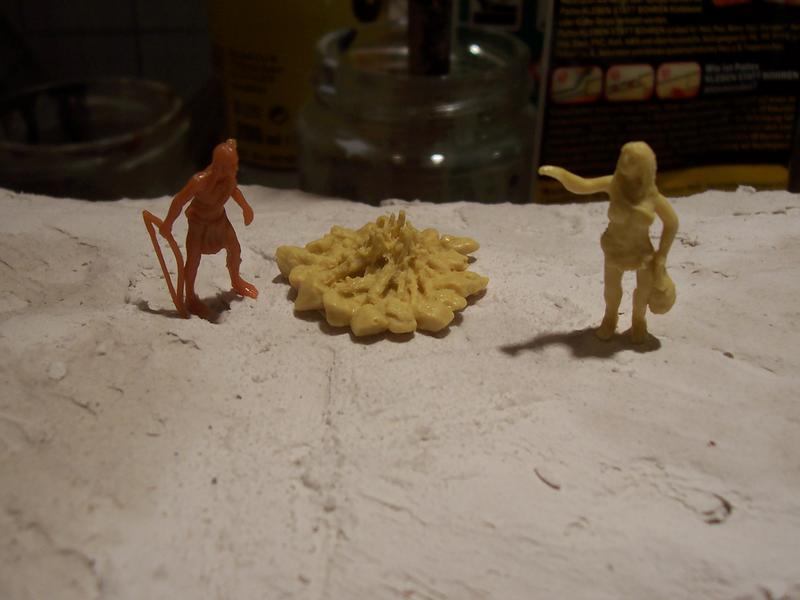
So the project has the working title „Italy before the Romans“. This is, of course, a cheap trick to bring my beloved Romans somehow into the story, but it is also a funny coincidence that the last of these prehistoric dwellings were actually built right at that time when Roman history had its dawn. I think this title is also fitting because the figures – and thus also the inspiration to start the project at all – are from Italy, too: I will use the set of prehistoric people by Phersu (set PCCF - Prehistoric Cavemen Cave and Fire).
User avatar
sberry  Germany
 
Posts: 932
Member since:
12 Mar 2010, 20:37


Posted by Kekso on 12 Aug 2016, 17:22

Great topic. Subscribe is a must ;)
User avatar
Kekso  Croatia

Moderator Moderator
Supporting Member (Bronze) Supporting Member (Bronze)
 
Posts: 6840
Member since:
19 Oct 2011, 18:32

Posted by giorgio on 12 Aug 2016, 18:55

wunderbar!!! i live near to a couple of these sites, look http://www.parcomontale.it/montale_english/
Terramara (literally terra=ground + marna=marl) are mounds that indicate the presence of bronze age houses or villages. In Modena you can find some of these sites more ancient of the coming of the Etruscans. In Bologna, instead, you can find sites of the iron age, they are of the Villanovan culture http://www.museibologna.it/archeologico ... 0/id/48682
In Piacenza, finally, you can find a neolithic village of the square-mouth-pottery culture http://www.archeotravo.it/index.php?language=eng
User avatar
giorgio  Italy
 
Posts: 130
Member since:
03 Jul 2009, 17:59

Posted by Peter on 12 Aug 2016, 18:55

Interesting topic! Great start! :thumbup:
User avatar
Peter  Belgium

Moderator Moderator
 
Posts: 22507
Member since:
25 Mar 2008, 18:51

Posted by giorgio on 14 Aug 2016, 07:30

Bronze Age Terramare were heavily entrenched, that means a permanent state of war.
I would use even bronze age miniatures, like troyans, achaeans, mycaeneans, egyptians, sumerians and similar...
Like your project very much!
User avatar
giorgio  Italy
 
Posts: 130
Member since:
03 Jul 2009, 17:59

Posted by sberry on 14 Aug 2016, 09:21

Thank you guys! And thank you, Giorgio, for the interesting links!

I plan to keep the diorama rather small, so it will show only a small section of a settlement. But, yes, I also have thought about including a section of wall and trench, to show that there were fortifications, even though I will have limited space on the base-plate.
User avatar
sberry  Germany
 
Posts: 932
Member since:
12 Mar 2010, 20:37

Help keep the forum online!
or become a supporting member

Posted by Wheeling Turn on 19 Aug 2016, 15:36

Interesting project...keep us update with the progress...
User avatar
Wheeling Turn  Germany
 
Posts: 1396
Member since:
14 Dec 2008, 14:05

Posted by Michael Robert on 19 Aug 2016, 19:58

Wow, this IS an interesting topic. Never thought there would be historical subjects for 1/72 miniatures full of research and information like you do. I will follow with great interest.
In the end only creativity, imagination, practical skills and time are the limit :(
Regards
Michael
User avatar
Michael Robert  France

Supporting Member (Bronze) Supporting Member (Bronze)
 
Posts: 825
Member since:
14 Oct 2009, 19:22

Posted by Cryns on 24 Aug 2016, 13:31

I missed so many interesting topics this summer. Like this one.

This is great sberry. Paying attention to a period and culture that nobody else in this forum ever thinks of.
And I love to see you using Phersu's miniatures.
What is fascinating me most is how you re-construct the whole building with every separate beam. And the rope-connections: very good.

Have you considered to handcut the wooden poles and beams out of bigger soft wood?
Or use real plants or twigs in stead of bamboo toothpick and straight modeling wood?

For educational purposes these straight wooden poles you use are perfect.
Also they are much stronger than handcut balsa wood.

But handcut poles, curved and not exactly smooth, will give the structure a more primitive, lively look. Its a lot of extra work, thats true.
With that in mind, using poles from real plants or twigs is a much quicker option. You don't even need to paint these afterwards.
Just a suggestion or consideration, this is no critic or what so ever.

Giorgio thanks for adding info to sberry's excellent topic.
User avatar
Cryns  Netherlands

Supporting Business Supporting Business
 
Posts: 1254
Member since:
11 Nov 2015, 15:33

Posted by sberry on 31 Aug 2016, 17:57

Thanks again, guys!
Yes, I thought about using twigs to yield a less regular, more naturally looking appearance, but for this building here I decided against this option (there will be probably two more huts, perhaps actually made with twigs). The reason is that this would negatively affect the stability, in particular since I wanted to have a construction of several "modules" that can be separated for further construction and painting steps.
User avatar
sberry  Germany
 
Posts: 932
Member since:
12 Mar 2010, 20:37

Posted by sberry on 19 Oct 2016, 11:41

After a long break, here’s some progress. I have built a roof for the first house, and constructed a complete second one. In both cases, I used epoxy putty for the roofs: #1 is made from Milliput, #2 from "Tesa Multi Knete" (Tesa Epoxy Kneedpasta in Dutch. I had to use it because I had run out of Milliput in the middle of a project – which in itself is shocking enough – and then I also had to learn that the modeling store nearby, which could have provided quick relief, had closed its gates forever).

Image

Image

Image

The corrections on roof #2 (red stuff) were done with modeling clay.
Those pics were taken some weeks ago, when the weather was still nice. In the meantime, I have started painting the houses and also building the base plate:

Image

Image

Image
User avatar
sberry  Germany
 
Posts: 932
Member since:
12 Mar 2010, 20:37

Posted by Cryns on 19 Oct 2016, 15:58

You really surprise me now. Both buildings become very lively. You know I have a fascination for weathered wood and this grey tone, though you are not even finished painting yet, works very well. (My brown wooden outdoor furniture already looked like this after one winter outside in sun and rain! :( ) Also the round model woods I discussed in an older reply turn out to look very nice primitive and realistic. As do the wicker&clay walls and thatched roofs. Great about the roof is that still the construction under the thatch is visible.

sberry wrote:"Tesa Multi Knete" (Tesa Epoxy Kneedpasta in Dutch.

Another product to add to our long list of modeling putty's.

sberry wrote:I also had to learn that the modeling store nearby, which could have provided quick relief, had closed its gates forever).

Sound like my lifestory, this happened to me 6 times in the last ten years. From all those train and model shops there is only one left somewhere in a suburb. And this is supposed to be the capital of the country.

sberry wrote:which in itself is shocking enough

You must have a very peacefull, all under control life then?

Looking at the long garden grass reminds us at the fact these neolithic people had not invented the scythe yet. :-)

I look forward to see more development.
User avatar
Cryns  Netherlands

Supporting Business Supporting Business
 
Posts: 1254
Member since:
11 Nov 2015, 15:33

Posted by sberry on 20 Oct 2016, 09:06

Thanks Mr. Cryns!

Mr. Cryns wrote:Another product to add to our long list of modeling putty's.

This stuff is quite soft and very sticky. It is more useful for gluing (that’s what it is made for in the first place) than for sculpting, I think.

Mr. Cryns wrote:Sound like my lifestory, this happened to me 6 times in the last ten years. From all those train and model shops there is only one left somewhere in a suburb.

That is probably due to two factors: First, we modelers are an endangered species; the younger ones seem to prefer everything that is online/virtual/digital. Second, the curse of the internet – everybody (including myself) is ordering many things online. However, I still like to go to a real shop and look at things before I buy them. Sad that they are slowly disappearing.

Mr. Cryns wrote:You must have a very peacefull, all under control life then?

Well, actually I had one or two even more serious situations in my life …
User avatar
sberry  Germany
 
Posts: 932
Member since:
12 Mar 2010, 20:37

Posted by Peter on 20 Oct 2016, 20:16

Can't wait to see the next steps of this project! ;-) :thumbup:
User avatar
Peter  Belgium

Moderator Moderator
 
Posts: 22507
Member since:
25 Mar 2008, 18:51

Posted by sberry on 23 Oct 2016, 11:43

While the plaster of the base is drying, I am playing a bit with the assignment of the figures and accessories. Here is a potter’s workshop:

Image

Image

Some people working on animal skins:

Image

Image

A surprise guest from another set:

Image

And some canoes. One is from HäT’s Jungle Adventure (the re-issue of Airfix’ Tarzan set), I had to modify the terrible "bench". The other two are carved from Styrodur:

Image

Image

Of course, I had to test if the canoes are ready to swim properly. Fortunately, I could use an older dio with a water surface. It is the second diorama ever that I had built (eight years ago, in my pre-Bennos era):

Image
User avatar
sberry  Germany
 
Posts: 932
Member since:
12 Mar 2010, 20:37

Posted by KenzoSato on 23 Oct 2016, 15:00

Fantastic job
KenzoSato  Italy
 
Posts: 3921
Member since:
06 Jun 2009, 07:45

Help keep the forum online!
or become a supporting member

Posted by Peter on 23 Oct 2016, 18:07

You made some nice progress! :thumbup:
User avatar
Peter  Belgium

Moderator Moderator
 
Posts: 22507
Member since:
25 Mar 2008, 18:51

Posted by Cryns on 24 Oct 2016, 11:50

sberry I would like to share this picture with you:

Image

Okay this is not a neolithic thatched roof and its not from Italy or the Alps.
I took the picture in Cluj Napoca, Romania, because it was the most terrific lively and primitive thatched roof I had ever seen so far. And you will see the comparison with your miniature roof I think: because of time and lack of maintainance the construction of the roof gets visible under the thatch.

This thatch had not much structure at all. It must be hay and it looked like just a messy bunch of dried grass dropped upon the beams and stuck together by adding smaller beams on top of the thatch. I hope this roof will give you some inspiration in some way.

Though overthinking your lake houses, these probably had roofs made of reeds. Did you find any information about that?

I enjoyed watching your little boats too. They float very well. I already knew that fantastic diorama of the Roman harbor of yours (I think you made two of those).
Back to the canoes: I tried that too, making little boats using styrodur. Last summer I was visited by somebody who carves them out of gypsum and sells them. If you want to make the boards of those boats thinner and more subtle, I recommend using a small, massive piece of soft wood. Hollowing it with a linoleum gouge Its almost as easy to work with as the foams we use but much stronger and it has those nice woodgrains which makes it easy to paint.
User avatar
Cryns  Netherlands

Supporting Business Supporting Business
 
Posts: 1254
Member since:
11 Nov 2015, 15:33

Posted by sberry on 14 Nov 2016, 12:15

Information on the roofs of these prehistoric houses is essentially archaeological guesswork, I would say, given the fact that it is mostly the foundations and lower parts of the buildings that are excavated. But reet is a good choice, I think.

In the meantime, some more progress, although slowly … I have painted all the accessories & stuff, and I’ve been working on the base:

Image

Image

Image

So there are *only* the figures missing, and then everything can be assembled. For the water I will use an epoxy resin, which is said to be crystal clear. Well, let’s see how it looks in the end.
User avatar
sberry  Germany
 
Posts: 932
Member since:
12 Mar 2010, 20:37

Posted by Cryns on 16 Nov 2016, 11:18

Nice pottery oven. I whish you good luck with the casting of the water.
User avatar
Cryns  Netherlands

Supporting Business Supporting Business
 
Posts: 1254
Member since:
11 Nov 2015, 15:33

Next page

Return to Work in Progress