Tutorials

Painting Guide- French Line Infantry(private)

Posted by Carlo Antonio on 24 Apr 2011, 23:47

I prepared a little "painting guide". As an example, I chose an soldier French Line Infantry (Hat). A figure very well detailed. I hope this guide will serve you all. This time I calculated the time i need to paint a figure! Three hours and thirty minutes.

This is a list of the colors that I used:
Vallejo Game Color
Black............................72051
Off White......................72101
White...........................72001
Cold Grey......................72050
Stonewall Grey...............72049
Charred Brown...............72045
Beasty Brown................72043
Scarlett Red..................72012
Blood Red......................72010
Gold Yellow....................72007
Chainmail Silver..............72053
Dwarf Skin....................72041
Glorious Gold.................72056
Polished Gold.................72 ...... (I do not read what is written)

Gameworkshop
Dark Angels Green
Flesh Wash
Black Wash

Lifecolor
Matt French Blue FS 35044

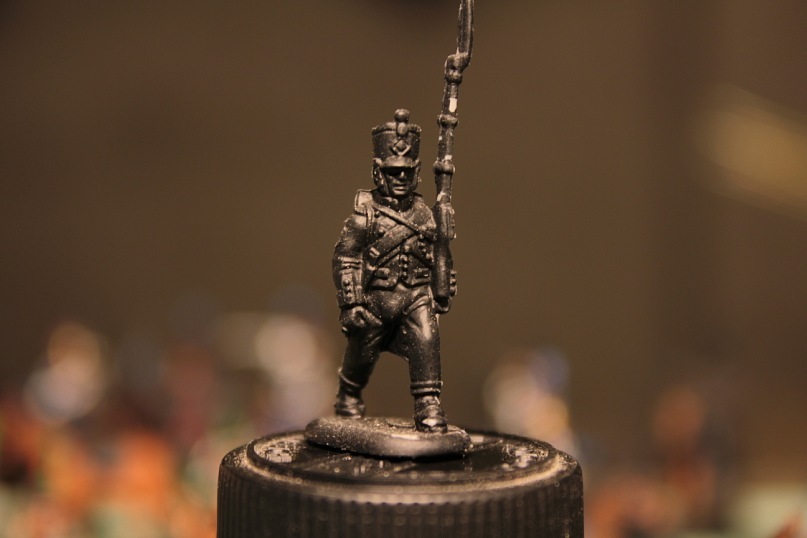
Step 1-Basecoat. Using black spray Gameworkshop.
Image


Step 2- I begin to paint all the areas that should be white with color Cold Grey. The jacket with the French Blue. The collar and cuffs with Scarlett Red, and finally the face and hands with Dwarf Skin. Remember that when you paint, you have to separate all the
different areas so that we can see a thin black line.
Image
Image

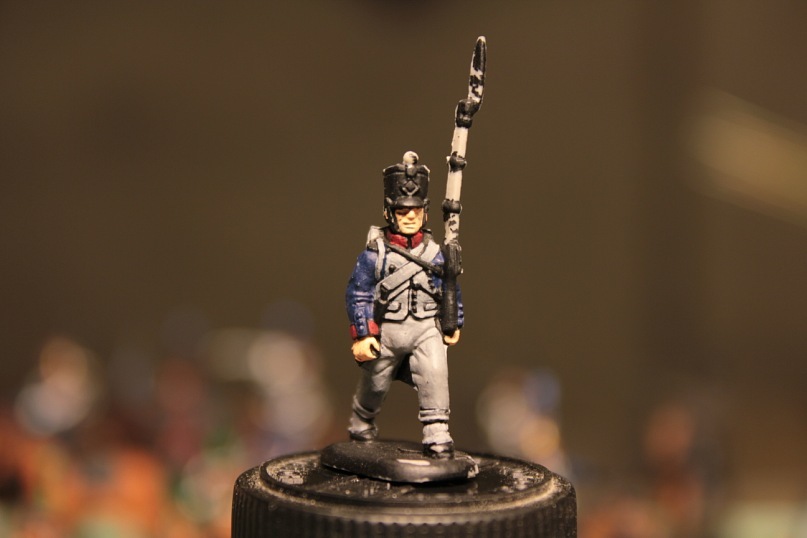
Step 3- Hightlight.I began to paint everything that is in gray (not including the straps and belts) with the color Stonewall Grey. The belts and belts with the color Off White.
I prepared four shades of French Blue. I paint with the coat 2 and 3. The collar and cuffs with Blood Red.
Image

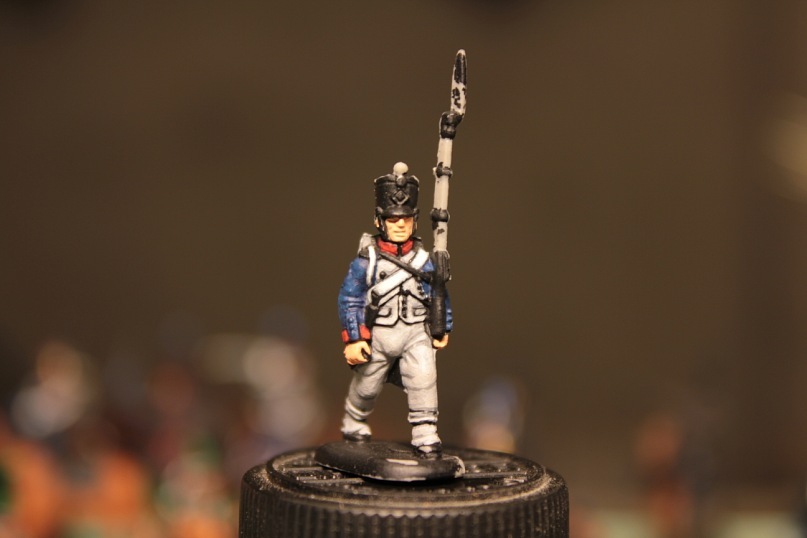
Step 4- Hightlight.All areas colored with Stonewall Gray must be painted White(including the straps and belts). I finish the coat with last shades of French Blue.I apply the Flesh Wash on his face and hands.
Image

Step 5-Hightlight . Apply the last coat of white.Finish the face with the Dwarf Skin.
Image
Image

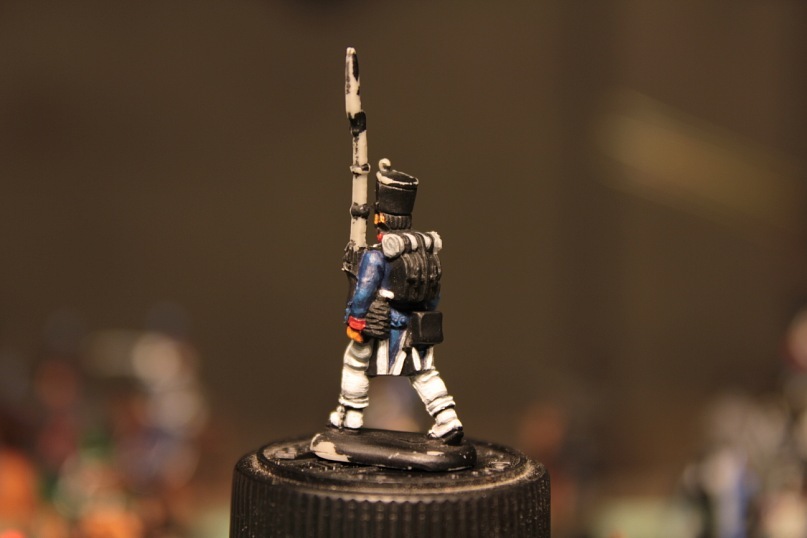
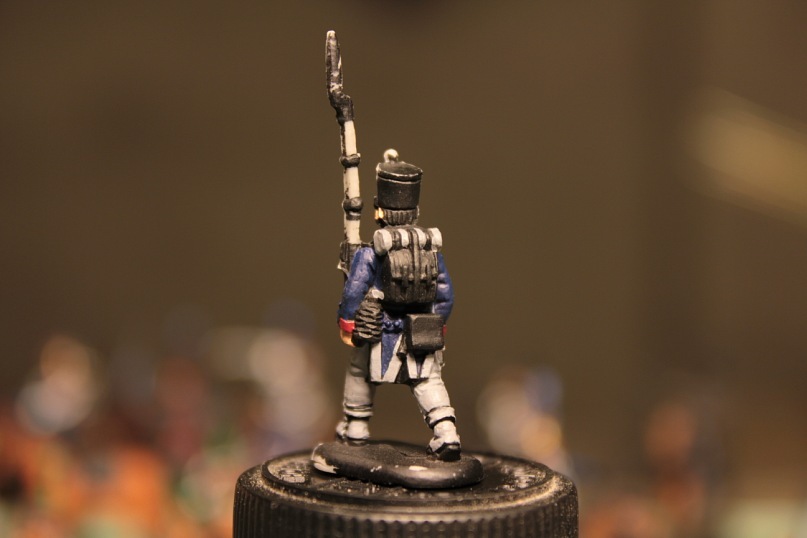
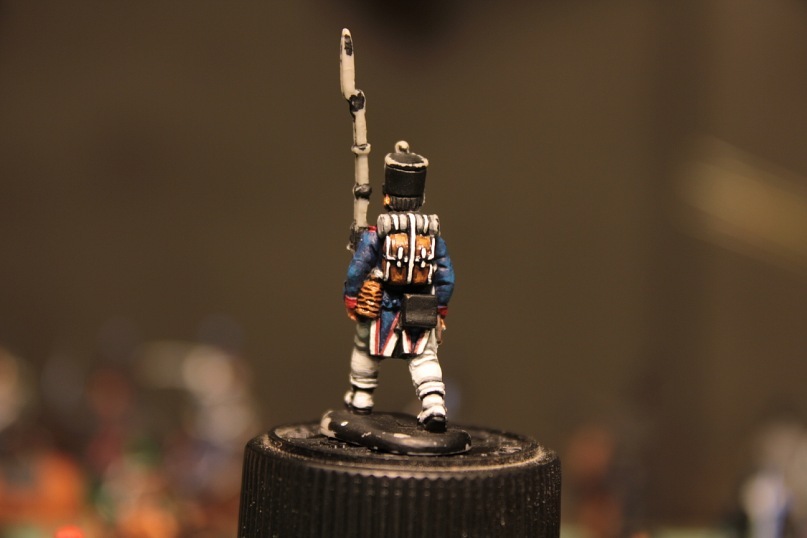
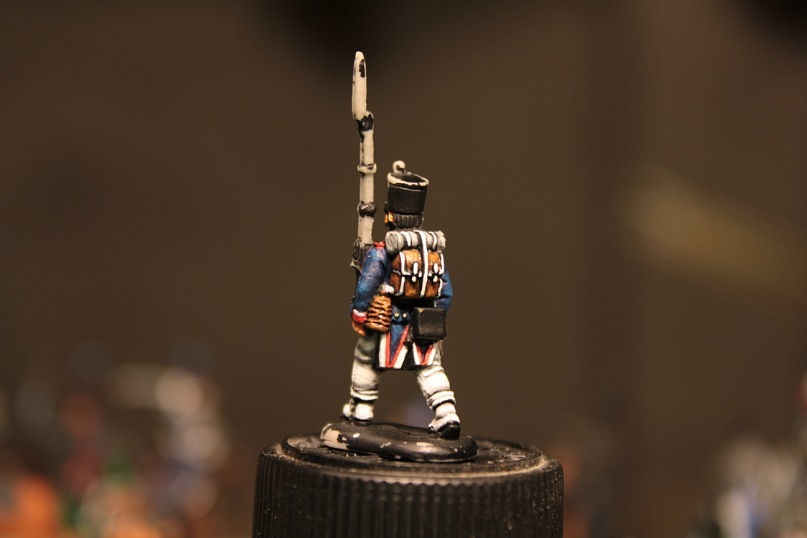
Step 6-. I paint the backpack and water bottle with beasty brown and apply a coat of black ink.
Image
Image

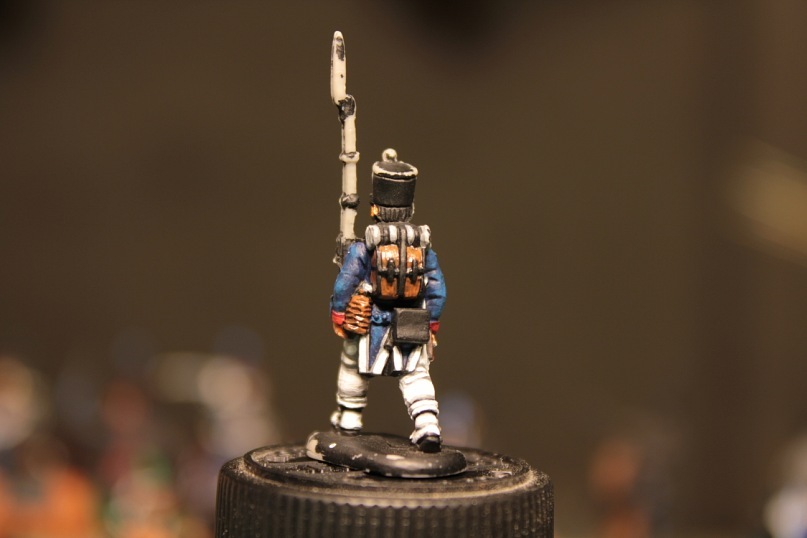
Step 7- I paint the shoulder pads and stripes with Scarlett Red.Hightlight the backpack and water bottle with a mixture beasty brown and Gold yellow . (5 / 1).I paint the strips of the backpack and greatcoat with white.
Image
Image

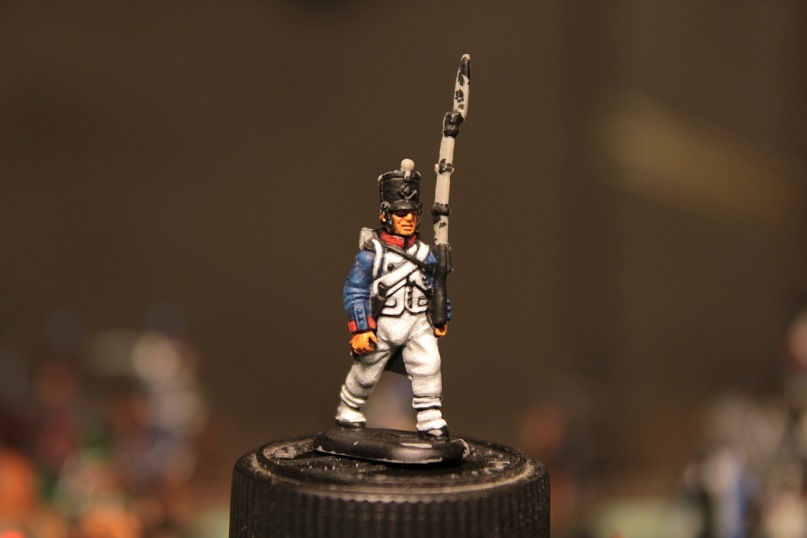
Step 8-Paint the stripes of the collar and cuffs with White.The buttons with the Polished Gold. The shoulder straps and stripes of the jacket with Blood Red.
Image
Image

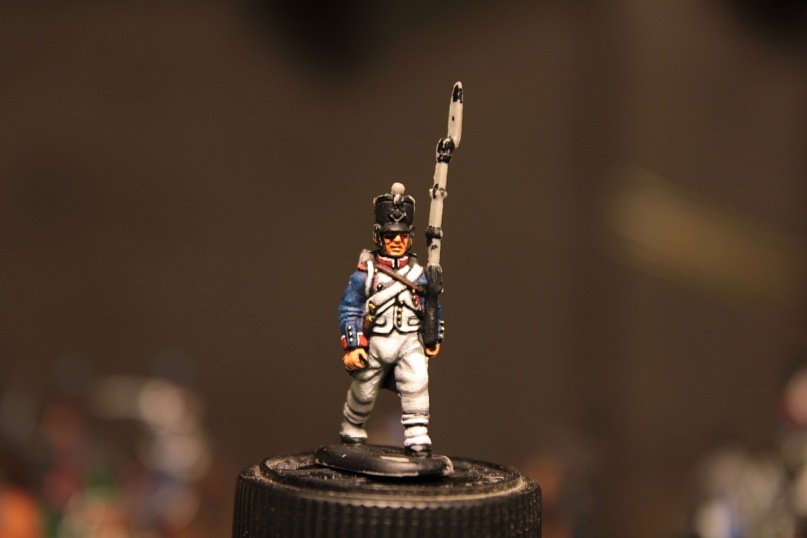
Step 9- Shako. I paint all metal areas with Polished Gold.The pompon is colored White and after with Dark Angels Green.
Regimental number??? I am not yet ready for this :mrgreen:
Image
Image

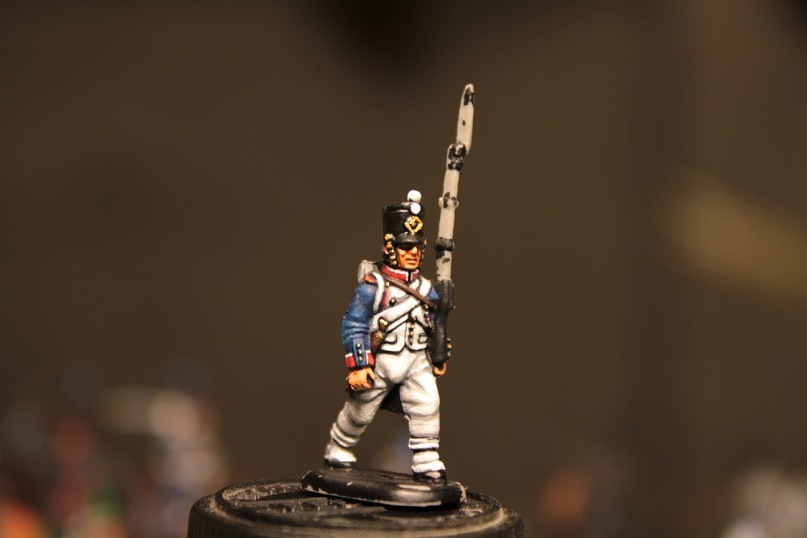
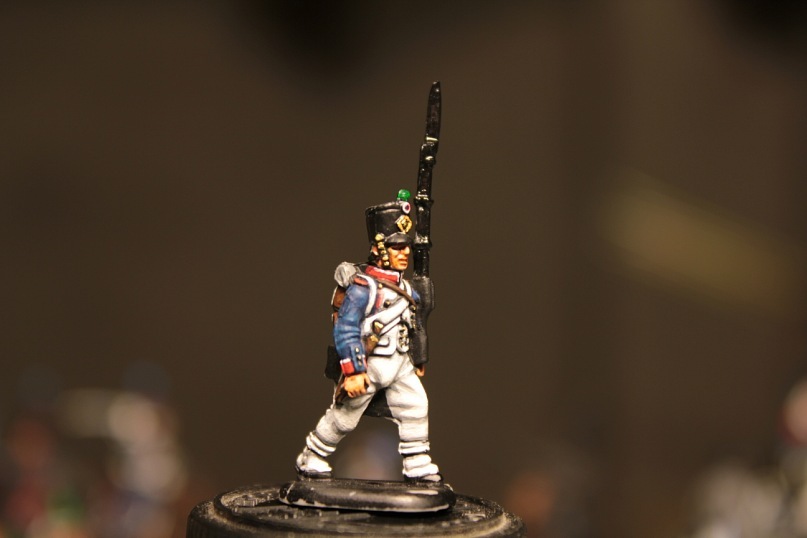
Step 10-I paint the musket with Charred Brown and Gun Metal Gray. The sections with the Glorious Gold. The bayonet with Chainmail Silver .
Hightlight the musket with a mixture Charred Brown and Gold Yellow(5 / 1) ..
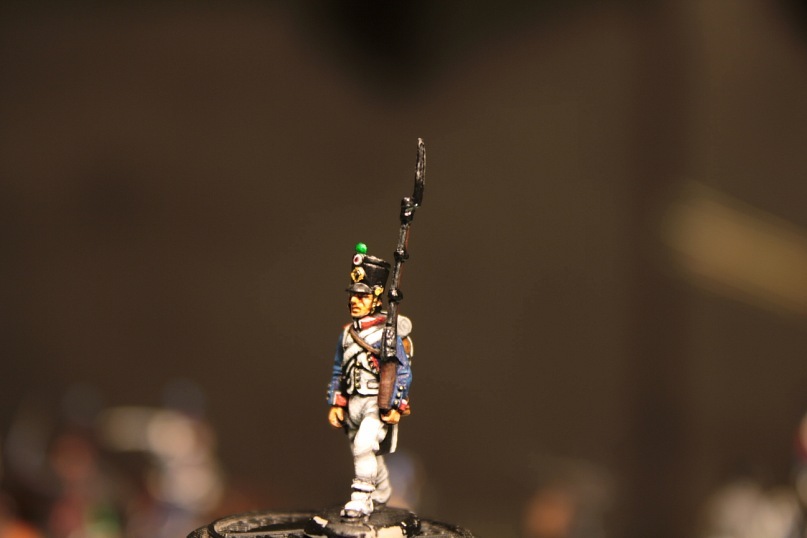
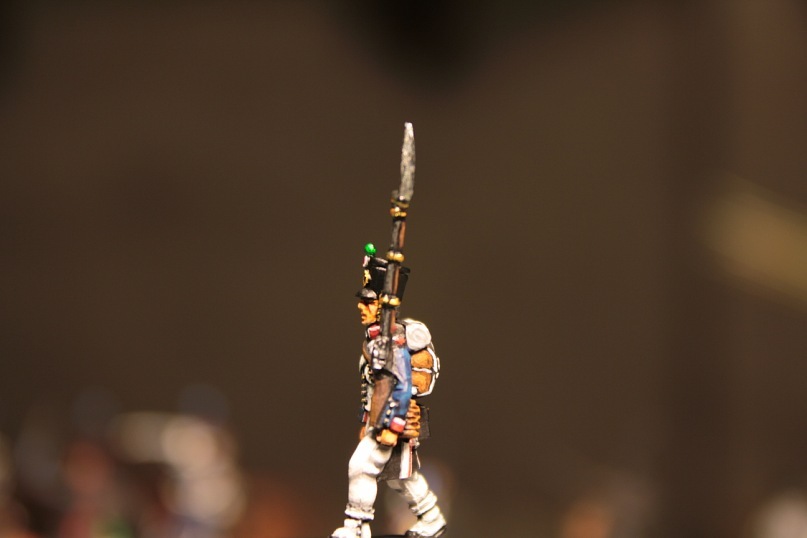
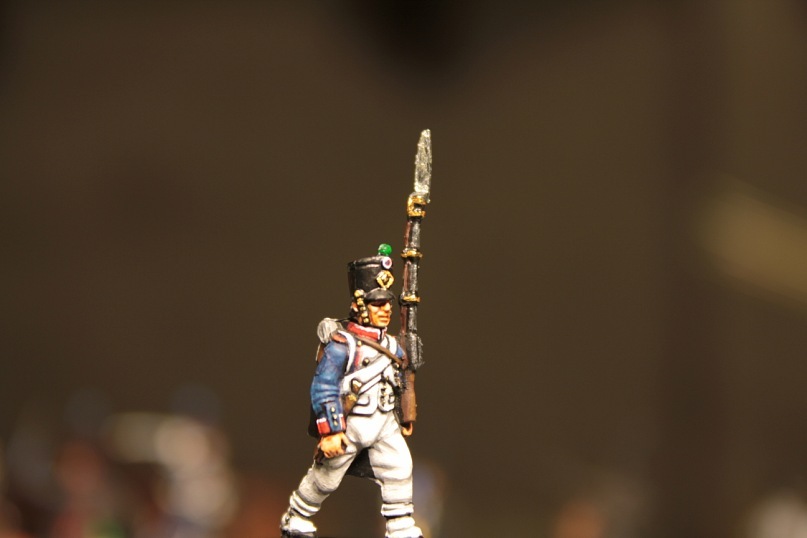
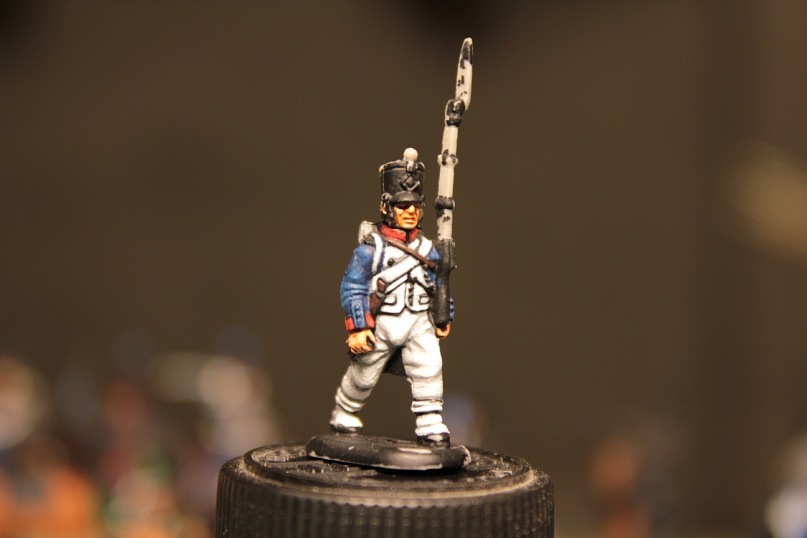
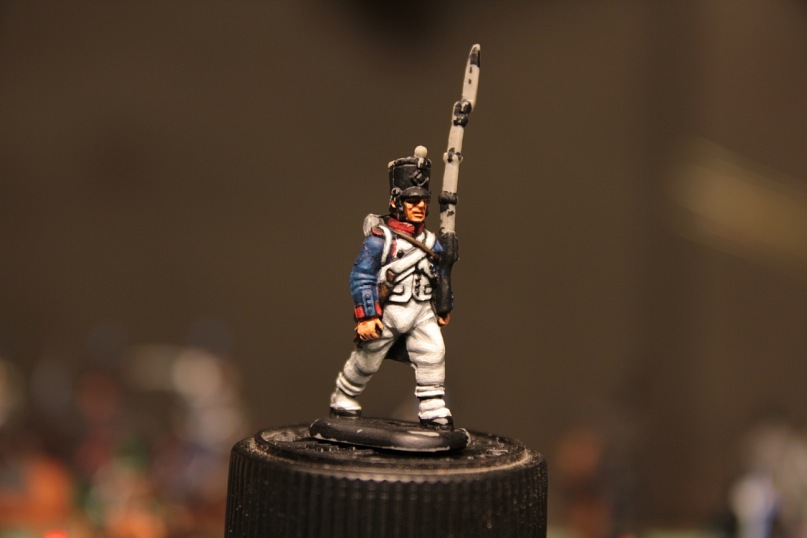
Image
Image
Image
Image

Finish !! :headbang: :headbang: :headbang:
Image
Image
Image
Image

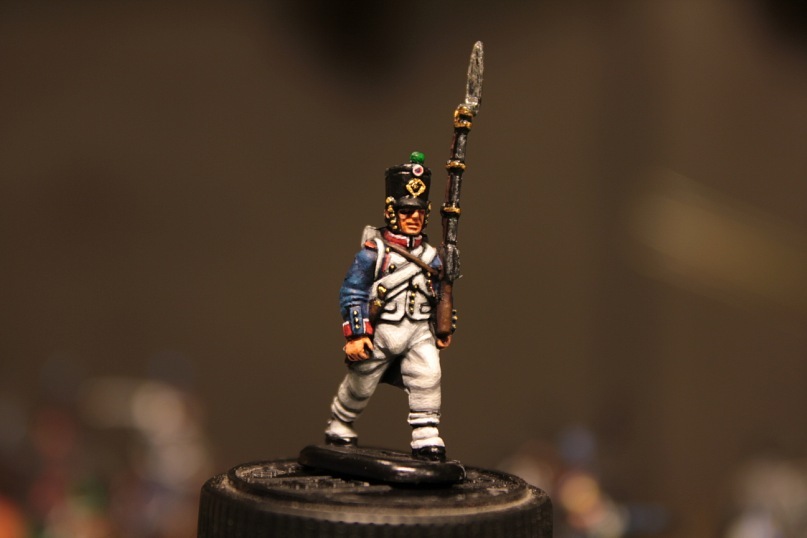
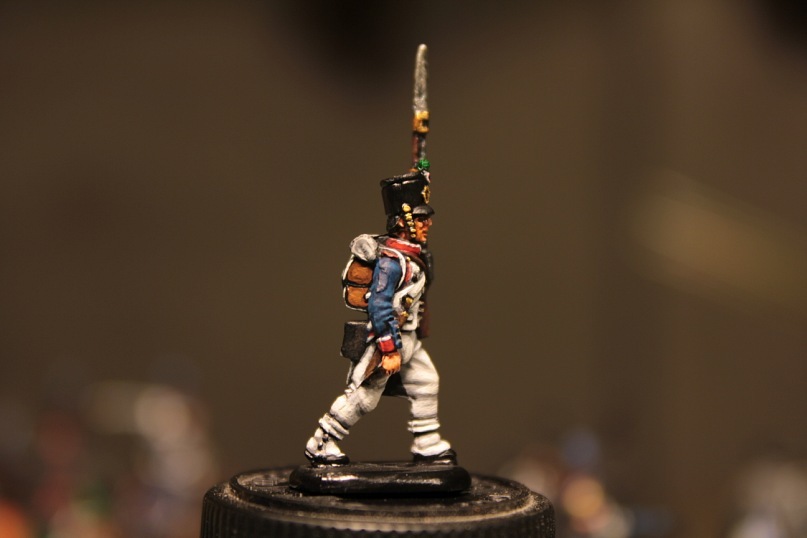
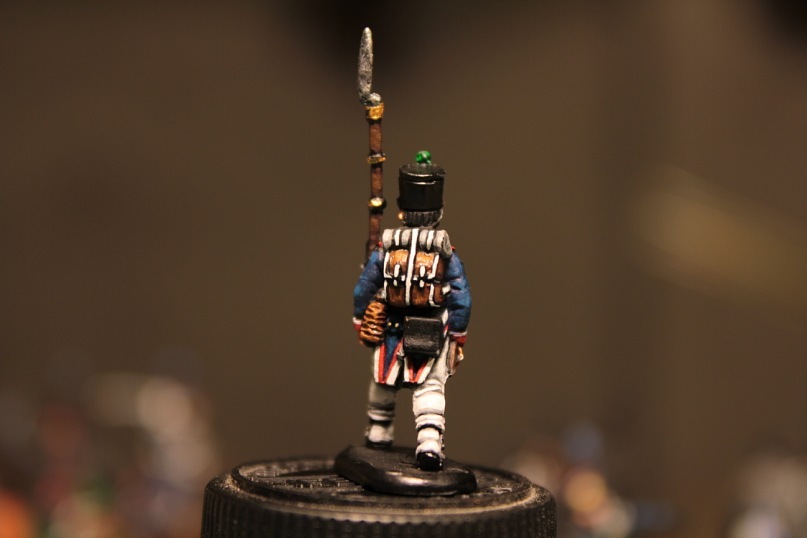
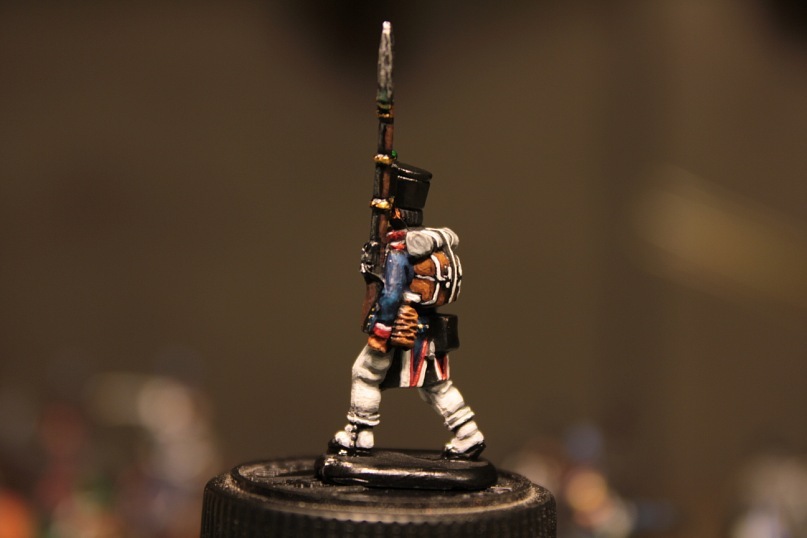
Done ... sorry for my bad English :oops: . I hope enough has been written correctly.If you have any questions. Please contact me :thumbup:
User avatar
Carlo Antonio  Italy
 
Posts: 662
Member since:
16 Apr 2011, 14:35


Posted by Victorious Secret on 25 Apr 2011, 00:51

Hi Carlo,

Thank you for the fantastic tutorial. I'm soaking it up! :love:

VS
User avatar
Victorious Secret  United States of America
 
Posts: 957
Member since:
01 Oct 2010, 06:49

Posted by Francesco Giova on 25 Apr 2011, 01:01

Thank you Carlo, the best painting tutorial on Nap Frenchmen I have ever seen, and easy to follow :thumbup:
I'll print it out to use it as reference :-D
User avatar
Francesco Giova  Italy
 
Posts: 661
Member since:
23 Nov 2008, 22:22

Posted by laurence strong on 25 Apr 2011, 02:09

Many thanks :thumbup: :thumbup: :thumbup:
laurence strong  
 
Posts: 229
Member since:
04 Dec 2010, 19:48

Posted by closerlookbooks on 25 Apr 2011, 06:24

Excellent, Carlo. Thanks for the tutorial. It makes for an excellent addition to the forum.
Steve
www.pegasusfigures.com
User avatar
closerlookbooks  United States of America
 
Posts: 203
Member since:
30 Jul 2010, 08:17

Posted by Zed1 on 25 Apr 2011, 08:13

Nice guide, Carlo. Please allow me to add two things:

- to be exact, the set is HäT no. 8095 1808-1812 French Line Infantry
- pompon colours marked the company to which a soldier belonged. 1st company was green, 2nd blue, 3rd orange and 4th purple
User avatar
Zed1  Germany
 
Posts: 1302
Member since:
17 Jan 2011, 14:25

Help keep the forum online!
or become a supporting member

Posted by Peter on 25 Apr 2011, 09:19

Great tutorial Carlo :thumbup:
User avatar
Peter  Belgium

Moderator Moderator
 
Posts: 22507
Member since:
25 Mar 2008, 18:51

Posted by Mai Strac on 25 Apr 2011, 10:11

Thank's Carlo for your guide very clear and complete!!!
With these tips I will try to paint some Napoleonic after a long long time, thanks again!!! :thumbup: :thumbup: :thumbup:
User avatar
Mai Strac  Italy
 
Posts: 2538
Member since:
11 Jan 2009, 19:08

Posted by Paul on 25 Apr 2011, 12:54

Excellent!!!!! :thumbup: :thumbup: :thumbup: :thumbup:
User avatar
Paul  China
 
Posts: 11724
Member since:
25 Nov 2008, 09:31

Posted by MABO on 25 Apr 2011, 12:59

Thank you for this tutorial. A great effort, but very useful I think.
:headbang:
User avatar
MABO  Europe
Supporting Member (Gold) Supporting Member (Gold)
 
Posts: 9146
Member since:
12 May 2008, 18:01

Posted by Carlo Antonio on 25 Apr 2011, 23:05

Many thanks friends !! I'm glad you like it !!!! :-D
User avatar
Carlo Antonio  Italy
 
Posts: 662
Member since:
16 Apr 2011, 14:35

Posted by Benno on 27 Apr 2011, 13:37

Nice tutorial. 8)
User avatar
Benno  Netherlands

Forum Admin Forum Admin
 
Posts: 2395
Member since:
07 Oct 2007, 16:31

Posted by Carlo Antonio on 27 Apr 2011, 19:24

Many thanks Benno !! On request, I can make others. :-)
User avatar
Carlo Antonio  Italy
 
Posts: 662
Member since:
16 Apr 2011, 14:35

Posted by Benno on 27 Apr 2011, 20:40

One on how you painted the Zvezda Russians would be nice. :-D I like how you painted the whites. Will try this myself!
User avatar
Benno  Netherlands

Forum Admin Forum Admin
 
Posts: 2395
Member since:
07 Oct 2007, 16:31

Posted by Carlo Antonio on 28 Apr 2011, 11:23

Ok :-) !!! This afternoon I begin to prepare
User avatar
Carlo Antonio  Italy
 
Posts: 662
Member since:
16 Apr 2011, 14:35

Posted by leifkarl1112 on 28 Apr 2011, 13:28

Thank you for this wonderful tutorial, Carlo.

I have been painting Napoleonics for many years, but it's always good to pick up other peoples tips! :mrgreen:

A very nice job. :thumbup:

Karl.
User avatar
leifkarl1112  United Kingdom
 
Posts: 1910
Member since:
13 Oct 2009, 18:11

Help keep the forum online!
or become a supporting member

Posted by Carlo Antonio on 29 Apr 2011, 13:10

Thanks leifkarl !!! I am glad that this guide will help you. In a short time, will be ready for another guide on how to paint a Russian grenadier :-)
User avatar
Carlo Antonio  Italy
 
Posts: 662
Member since:
16 Apr 2011, 14:35

Posted by Zed1 on 29 Apr 2011, 13:36

Carlo Antonio wrote:Thanks leifkarl !!! I am glad that this guide will help you. In a short time, will be ready for another guide on how to paint a Russian grenadier :-)


Are you using different techniques for them? Otherwise I (personally) would find it much more interesting how you're painting horses. Few horse guides here...
User avatar
Zed1  Germany
 
Posts: 1302
Member since:
17 Jan 2011, 14:25

Posted by Carlo Antonio on 29 Apr 2011, 14:14

I use the same technique! In addition there will be how to make the cords of shako.
As for the horses, I have to improve. You think this horse could go well?
Image
Image
User avatar
Carlo Antonio  Italy
 
Posts: 662
Member since:
16 Apr 2011, 14:35

Posted by Zed1 on 29 Apr 2011, 14:40

Carlo Antonio wrote:I use the same technique! In addition there will be how to make the cords of shako.
As for the horses, I have to improve. You think this horse could go well?


As always, you're massively overmodest. ;-)
This horse is extraordinary good, except from one thing that many painters do wrong: the hooves.
I know, I should keep my big mouth shut as long as I have not the farthest reached your level of perfection and don't put more attention on this fact as well, but it's simply a fact that nobody really seems to care about horse hooves at all.

Horse hooves are seldom black. And they are much more seldom equally coloured at all four legs. In reality, horse hoove colours are very individual from horse to horse and vary from flesh-like colour tones through all versions of grey to nearly black. That's why I, for example, chose a mixture of ivory and light grey for this one here: viewtopic.php?f=2&t=7510&p=92738&hilit=cossack#p92738
Next time I'll put light brown downward stripes on them and give them a dark-grey wash in order to bring some more structure into the hooves.

Call me a nitpicker now. :mrgreen:
User avatar
Zed1  Germany
 
Posts: 1302
Member since:
17 Jan 2011, 14:25

Next page

Return to Tutorials