Tutorials

Arabian House Building Tutorial

Posted by Old Wolf on 02 Feb 2011, 00:23

As promissed,
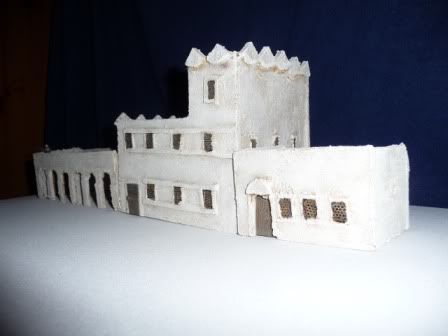
heres the tutorial for simple Arabian Houses in "Wargaming Quality" :mrgreen:
All material came out of the dark rooms of my cellar and things i found on the streets.

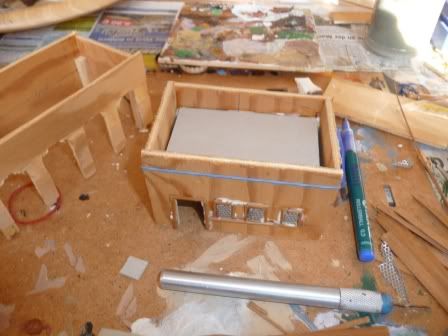
i took the thin wodden board from the back of a cupboard, cut the components out with an electric saw
Image

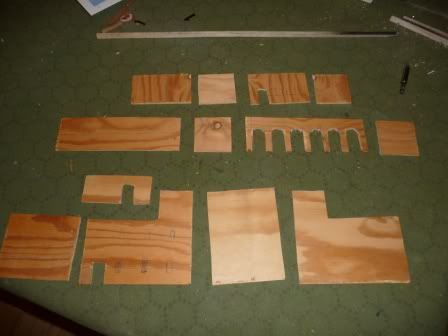
and glued them with white glue. A rubber strap is usefull to fix the components untill the glue dried.
Image
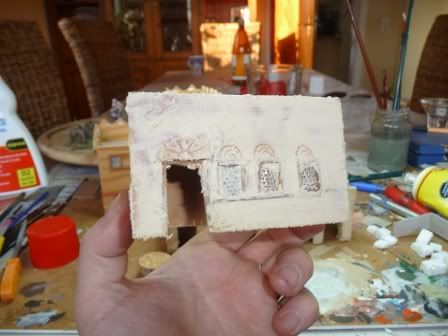
in the inner corners you can see the square timbers made from the stick of new years rocket

For the windows i used perforated metal plate from old speakers
Image

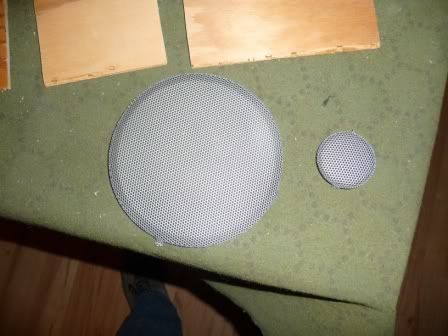
i cut it easy with the missus scissors :spank: and glued it on the wood
Image

Image

Image

Image
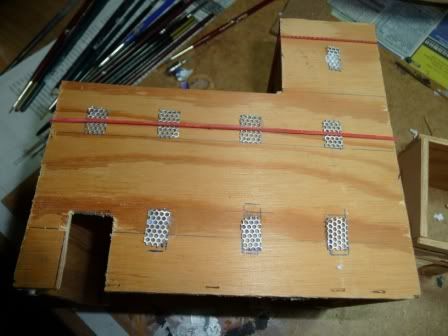
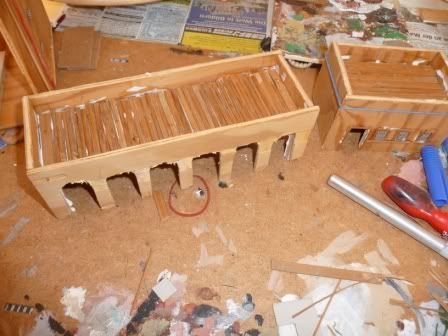
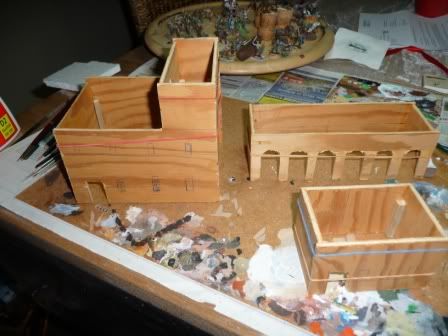
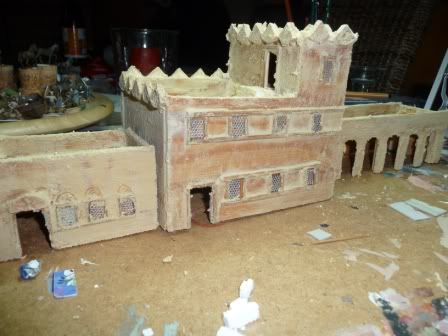
cardboard as base for the roof than wooden sticks glued on top

Image
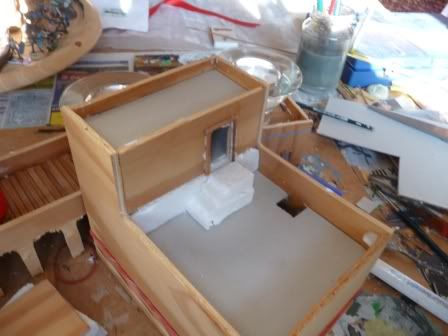
styrofoam for some stairs

Image

Image
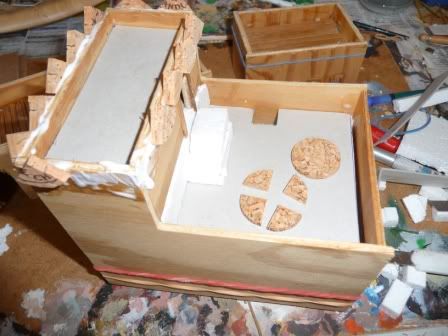
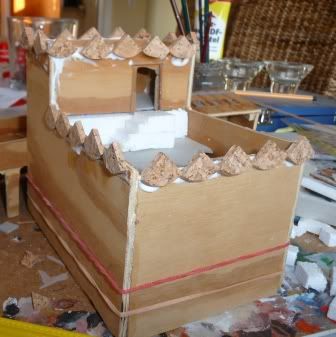
cork from sparkling wine for the battlements

Image

Image

Image
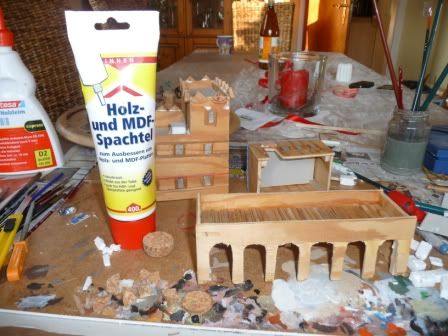
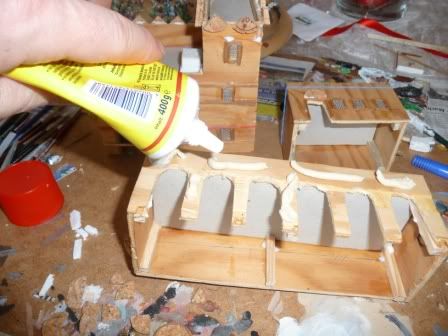
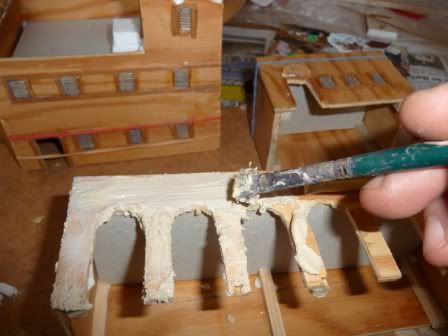
i used woodfiller for the surface. From the first Arabian House
viewtopic.php?f=2&t=6881
i ve learned to mix it with more water to get it thinner.

Image

Image

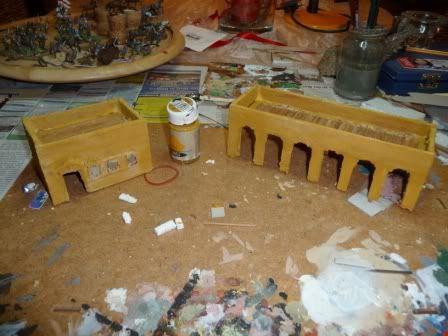
after drying i primed all with yellow ochre, a grey would do it too
Image

white drybrush and a dark prime on the wooden roof with a grey bown drybrush after
Image

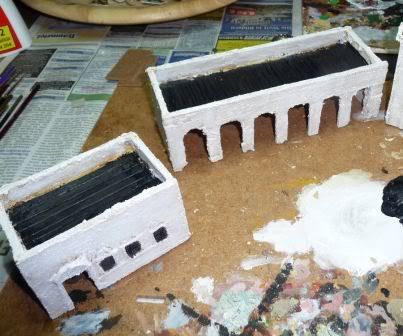
finished basic houses before getting details
Image

Image

Image

Image

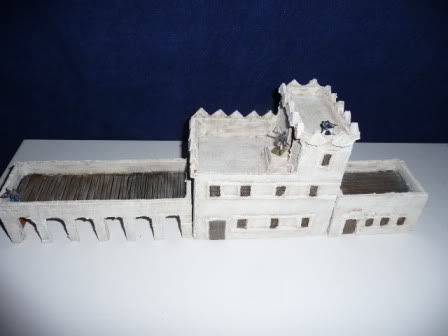
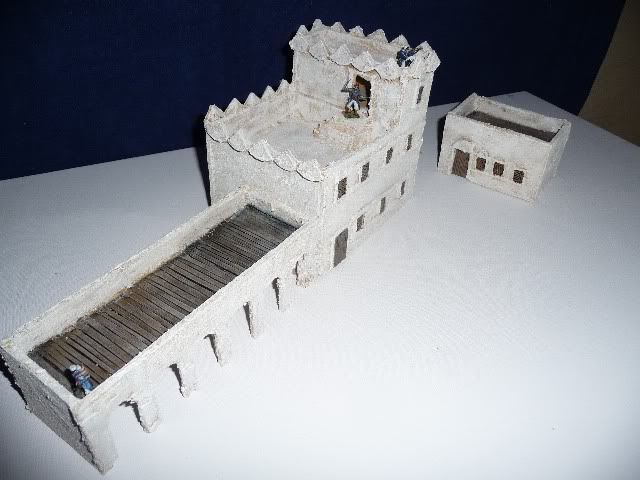
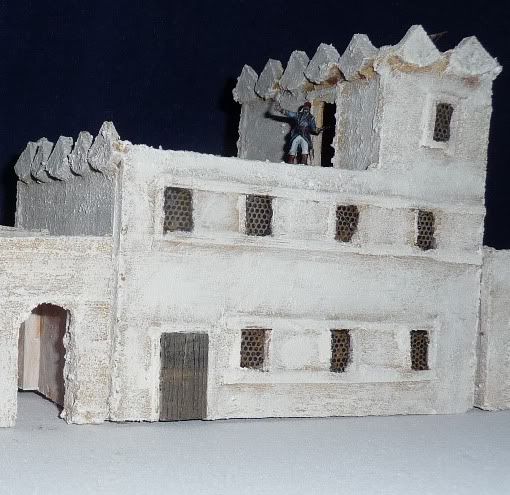
this was so much fun that i started a new house to better some parts

hope you enjoy
User avatar
Old Wolf  Germany
 
Posts: 704
Member since:
14 Dec 2008, 23:00


Posted by Jur2225 on 02 Feb 2011, 17:25

Thanks a lot for this tutorial! Too bad I am not working on an arabian wargame right now, but maybe operation desert storm will ever reach my painting brush :mrgreen: .
User avatar
Jur2225  Netherlands
 
Posts: 140
Member since:
24 Aug 2010, 20:30

Posted by Maurice on 02 Feb 2011, 19:22

Excellent tutorial :thumbup: How did you know all the parts would fit?
User avatar
Maurice  
 
Posts: 2925
Member since:
04 Jan 2009, 15:59

Posted by Peter on 02 Feb 2011, 19:35

Where can we order these buildings? ;-)

Great tutorial Andreas :thumbup:
User avatar
Peter  Belgium

Moderator Moderator
 
Posts: 22510
Member since:
25 Mar 2008, 18:51

Posted by Old Wolf on 02 Feb 2011, 20:49

Maurice wrote:Excellent tutorial :thumbup: How did you know all the parts would fit?


i didn t :mrgreen:
just tried and the dark rooms are full of parts didn t fit to anything :cry:
User avatar
Old Wolf  Germany
 
Posts: 704
Member since:
14 Dec 2008, 23:00

Posted by KenzoSato on 02 Feb 2011, 21:01

:thumbup:
KenzoSato  Italy
 
Posts: 3921
Member since:
06 Jun 2009, 07:45

Help keep the forum online!
or become a supporting member

Posted by The Observer on 02 Feb 2011, 21:01

...the Dark Rooms? :nono:
thought you are married happily? :lol: :lol:

Honestly-excellent tutorial and a nice building!!!! :love: :love: :love:
User avatar
The Observer  
 
Posts: 665
Member since:
11 May 2009, 21:31

Posted by west1871 on 02 Feb 2011, 21:09

Great tutorial mate :thumbup: A lot of ideas comming from this one ;-)
User avatar
west1871  United Kingdom
 
Posts: 2225
Member since:
06 May 2009, 17:08

Posted by MABO on 03 Feb 2011, 15:47

Very nice, Andreas. The idea with the speakers is great.
User avatar
MABO  Europe
Supporting Member (Gold) Supporting Member (Gold)
 
Posts: 9146
Member since:
12 May 2008, 18:01

Posted by KenzoSato on 07 Mar 2013, 20:33

:thumbup:
KenzoSato  Italy
 
Posts: 3921
Member since:
06 Jun 2009, 07:45

Posted by Duke atreides on 08 Mar 2013, 11:36

Excellent!!

Where did you find the design? Or did it come out as you were doing it?
Duke atreides  Portugal
 
Posts: 624
Member since:
04 Dec 2011, 00:24

Posted by dykio on 11 Mar 2013, 09:31

Great tutorial :thumbup: :thumbup: And i would never have thought about using cork and old speakers :thumbup: :thumbup:

Laterrrrrrrr
User avatar
dykio  Netherlands
 
Posts: 1503
Member since:
31 Jan 2008, 19:56

Posted by Geoffrey on 14 May 2014, 15:15

very nice done.


greetings
Geoffrey  Belgium
 
Posts: 32
Member since:
12 May 2014, 14:42


Return to Tutorials