This was my contribution for the 24th painting comp. People didn´t like it very much. So It didn´t make it over the 2nd round.
 , the chunky Valiant-figs
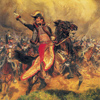
  or just a very good painted and charming drunken Nappie
  with his horse and his girlfriend
 Nevertheless I documented nearly every step of this diorama and here is a Making Of. Hope you enjoy. At the end of this post you can see more picture of the finished diorama with Bavarian sky if you like.
It all started with a model house made of paper and wood I bought years ago from a collector´s widow. (guys, this happens to your stuff when you are dead). It was made in the 70s or 80s for a 30mm flat figure diorama (FPW). So it is quite too big for “normal” 1/72 figs. There was only one solution....Valiant! They are big, chunky and perfectly convertable through their multipose character. Then I had to find vehicles fitting to the figs. Every 1/72 vehicle looks ridiculous small when a Valiant soldier stands near of it. So my choice was the 25mm series “Berlin or Bust” by Westwind Productions. I also purchased the telegraph poles and some ammo crates from this brand.
The intention was to show a “urban” scene. All my dioramas play on open field. So this was a good way to do something different.

As a base I used a ready framed flake board. After collecting the material I started with the figs.

Here you can see a choice of converted figs for the diorama.

Gluing the figs on “foam paper” (Schaumpappe), using hot glue pistol. Now the figs are ready for undercoating.

After undercoating with beige spray color (good as basic color for the camo smocks) I painted the Valiant´s with basic colors. (different brands).

Armypainter´s “dark tone” is splashed on the figs with an old brush.

After aplying dull varnish the figs look like this. After that I painted some highlights and details, like piping, batches, dirt...

This is the Sd-Kfz 251/9 in 25mm from Westwind. Pretty heavy (solid pewter). I builded a crew and added some detail on the vehicle.

Painting the vehicle with Gunze Sanyo “tank colors”....

...and giving it a wash with “devlan mud” from GW.

Camo stripes added with brush, not airbrush. (too much cleaning work afterwards)

After some drybrushing I added decals, some shells and a matt varnish coat.

Time to start with the landscape. For the street and the wall I used foam sheets. I bought it from an architect supplier.

This time my diorama was a bit strict in it´s choreography. So a little wall breaktrough would add more action and diversity.

Graving in the cobblestones with a thin black pen was quite a work!

Painting the landscape around the house with black acrylic color.

After drybrushing wall and street in different gray tones I mixed a “rubble pudding” with wood filler, color, sand and all sorts of little bricks, wood pieces and stones and soiled the freshly made street with this stuff. I also carved out some craters.

Bringing on the first figures and stuff while adding some more detail like the broken covering plates for the wall. It is very important not to forget those details...I nearly did.

Gardening work with grass tufts and static grass.

Drybrushing the grass with bright olive green. See the two dead GI´s in the background. I had to remove them because the halftrack must have driven over them....those mistakes you can make in nearly every diorama that tells a story....

As last detail I added bullet shells all over the house and landscape by cutting brass wire.

I thought about a second vehicle. There was not much too choose from. I decided to use a Jagdpanzer IV from Westwind......no Zimmerit of course. So I created it by using a hobby milling machine. It is a bit crude but OK and better than no Zimmerit. All German tanks at this stage of the war had Zimmerit coating.

The ready built tank with Valiant-commander.

Painting was done the same way as with the halftrack.

After adding rifle slings from lead foil, some camo foliage and radio antenna for the tanks all forces are ready for action.

The diorama is finished. The tree is a ready made tree for model railway. I added some foliage and color.

Vorwärts!

Infantry moving forward, covered by the Jagdpanzer.

German officer on the roof leading mortar fire.

Schau mal Hans, jetzt hat das Zimmer zwei Fenster!

Moving out while getting covering fire from a sniper and a machinegun on the house´s loft.

Halftrack and Panzergrenadiers conquer the wall.

Counterattack with heavy losses.

Tank Hunters!

Mortar pit inside the house!
Best regards!
Thomas