
I posted this article in modelarmour forum, so I hope you'll find it interesting here too,
***************************************************************
Ever since I moved to 1:72 scale for modeling I was collecting all kinds of figures. I believe that adding a figure to a vehicle enhance its appearance adding life and a sense of scale to it. Being the technical type rather than the artistic, I had to find a method to paint these figures effectively and with simple techniques and after a couple of trials I settled on the method that is described in this article.
The method I'll show is nothing new, just a combination of known processes, that results in fair looking figures (at least to me), but can serve as a starting point for more advance painting systems.
The idea of painting these small figures is based on a simple principal. Paint a base color, shadow it and highlight it. Paint the details and line them. I use a mixture of enamels and acrylics, but it can be used with only one type of paint without too much problems. Also there is an illusion that painting 1:72 figures is harder because of their small size, but as you will see in this article it is much easier and quicker. They are painted over a couple of evenings, each time spending a bit of time on one of the steps to make painting many figures a fun process rather than a chore.
So here goes, and I will be very happy to answer any questions by email or the forum.
The only thing I'm sorry for is my poor photo taking skills and setup, but I promise it looks much better in real life, so don't let my poor pictures affect your opinion, and just take a shot and try it
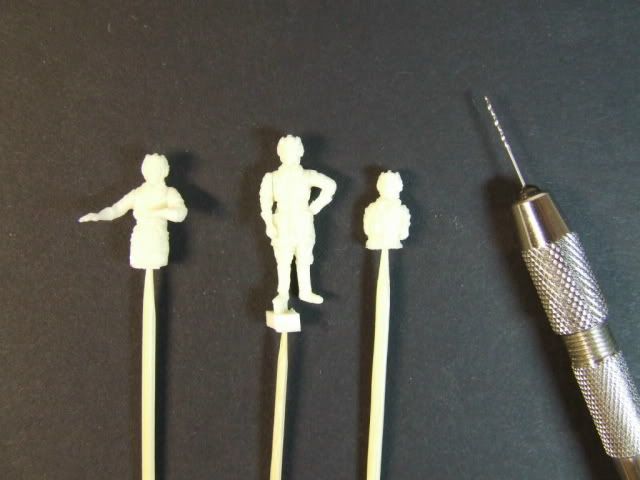
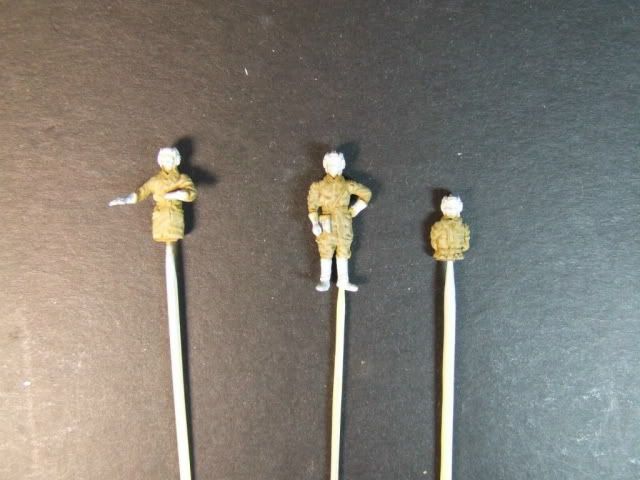
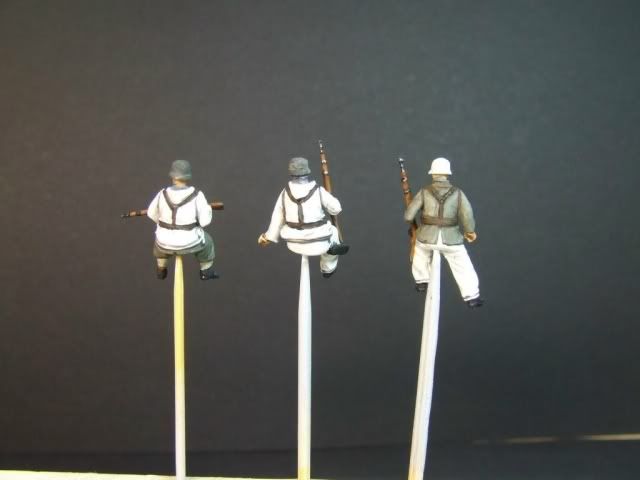
Step 1 – selecting the figures.
When I moved to 1:72 I knew virtually nothing about figure ranges for this scale, who is manufacturing them ETC. Starting to look for 1:72 and 20mm scale figures, I found a vast range of companies holding high quality figures.
I prefer to work with metal, resin and hard plastic (polystyrene) figures, and have yet to figure how to paint soft plastic (polythene). I can't go over all the list of great figures makers available, as I will definitely forget someone and it will be unfair, but you can find them easily via google, or you can check out my blogs and the ranges I'm using.
In this case I was thrilled to get a couple of sets from Vinnie in Modelarmour for writing this article.
I will try to show the method for the two sets, to demonstrate that it can be used for any period and uniforms.
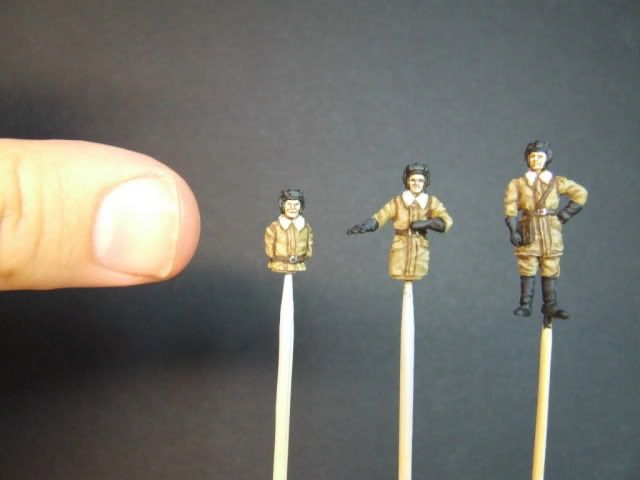
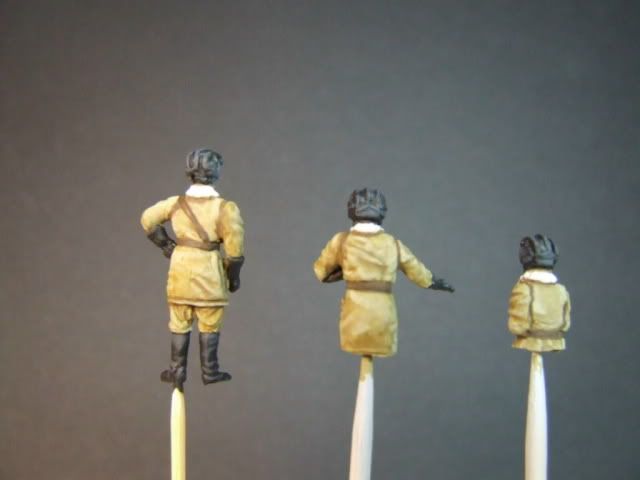
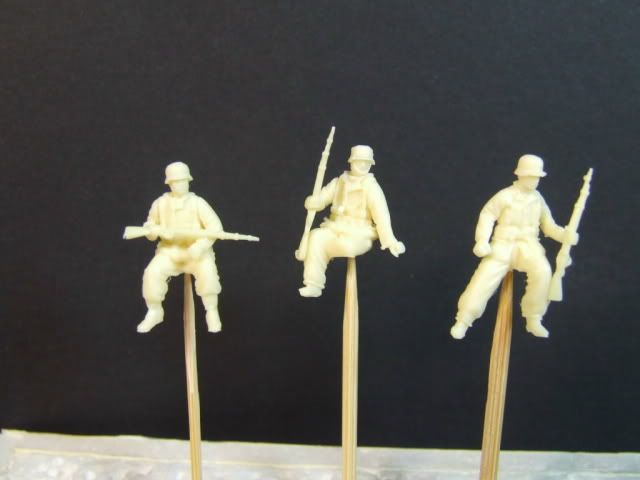
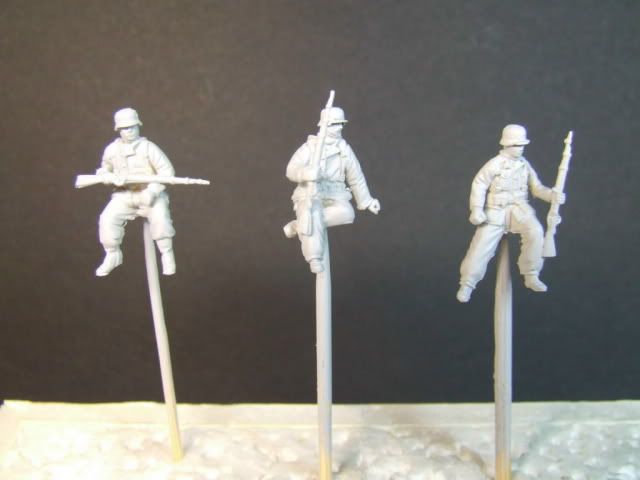
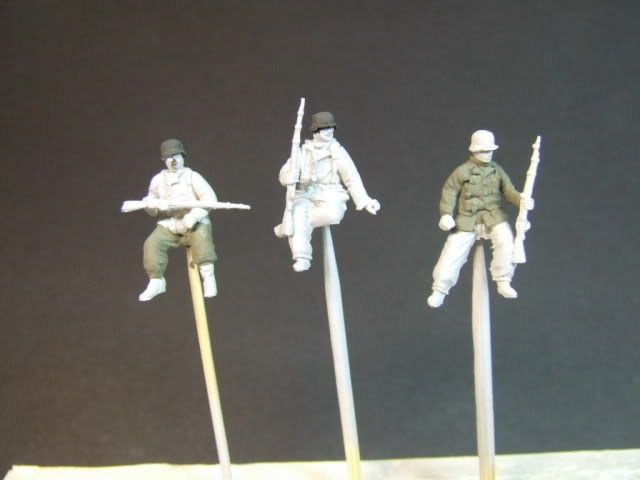
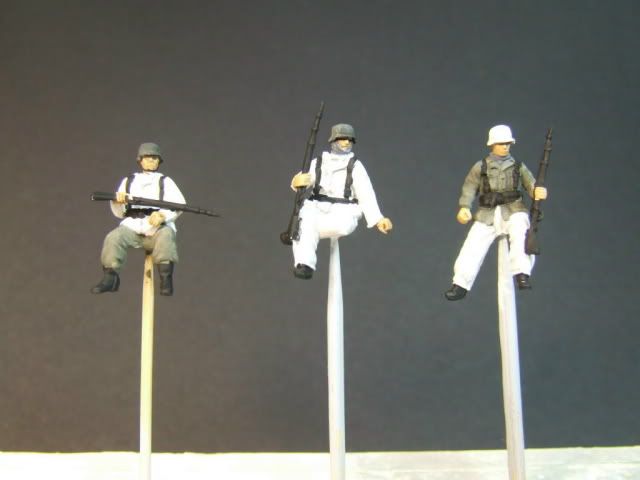
The first set is Russian WWII tankers from wee friends, modeled by T-Izumi and the second is for German winter tank riders from MIG. Both sets are resin, and are highly detailed and recommended.

Step 2 – construction
For somebody who is able to build a tank out of plastic and other materials, constructing the mini soldiers shouldn't hold any problem. In this step they are cleaned and prepared for painting. The one thing I find easy to do is drilling a hole in their foot with a pin vice, so I can place a tooth pick there for ease of painting. Also it will help when sticking them stronger to the base, using a pin.
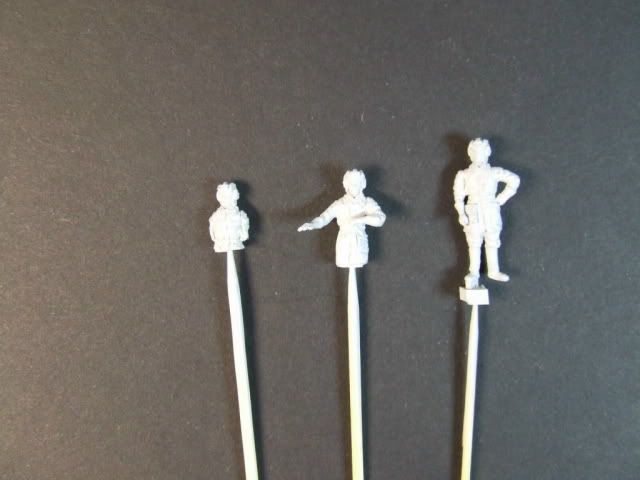
Step 3 – priming
Priming the figures will greatly ease the painting process, and for this I use car primer bought from a DIY store and used from a can. Spraying the figures in a couple of thin layers from a far will help in preventing the primer from over clogging and hide the details. The primer I use is light gray color which helps giving a lighter finish to the painted figure. It dries after a day or two.
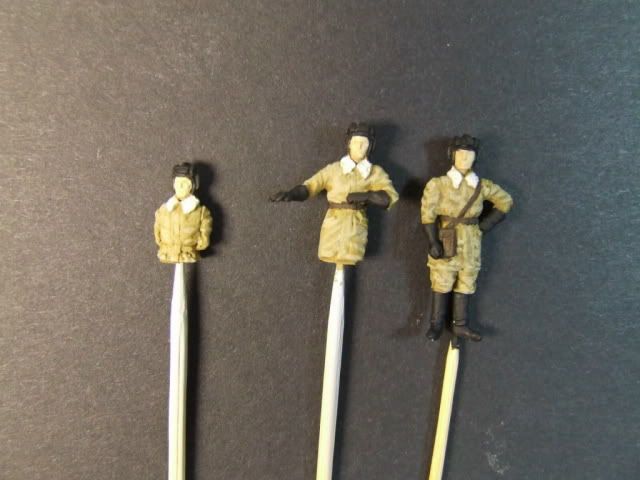
Step 4 – base paint
The figures are now ready to paint. For the Russian tankers I've started with painting the coats in Humbrol 84 stone color. This is painted on the uniforms and let dry overnight.
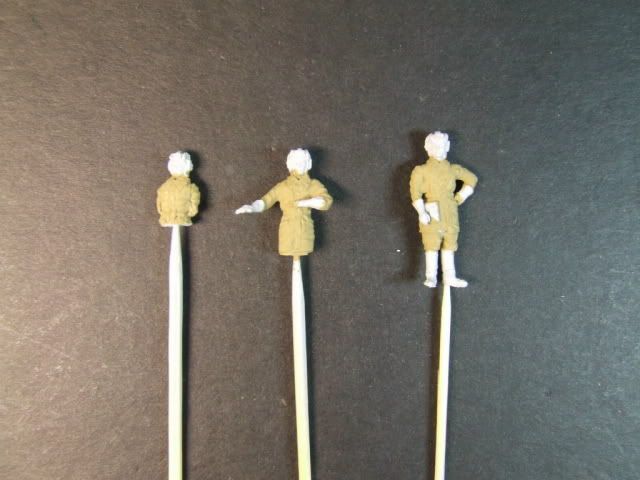
Step 5 – shadows
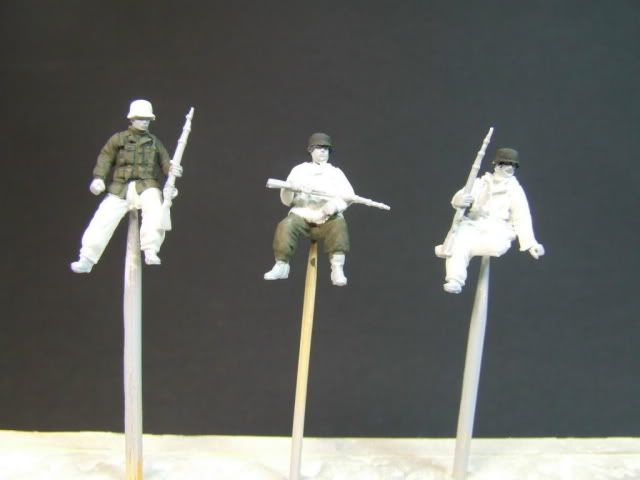
There are a couple of ways to do this. The more time consuming that will yield better results is to paint the shadows using a fine brush and a darker shade of the original color, like adding dark brown to the base color. But I wanted to try a faster method, and mixed a dark yellow brown color by mixing raw umber and yellow ochre oil colors with lots of mineral white spirits, and washing the uniforms with it. The wash is a highly diluted paint, that pool in the crevices and low points of the uniforms thus creating shadows that can't be seen otherwise. Instead of oils I sometimes use acrylics diluted with water for the same effect. This is left to dry overnight.
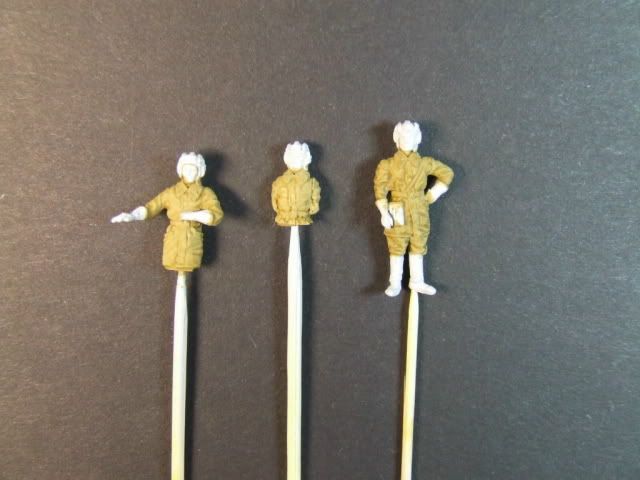
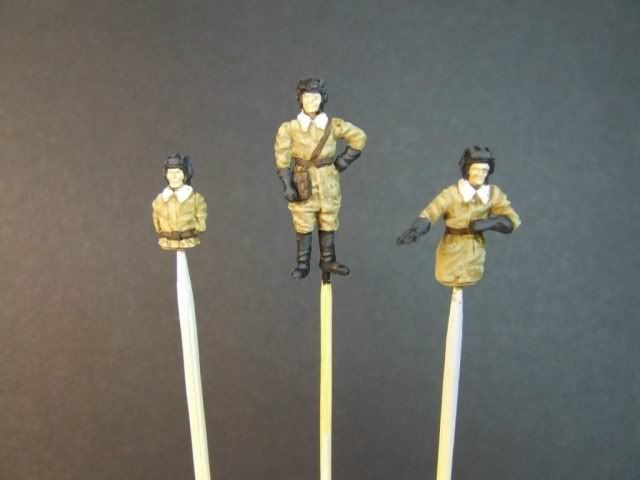
Step 6 – highlights
Now the figure is darker, and with some shadows. To highlight it I mixed a light version of the base color. For Humbrol 84 I added some white. Now with a fine brush I started to paint the higher folds and places of the uniforms, the places that will receive the most light and that create the shadows. Right after they are painted, I softened the highlights by using a second brush, moistened with some enamel thinner and gently brushing the edges of the highlights, thus melting the fresh paint and making it look less sharp. If necessary, a second highlight can be added with more light and only on the highest points, and also shadows can be added if they are painted over with the light color. This is left to dry overnight, as the enamels take time to cure.
Acrylics can be used to highlight, but they can't be softened due to fast drying time. So instead just use a couple of diluted layers of highlights instead (a two should be enough for this scale) and create the illusion of softening by a gradual lighter colors in the highlights.
At this point the figure should look lighter than before.
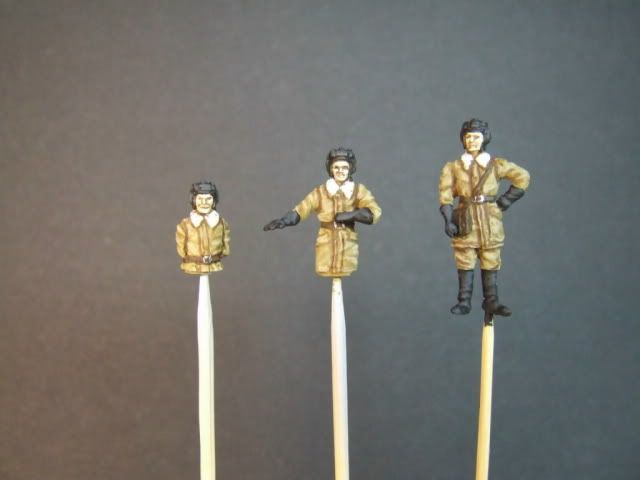
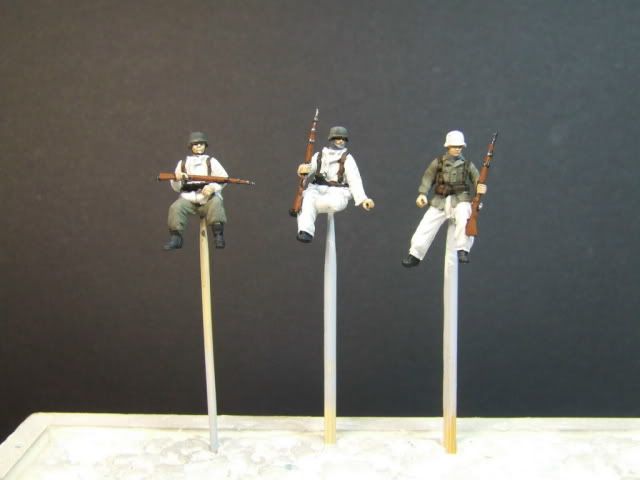
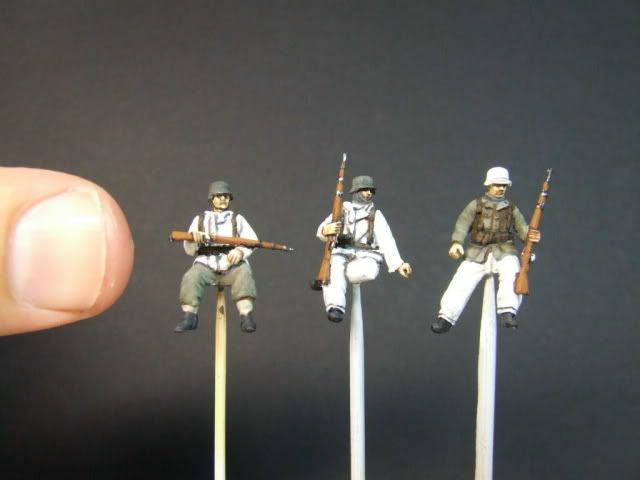
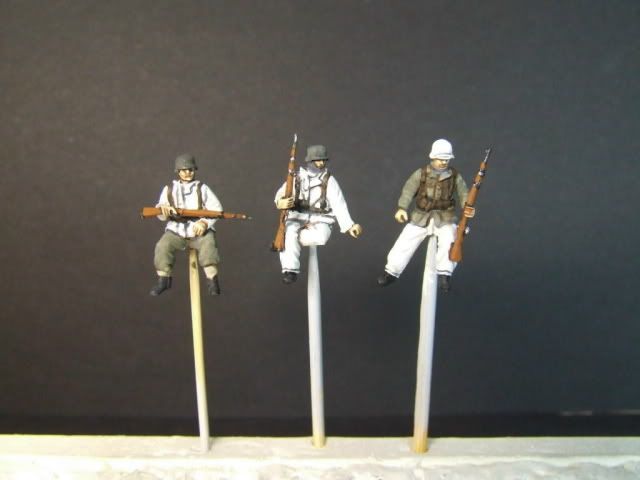
Step 7 – details
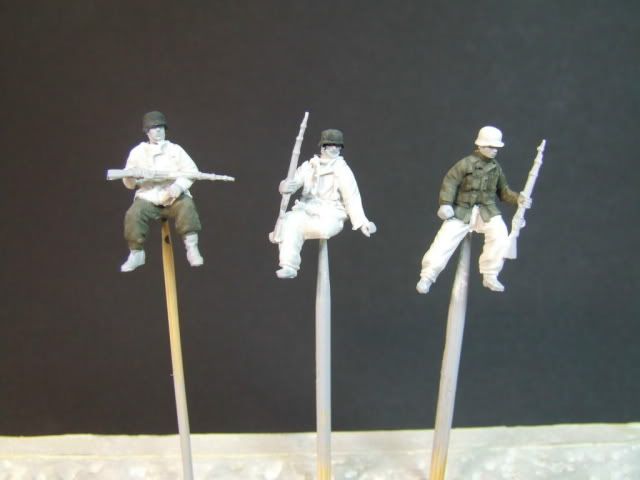
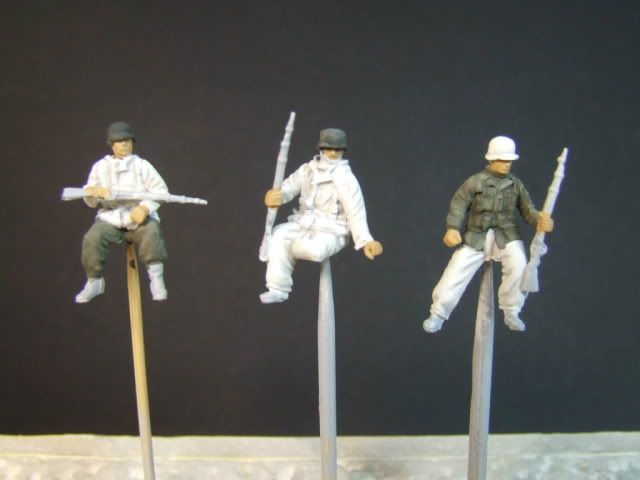
For the boots, gloves and leather helms I used Vallejo acrylic black paint, and for the belts and bag I mixed Vallejo black with Games Workshop bestial brown. The face was painted with a mixture of Vallejo sunny skin tone and a tiny bit of German light brown for their camo uniforms.
Next, the black is highlighted with dark gray mixed from black and sunny skin tone. I used acrylics so the highlight color was fairly diluted. The belts and bag were highlighted as well, with lighter shade of the dark brown mix (more brown added to the mix than before).
The flesh for the faces and hands was washed with Vallejo chocolate brown with high amount of water, and when dry highlighted with the base mixture with some white.
For the face I added a second layer of highlight to accentuate the details better, and also added more shadows using a highly diluted mix of chocolate brown and water, and very fine brush. The shadows were painted under the cheeks, below the neck, sides of the nose and in the eye cavities.
 Thanks for sharing this with us

 Moderator