

In the old days they made hollow cast metal figures usualy out of lead & alloy mix. The mould was cast up & then simply turned upside down once it was filled with hot metal,and so the metal ran out,leaving inside the mould a hollow casting! ( This made production very cheap.) Later it was released from the two part rubber mould ,and the figure was then fixed to it heavy metal base by a soldering iron. Then off to the paint shop next ,and then out to the Toy Shops.

So this poor chap after many years service to his country has lost his head.

You can clearly see how hollow he is by the thickness of the metal where the head came off.

Yip! As the Doctor said ,"That is for sure some Black Hole!" ______________ A Metaphor!

However all is not lost for this Tuff Old Scot, and a simple repair will make him well fit for Muster!

A match stick has been used for this purpose of repair since hollow cast figures were invented way back in the day.

The match stick has been pushed right up into the hollow head,and is the perfect size fit for the job,and has been measured so when pushed into the figure it will touch the bottom inside.

However we have a bonus now to add to this ancient art of repair, SUPER GLUE! It will be applied carefully to the where I have pointed it. This is a dry run, because I have no intention of being permanently stuck to my rather expensive camera. Don't laugh,if anyone could do it ,it would be me.

The neck too.

Then the end of the match stick.

Now when I did apply the Super Glue, the figure was standing headless on my worktable.
A Warning now never squeeze the Super Glue bottle. Just turn it to the angle required and let it flow out in its own good time. If it does not push a pin down the spout and remove and place it somewhere safe out of the way. Now when tipped at an angle it should flow freely.

The Highlander is not only repaired ,but he is stronger now than his comrades in arms. After repainting the repair will be unseen.

(All the painting will be restored on the Highlanders by Little Old Me later. )
Restored to active duty. Now compaired to repairing Fred, this was a Piece of Cake! Means Very Easy Indeed. Sad the poor guy got broke,but looking on the bright side it did give me the perfect opportunity to show ,how to repair hollow cast figures of the Headless Variety BB

")


 Moderator
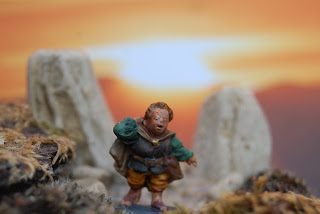

")