Tutorials

How to build a 1/72 scale warship

Posted by Gowan on 30 Nov 2012, 06:12

Now I am going to do this post in several parts this the first part will be for just building the hull structure. now I have a better one right here on my blog and its better that you go there if you do not have plans already.

YOU WILL NEED

some french curves (well more useful than necessary)
a pencil
Foam board, polystyrene or other foam material
Craft knife
some thick card, foam-core or some hardboard or a material thinner than the foam
A ruler
cutting board
PVA glue
patience and lots of it :-(

Step 1: getting the rectangle
it is important that you get the overall length of the ship and the width so that you can make a rectangle. Draw this rectangle onto your foam and then score the foam before cutting.
Do this process twice.
Now that you have your rectangles you need to cut them out. do this carefully as you will need to do more measurements later on. I recommend that you only cut one out for now.
Image

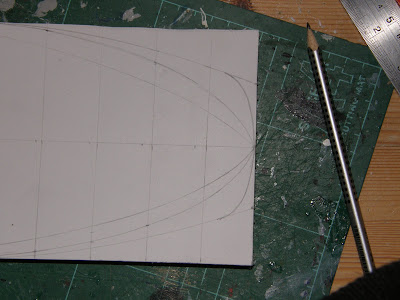
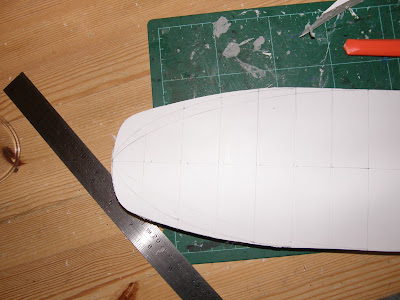
Step 2: Getting the curves
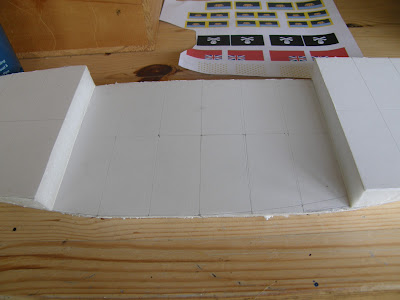
Now ships are not giant rectangles so we need to put in the curves for the bow and stern to do this make a grid pattern on the face of the foam. I put "vertical" lines every 3 cm.
Now you must look back at the plans to see what the curve on the actual ship is like. Now go to your foam sketch an proximate curve onto it. in the image across I have drawn the sterns lines and also some lines to represent what the underside will look like.remember do to make these smaller than the plans so bow is thinner and sharper and stern is less rounded.
Image
Now do some cutting this must be done slowly and precisely to minimise the risk of ending up with an odd looking ship later on.
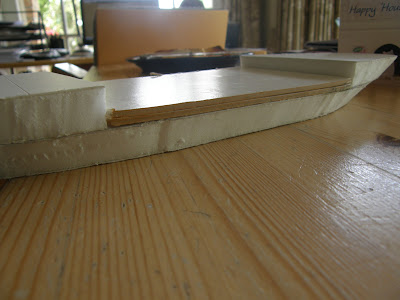
Now do the same on the underside. for this go about 1 cm in from the edge at the side and around 2-3 on the bow and stern... referring to the plans help determine the angles.
now comes the blade destroying part. cut diagonally through the foam from the bottom to the top creating the angles. it helps to cut the lines on the bottom first to reduce the risk of snapping your craft knifes blade!
Image

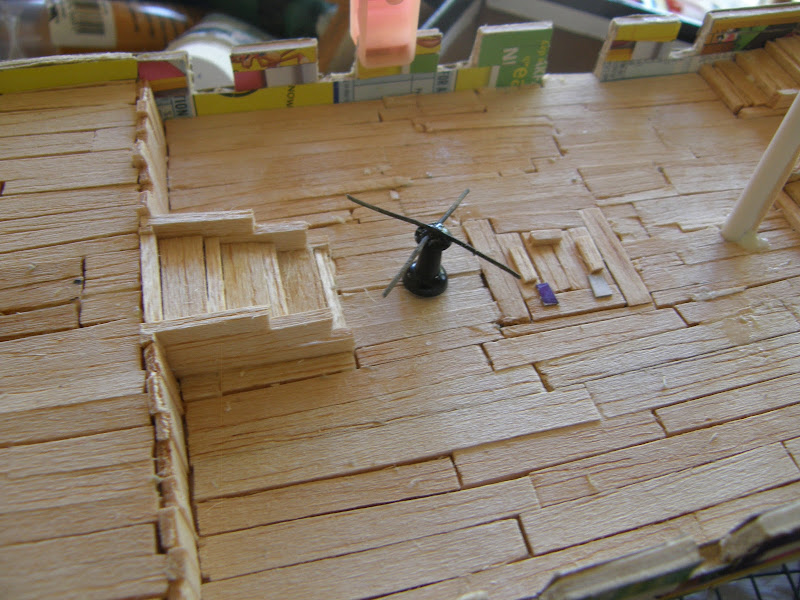
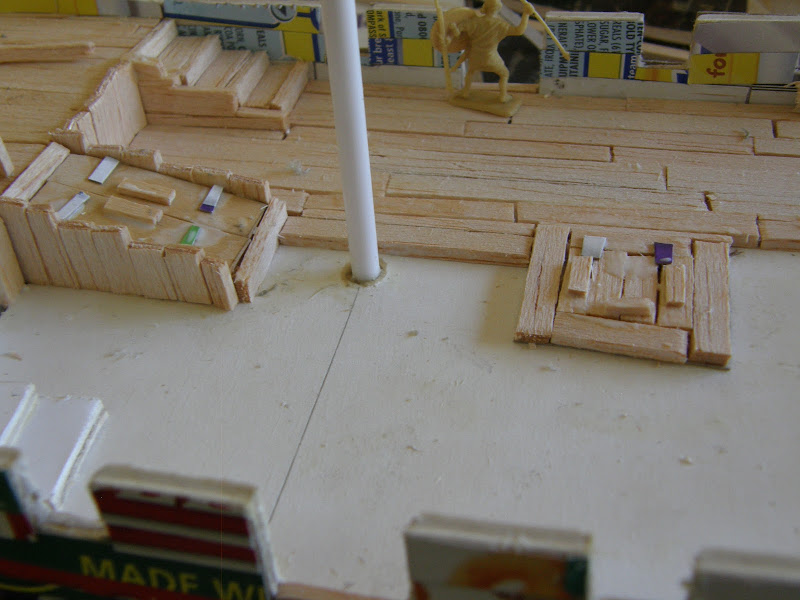
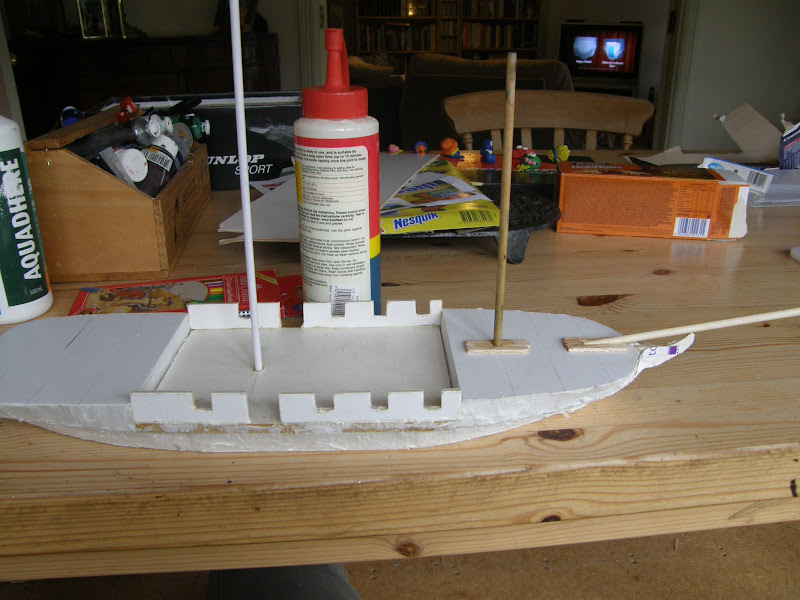
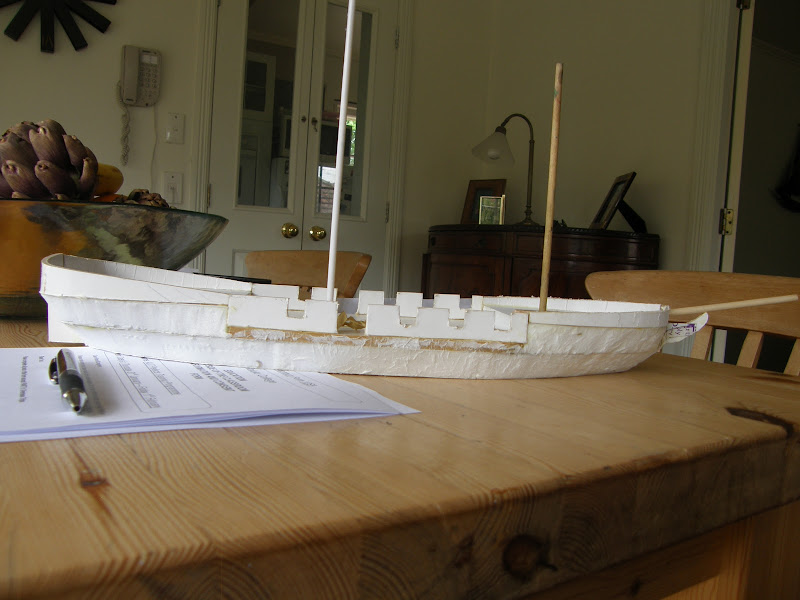
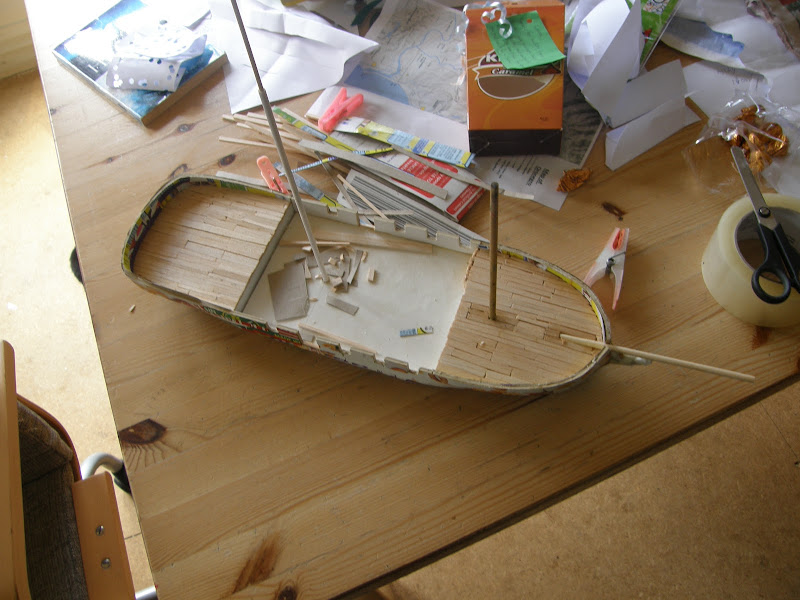
Step 3: the layers - poop deck and forecastle
Now that you've done the base of the sloop you need to do the top. re-do steps one and 2 but this time follow the plans more exactly so that the curves on the ship are more like those on the plans.
make sure that the bottom of this layer matches up with the top of the previous one so that they fit together. or else you will be in trouble.
Now cut out the centre of the second foam layer so that you have the ends. These are the forecastle and poop deck. glue these in place. unlike me I recommend that if you have a clamp to use it.
Image

Step 4: the gun deck/ centre of the ship
get your other material, I use some really thick card. its really strong which might be useful later but even some foam core or hardboard will do.
measure up the gap between the forecastle and poop deck. Once again cut out a rectangle to fit in the gap. if there are some curves that need to be taken into account simply trim the rectangle to fit without overhanging the edges.
Then glue down the card, foam or whatever you are using if like me this layer is not thick enough add another until the gap between the layers seems more like that of the plans... so in this case not to big.
Image

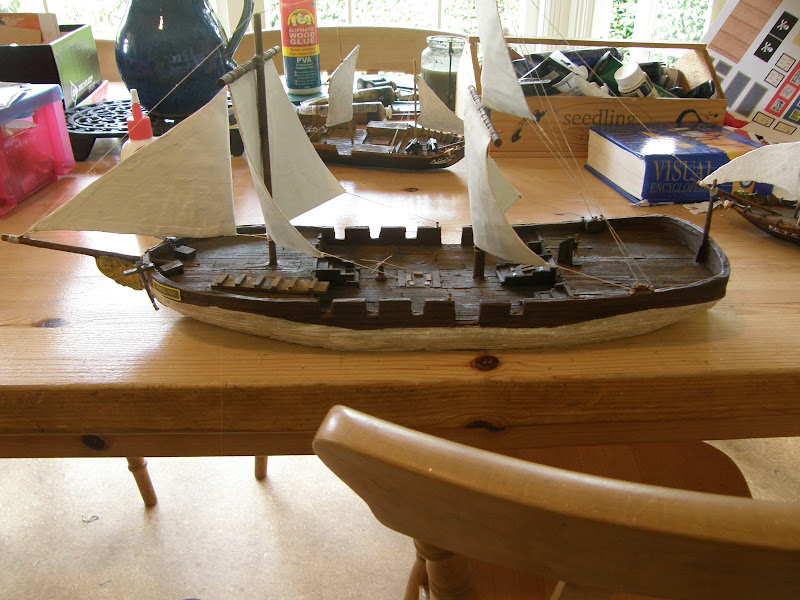
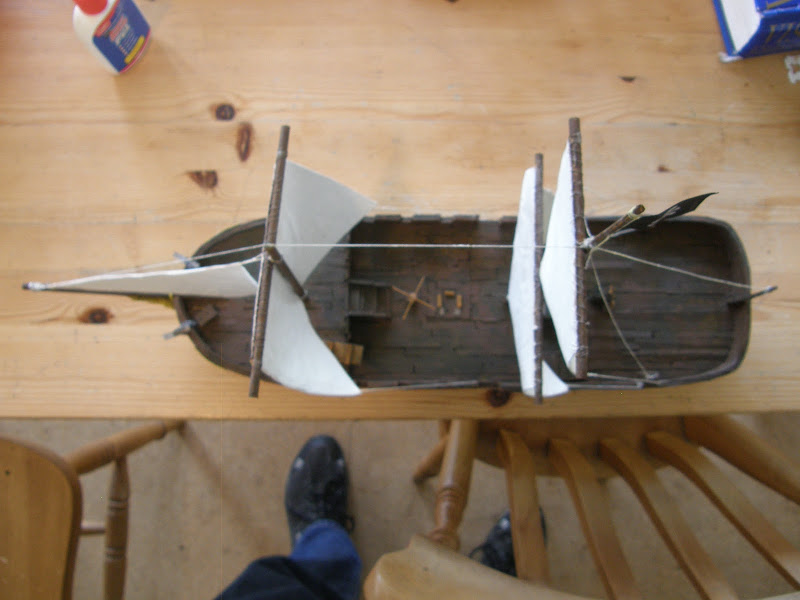
There you go... part 2 will come in another post so don't make to many comments until then... I think it will be between 3-5 posts in total so yes it is a big ship
User avatar
Gowan  
 
Posts: 1204
Member since:
13 Dec 2011, 04:33


Posted by Susofrick on 30 Nov 2012, 09:12

Good! But french curves??? :oops: :oops: :oops: :-D
User avatar
Susofrick  Sweden
Supporting Member (Gold) Supporting Member (Gold)
 
Posts: 7678
Member since:
19 Feb 2008, 12:10

Posted by Gowan on 30 Nov 2012, 10:47

useful but not really needed unless like me you're useless at drawing curves :oops:
User avatar
Gowan  
 
Posts: 1204
Member since:
13 Dec 2011, 04:33

Posted by Susofrick on 30 Nov 2012, 15:02

In Swedish it can mean a good looking french woman. :-D
User avatar
Susofrick  Sweden
Supporting Member (Gold) Supporting Member (Gold)
 
Posts: 7678
Member since:
19 Feb 2008, 12:10

Posted by Gowan on 30 Nov 2012, 19:31

oh... perhaps they are needed in the process then :lol:
User avatar
Gowan  
 
Posts: 1204
Member since:
13 Dec 2011, 04:33

Posted by KenzoSato on 30 Nov 2012, 22:29

:thumbup:
KenzoSato  Italy
 
Posts: 3921
Member since:
06 Jun 2009, 07:45

Help keep the forum online!
or become a supporting member

Posted by Gowan on 07 Dec 2012, 02:26

Yep here is part2 this will take you a few days unless you can hire a few slaves to help you... I tried but my sister walked off after cutting a few strips of cardboard :lol:

here is the link to my blog this has more explanation but is a bit long winded

you will need
carboard
the thick card stuff
wooden dowel
an old wooden paintbrush
a long length of dowel
balsa
paper towel/ toilet paper (unused is best but up to you)

first add the prow and rudder these are made from the thick card stuff.
second find the locations for the masts, and the jib boom. make sure the jib boom (the shorter dowel) can rest on the prow, the foremast behind it is made from the old paintbrush and the main mast can be made from either dowel or as in this case a long hollow plastic rod filled with balsa and a cocktain stick stabbed into the top... for the masts make/ drill holes in the decks in the places that best fit your plans, place these in with a bit of glue and you should end up with something like this..
Image

now to make the sides, these are also made from thick card, which are bent into shape and then cut at an angle so that the sides on the bow and stern curve down to match up with the sides in the middle which are flat... for the middle cut a strip 2 cm high add some gun ports and cut a place out for the gate to go later... glue all the sides and you will end up like this...
Image

now for the sides this may take between 2 days and a year... depending on the side of the ship and your speed. if you do not want to use that much time just cover the hull in sheets of cardboard instead of planks.
the planks are made from cereal boxes but up into strips, my sister helpped sort of. you can also invest in a slave or 2 to do this to speed up the process. cut the strips into smaller planks longer ones for the flatter mid-ship area and longer ones for the ends. start glueing the strips from the bottom up overlapping them so that in the end you have this...
Image

Now onto the decks, we'll only do the forecastle and the poop deck for now because of the haches in the main deck ;-) simply cut strips of balsa and then also cut them into planks make sure that those at the planks are trimmed so that those touching the sides along the stern and bow are almost flush or at least the gap is not huge... glue down and you will get this...
Image

ignore the cardboard strips on the inside for the moment that will all be explained in part 3 ;-)
User avatar
Gowan  
 
Posts: 1204
Member since:
13 Dec 2011, 04:33

Posted by mickey mouse on 07 Dec 2012, 07:36

looking good sofar, gowan
User avatar
mickey mouse  Netherlands
Supporting Member (Gold) Supporting Member (Gold)
 
Posts: 1433
Member since:
24 May 2012, 19:42

Posted by Susofrick on 07 Dec 2012, 09:04

Agree! :thumbup:
User avatar
Susofrick  Sweden
Supporting Member (Gold) Supporting Member (Gold)
 
Posts: 7678
Member since:
19 Feb 2008, 12:10

Posted by Gowan on 08 Dec 2012, 22:20

thanks :thumbup:
User avatar
Gowan  
 
Posts: 1204
Member since:
13 Dec 2011, 04:33

Posted by Peter on 13 Dec 2012, 12:22

Nice tutorial so far Gowan! :thumbup:
User avatar
Peter  Belgium

Moderator Moderator
 
Posts: 22509
Member since:
25 Mar 2008, 18:51

Posted by Gowan on 17 Dec 2012, 04:44

well here it is the final post, GO TO MY BLOG FOR A BETTER TUTORIAL for final part this you will need

string
thread
normal paper
nylon fabric or suitable material
wooden dowel
thin card
cereal box card
thick wire mesh
balsa
small nails or the tops of them
HO scale rail pins... for track (Hornby is what I used)
thick card, same material as before
thin wire mesh
tin foil
super glue
PVA/ wood glue
paint
necessary painting materials
craft knife
wire cutters
pliers, different types might help
any program that allows you to print pictures and words (Microsoft word)

Now lets start by competing the sides and deck, complete the sides by adding strips of cereal box card sides by side not overlapping alaroung the inside edges of the walls. do the same for the rudder. now add little details on the mid-ship and the other decks, made from balsa, thick card and cereal box card is the entrance to the captains quarters , whick goes on the rear of the main deck, Now is the main hatch in the centre on the mid-ship made from cereal card and balsa, and then the capstan made from an old board pin and some wire put on the main deck infront of the hatch, the ships wheel made from wire and balsa put on the front of the poop deck and 3 stairs made from stacked card and balsa 2 put on either side of the ship at the stern end and one in the middle from the mid-ship up to the bow.
Image
front stairs, capstan and main hatch.

Image
main hatch and the entrance to the captains quarters, rears stairs in background.

now complete the decks, first cover up the rise between decks with strips of balsa and then lay down balsa strips all over the deck to cover up the foam base. then cover the top of the sides with paper to hide the thick card, this is a good way to protect the planking as it could get rubbed in gaming

Now onto the sails and rigging. sails are made from 2 layers of paper with some nylon fabric sandwhiched between them, make 3 square ones and 1 triangular one, through this depends on what ship you build. attatch the square sails to wooden dowels, cut a grove in the dowels so that they fit around the masts. glue in place, now get thread. pull one thread from a pole on the stern which you should attach now. all the way to the job boom sticking out the front. wrapping it around the main mast and through a groove cut into the top of the fore mast. make sure its tight as it helps to keep the masts steady. now make a couple of blocks from the heads of some small nails put into a lblock of balsa, they are glued to the poop deck and have string wrapped around them and then tied to the main mast. this is to keep the main mast steady for the rest of construction.

Image
attachimng the sails to the masts

Image
with the basic rigging in place

now get a needle and thread, push the needle through the 2 bottom corners of the square sails, tie the string onto the sail and then pull out a long tail, wrap this around a track nail pushed into the sides behind the sails. glue in place... this will slaken and pull any slack aroung the nail this also pulls the edges of the sail back making it look like there is wind pushing it. for the front triangular sail first join the jib boom to where the sail on the foremast is located with string, then from there connect another string to below the sail on the mast and from there back to the job boom with another length of string. inside this fit the sail and use folded paper to connect the edges of the sail to the srting.

Image
triangular sail in place

Image
rigging for the main masts and its sails

also for decoration and added strenght get a needle and thread and use it to tie the mast to the sails by putting 2 holes in the sail just below the yard (cross beam) and then pulling the string through that and aroung where the yard meets the mast. be careful not to pull the sail off the mast while doing this, keep going until the wrapping and occasional knotting holds tha sails securely. then take a needle and thread and push it through the sail then pull it aroung the yard puck it through the sail again to make a sort of coil along the yard and sail, going aroung the mast when the coil reaches it. the coil does not have to be perfect and leave a gap roughly 5mm wide between the points where the thread enteres the sail.

now make the final details an anchor and adecoration for the prow. most prows have a figure head which is easy to do... get a fig, I instead coiled some string from the super market, the anchors are made from some jewelry chain, cocktail sticks and some thick wire mesh. glue the anchors to the bow of the ship with the chain draped inside and the ends covered in balsa to hide the ends. this represents where the anchor chain theoretically goes bellow decks.

Image
Prow with decoration

Image
anchors

NOW PAINT, paint the way you find best and add details like flags or name boards you can use a normal printer to get these and you should end up with something like this .... when you are done
Image
Image
Image

I hope the tutorial was useful and now its complete. refer to my blog for better explanation for the processes invold in making the ship
User avatar
Gowan  
 
Posts: 1204
Member since:
13 Dec 2011, 04:33

Posted by mickey mouse on 17 Dec 2012, 07:29

looking awsome gowan! :thumbup: ;-) :notworthy: :notworthy: :notworthy:
User avatar
mickey mouse  Netherlands
Supporting Member (Gold) Supporting Member (Gold)
 
Posts: 1433
Member since:
24 May 2012, 19:42

Posted by Duke atreides on 17 Dec 2012, 14:30

Love it!! :love:
Duke atreides  Portugal
 
Posts: 624
Member since:
04 Dec 2011, 00:24


Return to Tutorials