
Work in Progress
Airfix 1/76 88mm Flak en Sd.Kfz.7 tractor
100 posts
• Page 3 of 5 • 1, 2, 3, 4, 5
An impressive work, but why did you choosen to transform the simple Airfix set? Also in regard of the well detailed Revell 8,8 flak?
-
Santi Pérez likes this post. •
- Reply
-
sansovino

- Posts: 794
- Member since:
27 Mar 2014, 21:42
sansovino wrote:An impressive work, but why did you choosen to transform the simple Airfix set? Also in regard of the well detailed Revell 8,8 flak?
Reminiscence, Childhood memories and challange, I would guess...
-
Santi Pérez likes this post. •
- Reply
-

MABO
") Supporting Member (Gold)
Supporting Member (Gold) - Posts: 9146
- Member since:
12 May 2008, 18:01
Impressive work, we have our self a real mechanic here. Now all that is lacking is that the vehicle gets a real engine so that it can drive it self.  Those Airfix injection marks are a real pain in the butt to deal with.
- Hobbyinovator
- Posts: 235
- Member since:
28 Dec 2009, 23:19


 Moderator
Thank you very much, guys!
Good question!
The answer is partly given by the other writers already:
1. Nostalgia
2. Modelling challenge
3. More fun for the buck
sansovino wrote:... why did you choosen to transform the simple Airfix set? Also in regard of the well detailed Revell 8,8 flak?
Good question!
The answer is partly given by the other writers already:
1. Nostalgia
2. Modelling challenge
3. More fun for the buck
-

huib
- Posts: 962
- Member since:
12 Dec 2015, 15:57
Bodywork(2)
The next stage of work on the body.

First the luggage rack on the back. The Airfix rack is the starting point. I fill it with homemade jerrycans.

Then the rack is finished on the frontside. Quite a fiddly job!
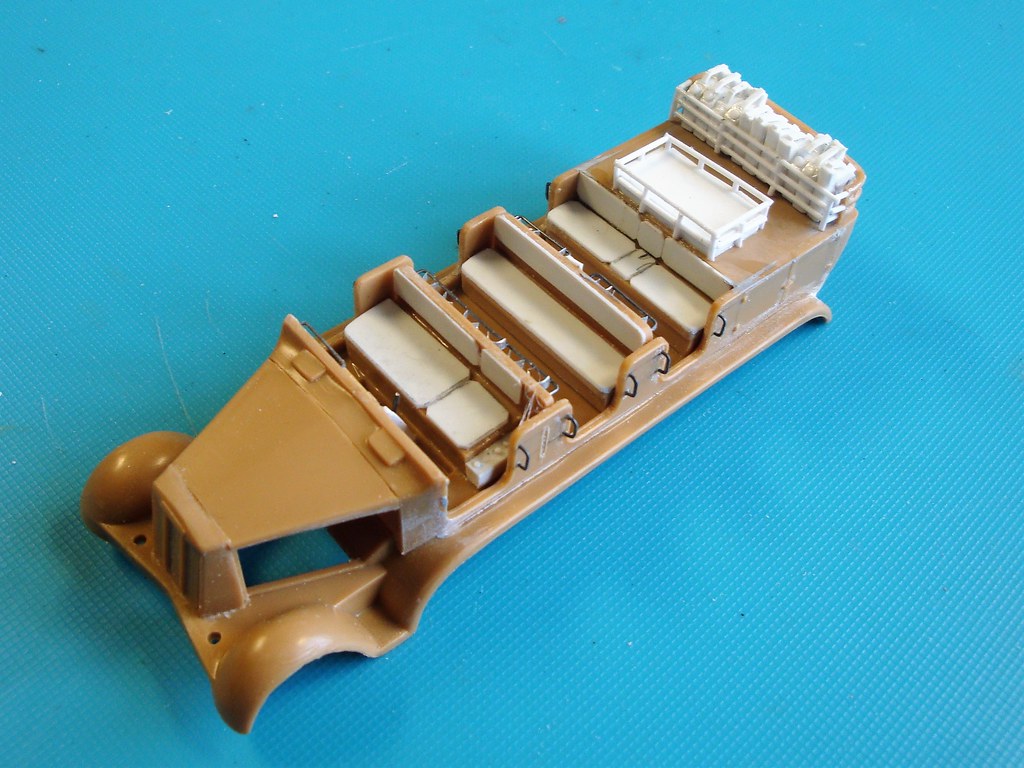
The jerrycanrack fixed with glue, and a second rack built in front of it. For sturdyness it's based on a 2 mm piece of plastic card, which will be hidden from view in the end.

Iron wire, paper tissue and white glue is used to make the foldable hood and windscreen cover.
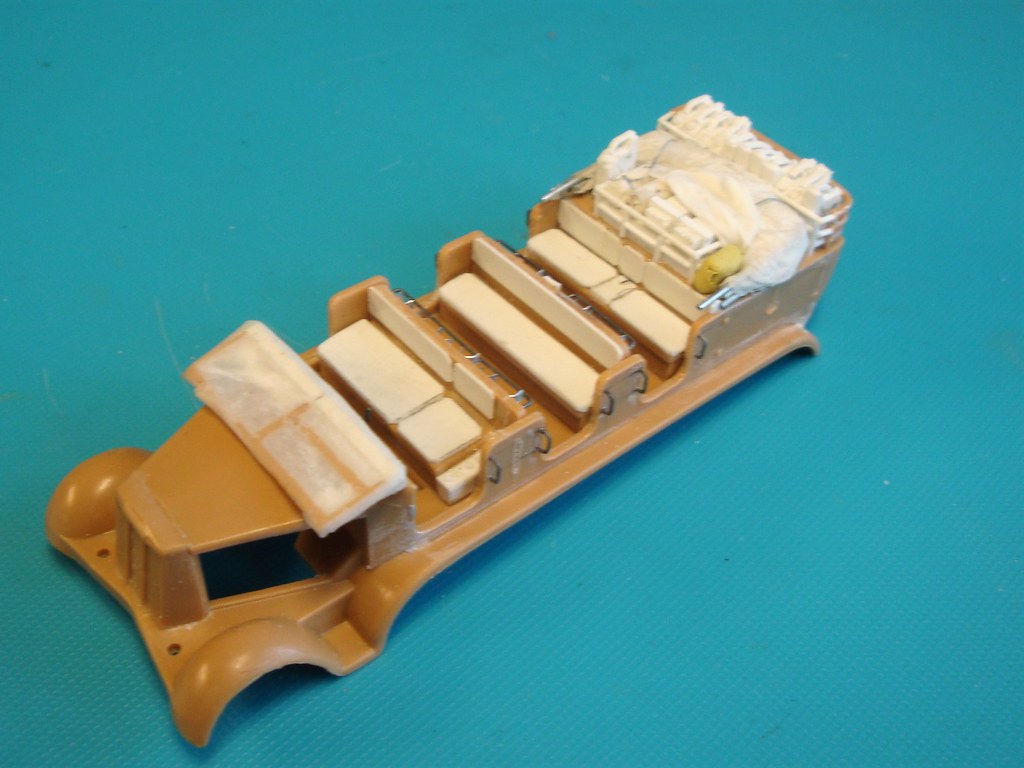
Hood and windscreen fixed. The second luggage rack is stuffed with crates, tarpaulins a jerrycan and a backpack.

Another point of view.

More detail added on the front end: driving lights, towing hook, radiator cap, mirror and some other things.
Almost ready for paint, I think.
The next stage of work on the body.
First the luggage rack on the back. The Airfix rack is the starting point. I fill it with homemade jerrycans.
Then the rack is finished on the frontside. Quite a fiddly job!
The jerrycanrack fixed with glue, and a second rack built in front of it. For sturdyness it's based on a 2 mm piece of plastic card, which will be hidden from view in the end.
Iron wire, paper tissue and white glue is used to make the foldable hood and windscreen cover.
Hood and windscreen fixed. The second luggage rack is stuffed with crates, tarpaulins a jerrycan and a backpack.
Another point of view.
More detail added on the front end: driving lights, towing hook, radiator cap, mirror and some other things.
Almost ready for paint, I think.
-
huib
- Posts: 962
- Member since:
12 Dec 2015, 15:57
Help keep the forum online!
or become a supporting member
Peter wrote:Nice, but as an old airforceman, I was wondering where the minibar is located on the truck?
Looking forward to your next step!
Don't drink and drive, Peter!
-
MABO
- Supporting Member (Gold)
- Posts: 9146
- Member since:
12 May 2008, 18:01
-
MABO
- Supporting Member (Gold)
- Posts: 9146
- Member since:
12 May 2008, 18:01
This topic must be the world record for useful scratch made parts to a commercial kit.
With each page of that build it gets harder to find the sandbrown kit parts between all that white stuff.
MM was singing: Diamonds are a girsl`s first best friend.
Huib is thinking : Evergreen are a modeller`s first best friend !
(No difference, both shines bright )
)
Africa ?
Huib ! We need that effective can opener at the eastern front. To stop that build hordes of T34. URGENT !!!
Do you remember?


With each page of that build it gets harder to find the sandbrown kit parts between all that white stuff.
MM was singing: Diamonds are a girsl`s first best friend.
Huib is thinking : Evergreen are a modeller`s first best friend !
(No difference, both shines bright
Africa ?
Huib ! We need that effective can opener at the eastern front. To stop that build hordes of T34. URGENT !!!
Do you remember?
-

Wiking
- Posts: 2825
- Member since:
14 Sep 2015, 10:03
Thank you very much guys!
Minibar? I think you should be more ambitious.....
What do you think is behind these doors?

A full assortment of German draft beers!
Hm, I am a bit in doubt, as I also made this:

What's more urgent?
Peter wrote: as an old airforceman, I was wondering where the minibar is located on the truck?
Minibar?
I think you should be more ambitious.....What do you think is behind these doors?
A full assortment of German draft beers!
Wiking wrote:Africa ?
Hm, I am a bit in doubt, as I also made this:
What's more urgent?
-
huib
- Posts: 962
- Member since:
12 Dec 2015, 15:57
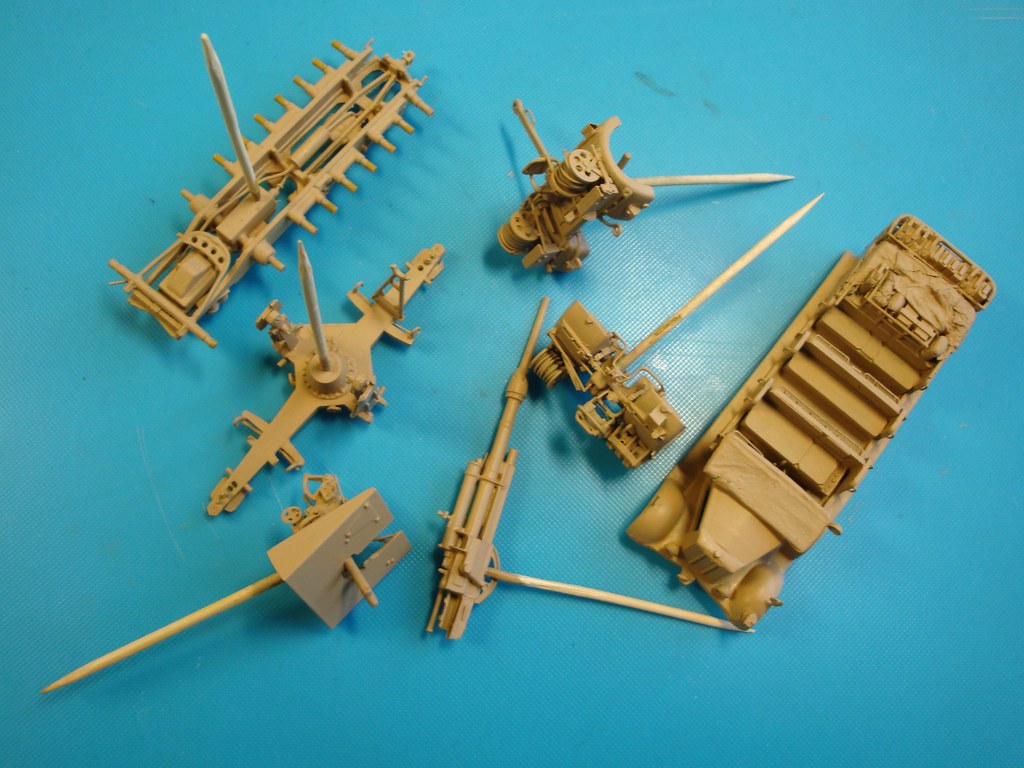
Paintjob
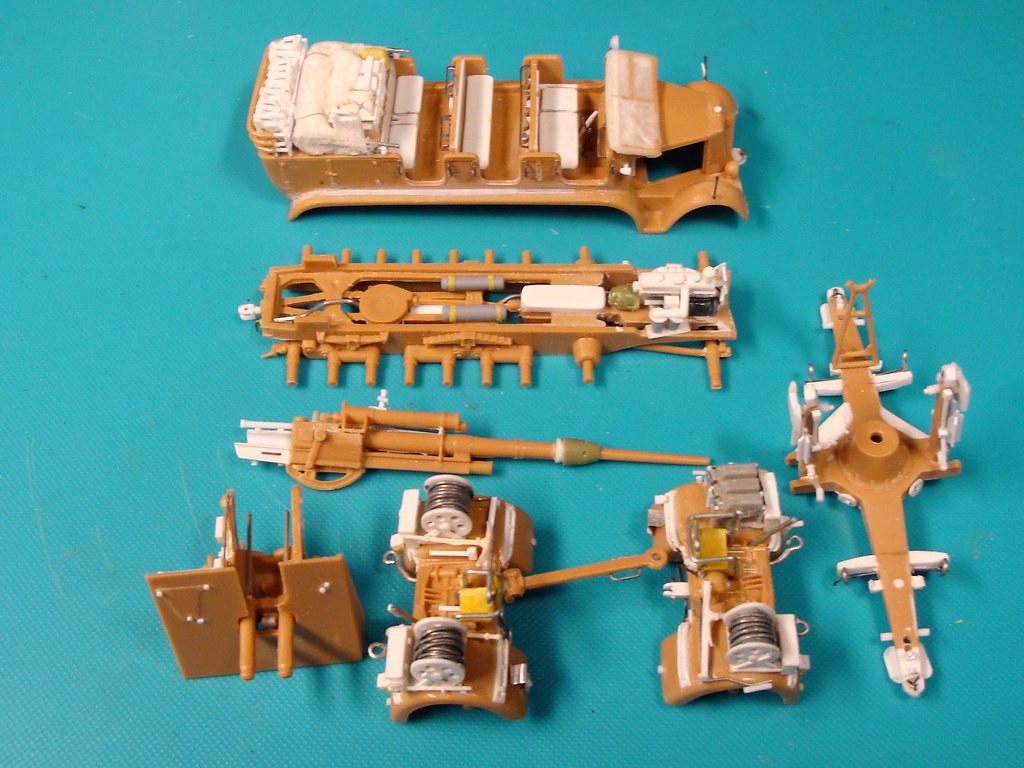
All different subassemblies waiting for paint.

As a primer I used Vallejo German Dark Yellow primer.

A testsheet for the right colours and scheme.
Everything painted in Sandbraun (RAL 8020), the basic German desert colour from 1942 on.

A camouflage pattern on the truck and gunshield in Sand Grey (RAL7027).

Details painted.

I thought the front of the tractor a bit empty, so in the painting process I added a few tarps and tents made from paper tissue
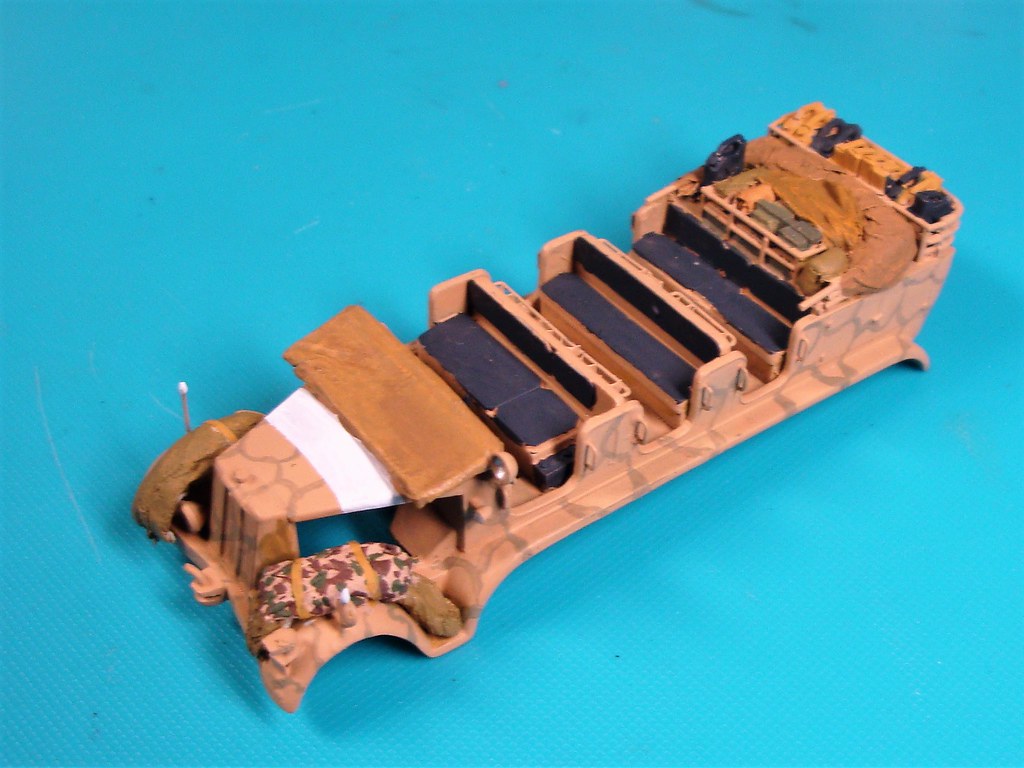
Everything painted including the white air recognition band on the bonnet.
Now on with weathering.
All different subassemblies waiting for paint.
As a primer I used Vallejo German Dark Yellow primer.
A testsheet for the right colours and scheme.
Everything painted in Sandbraun (RAL 8020), the basic German desert colour from 1942 on.
A camouflage pattern on the truck and gunshield in Sand Grey (RAL7027).
Details painted.
I thought the front of the tractor a bit empty, so in the painting process I added a few tarps and tents made from paper tissue
Everything painted including the white air recognition band on the bonnet.
Now on with weathering.
-
huib
- Posts: 962
- Member since:
12 Dec 2015, 15:57
Weathering
Well, now let's make everything dirty, worn and dusty!

After two layers of gloss cote, with a few decals inbetween, I applied a filter of sandcoloured oilpaint. This fades the colours and gives a dirty dusty look.

After a new gloss coat, a dark brown pointwash from oilpaint was added to increase optical depth.

Weathering was finished for this moment with a drybrush in a very light sand color, almost white.

The limbers.

The tractor.

And the gun.
In the final phase there will be some chipping. But for now first some work on the wheels and tracks.
Well, now let's make everything dirty, worn and dusty!
After two layers of gloss cote, with a few decals inbetween, I applied a filter of sandcoloured oilpaint. This fades the colours and gives a dirty dusty look.
After a new gloss coat, a dark brown pointwash from oilpaint was added to increase optical depth.
Weathering was finished for this moment with a drybrush in a very light sand color, almost white.
The limbers.
The tractor.
And the gun.
In the final phase there will be some chipping. But for now first some work on the wheels and tracks.
-
huib
- Posts: 962
- Member since:
12 Dec 2015, 15:57
Help keep the forum online!
or become a supporting member


Thanks, Egbert and Peter!
Wheels and tracks
On with the rolling part.

All wheels cleaned, assembled when necessary, and prepared for paint.

Painted.

Weathered.

The so-called Schachtelllaufwerk (interleaving roadwheels) constructed. The neat fit of the wheels asked for some extra attention and a bit of filing. The tracks were first primed with dark grey and then drybrushed using a very light sand colour.

The tracks constructed. They are held in position by 0,7mm iron wire.
The front wheels are also attached steering in a bit.

And a track rod on the underside.

The wheels of the bogies attached, with those of the front bogie steering in too.

And in the end, the hub covers were placed, painted and weathered. They are too large in fact, but OK, I'll leave it like that.
Now we're approaching the end of the build, only some final detail and a crew to go for.
Wheels and tracks
On with the rolling part.
All wheels cleaned, assembled when necessary, and prepared for paint.
Painted.
Weathered.
The so-called Schachtelllaufwerk (interleaving roadwheels) constructed. The neat fit of the wheels asked for some extra attention and a bit of filing. The tracks were first primed with dark grey and then drybrushed using a very light sand colour.
The tracks constructed. They are held in position by 0,7mm iron wire.
The front wheels are also attached steering in a bit.
And a track rod on the underside.
The wheels of the bogies attached, with those of the front bogie steering in too.
And in the end, the hub covers were placed, painted and weathered. They are too large in fact, but OK, I'll leave it like that.
Now we're approaching the end of the build, only some final detail and a crew to go for.
-
huib
- Posts: 962
- Member since:
12 Dec 2015, 15:57
100 posts
• Page 3 of 5 • 1, 2, 3, 4, 5