Work in Progress

Huibs T34 tank project

Posted by huib on 11 May 2021, 10:59

Thank you Peter and Mabo!

Weathering
Painting, weathering and adding parts is all a bit mixed up in my present approach, due to the procedure for the whitewash I choose.

Image
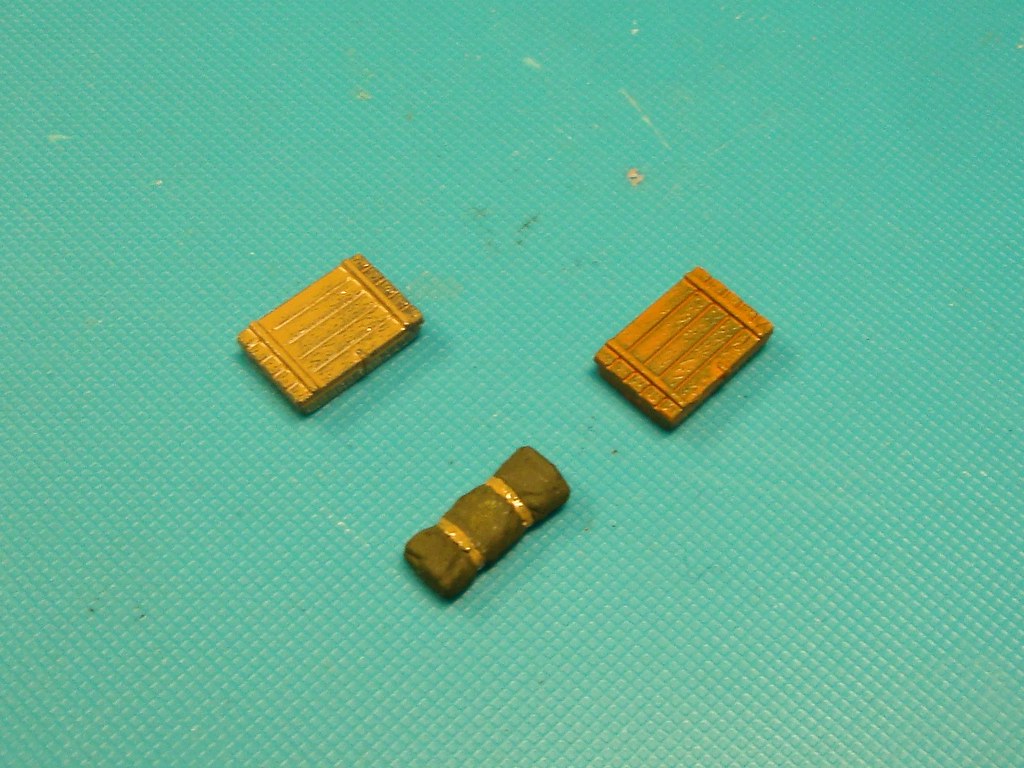
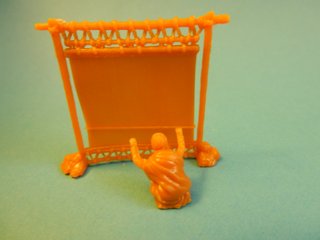
Two ammunition boxes and a tarp painted in the basic colours.
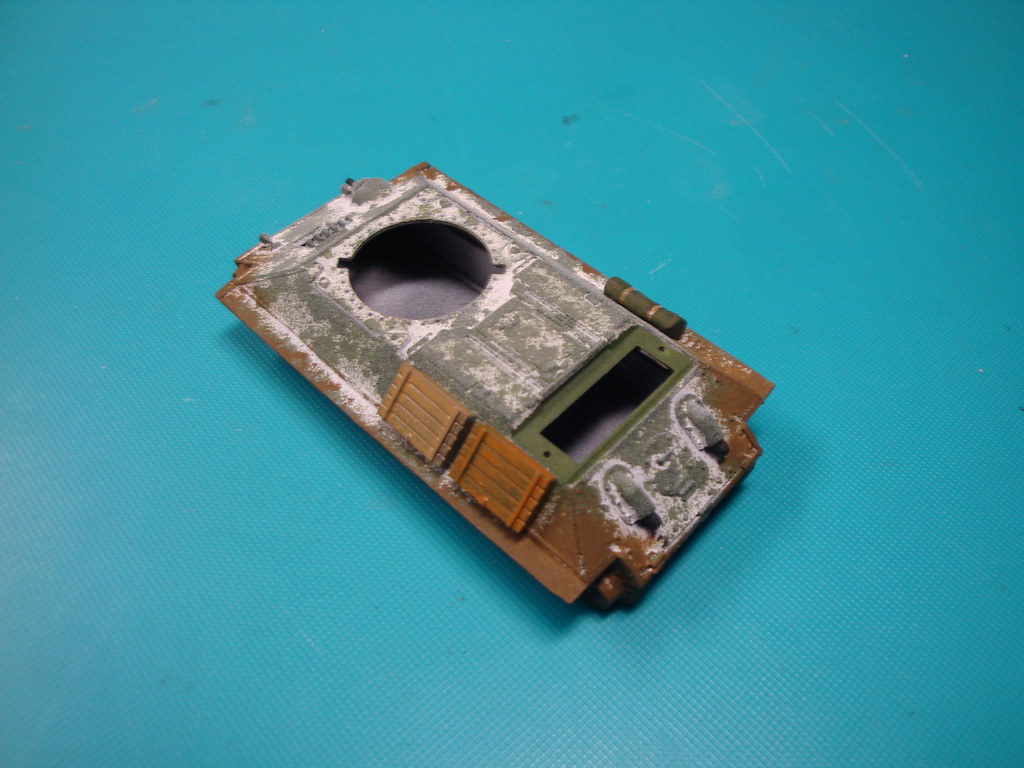
Image
Glued to the hull.

Image
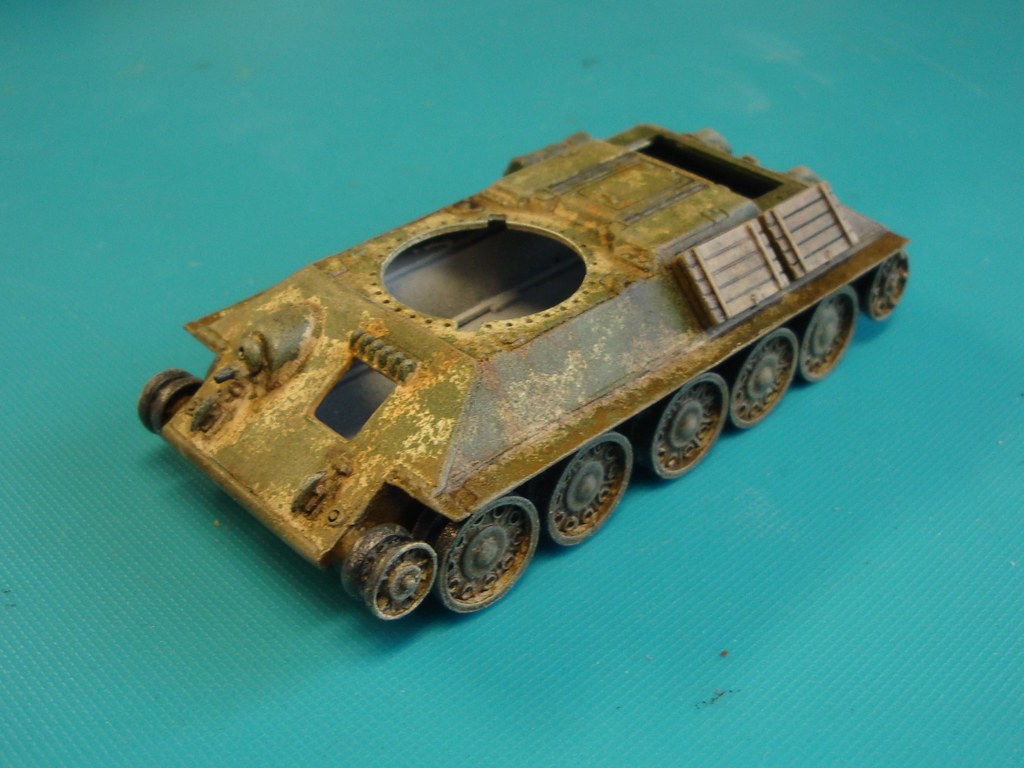
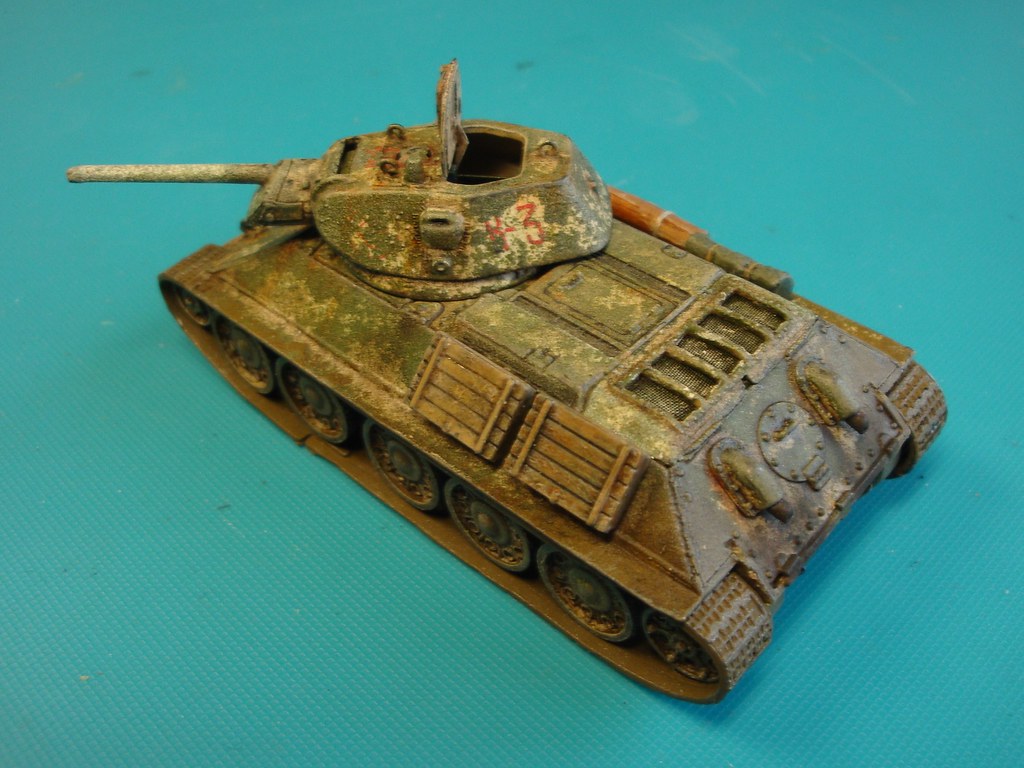
The whole tank is covered with a gloss varnish, followed by a pointwash using diluted dark brown oil paint.

Image
The next steps are drybrushes using different light green and sand coloured paints. Oil and rust streaks were added using oilpaints. Well, I think it starts looking very dirty and battered now.

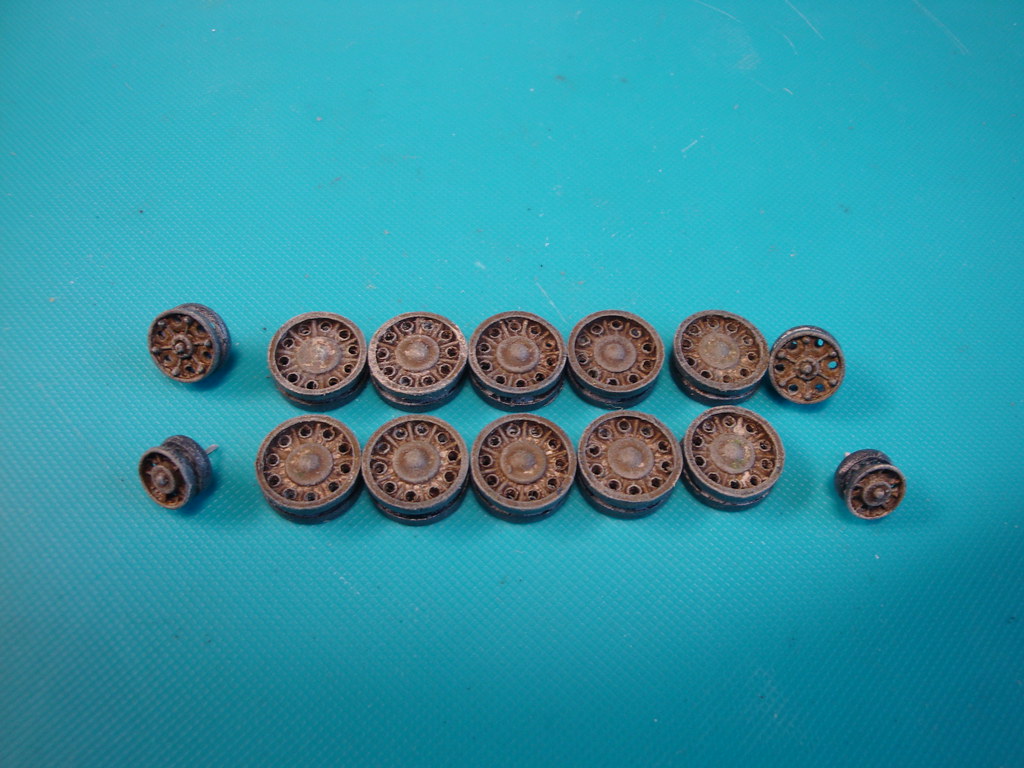
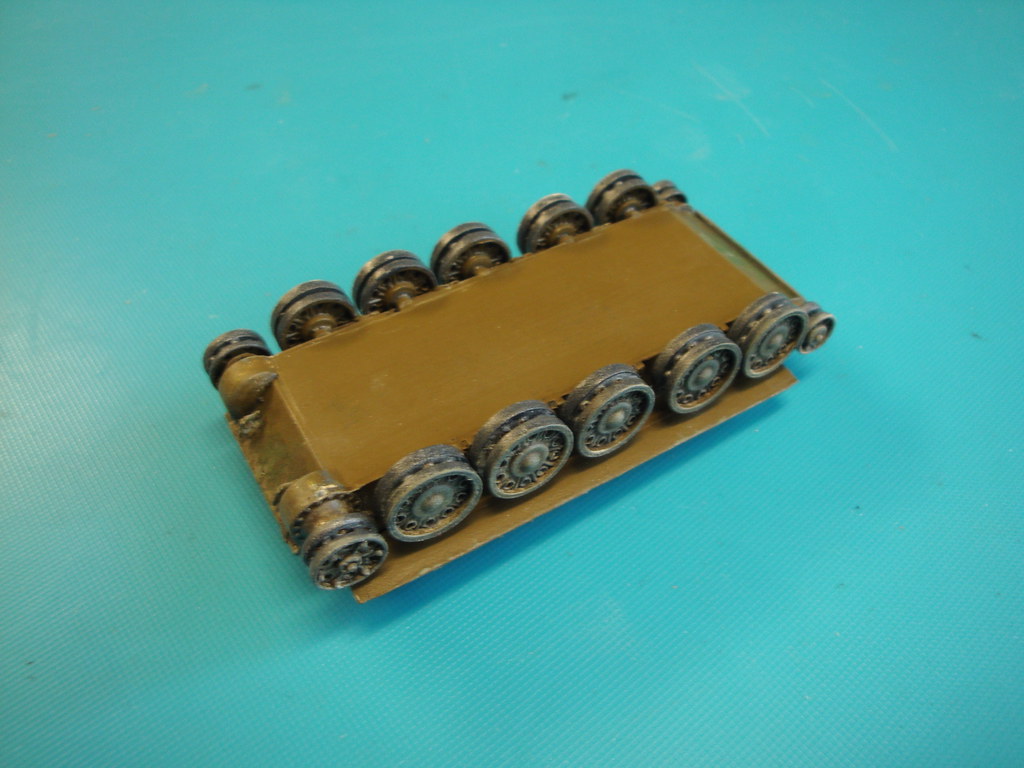
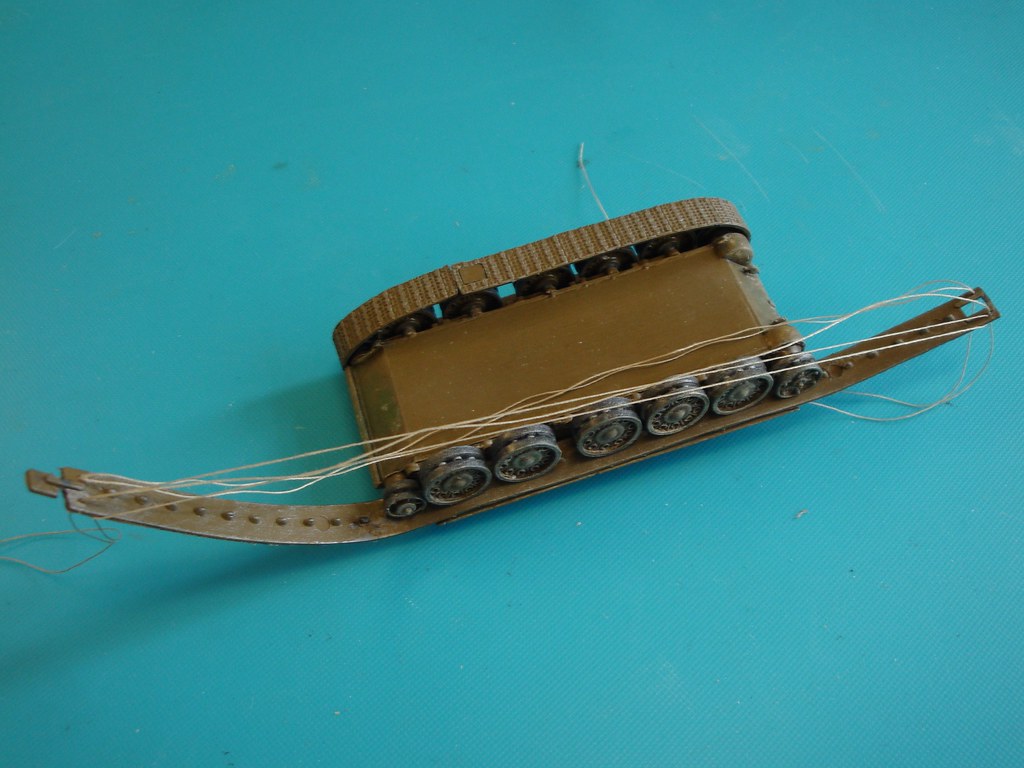
Now to continue with the wheels and the tracks.
User avatar
huib  Netherlands
 
Posts: 962
Member since:
12 Dec 2015, 15:57


Posted by Peter on 11 May 2021, 12:47

It looks all very old and worn out! And that I like a lot! :thumbup:

Now I'm interested in those oilpaints you're talking about. Which oil paints and how to use them? Doesn't it take long time to dry? :eh:
User avatar
Peter  Belgium

Moderator Moderator
 
Posts: 22508
Member since:
25 Mar 2008, 18:51

Posted by MABO on 11 May 2021, 20:27

So you created a time-lapse: White paint on the tank and shortly after no white paint left after month of hard fighting. I agree with Peter, I like it as well!
User avatar
MABO  Europe
Supporting Member (Gold) Supporting Member (Gold)
 
Posts: 9146
Member since:
12 May 2008, 18:01

Posted by huib on 17 May 2021, 18:50

Thank you, Peter and Mabo!

Wheels and tracks

Image
The wheels after painting and weathering. Also here, lots of mud.

Image
The tracks painted in a moddy brown, with some drybrushing using gun metal.

Image
Wheels glued in place.

Image
Looking ok.

Image
Then a long struggle to get the tracks around the wheels. These old Esci tracks are stiff en not elastic at all. This caused some broken of wheels, which I placed back using 1.2mm iron wire as an axle for extra strength. When I took a look at my model the next morning, one of the tracks was broken at its weakest point: the connection between the track ends. :eh:

Image
How to solves this. Normally I would reconnect the track ends using a staple, but then the tracks should be taken off completely and replaced, with all the risk of broken wheels again. So I decided to use sewing thread instead, pulling the track ends carefully together.

Image
Well, despite the issues, the result is not bad in the end.

Image
On its tracks. Only a few things to do now.
User avatar
huib  Netherlands
 
Posts: 962
Member since:
12 Dec 2015, 15:57

Posted by JueHue on 17 May 2021, 20:16

Looks pretty good. Maybe temperature would have been a help with the chain. :yeah: :yeah:

I'm also currently fighting with my figures for the SU 85 Dio. I hope
there will be photos of it soon.
Stay healthy
JueHue  Germany
 
Posts: 153
Member since:
25 Dec 2020, 13:01

Posted by Wiking on 17 May 2021, 21:20

3rd last pic.

Crocheting and knit with huib.
Today, how to make a chain mail with the right pattern.

Image
User avatar
Wiking  Germany
 
Posts: 2825
Member since:
14 Sep 2015, 10:03

Help keep the forum online!
or become a supporting member

Posted by huib on 18 May 2021, 21:28

Wiking wrote:Crocheting and knit with huib.

:xd: :xd: :xd:
User avatar
huib  Netherlands
 
Posts: 962
Member since:
12 Dec 2015, 15:57

Posted by Peter on 18 May 2021, 21:37

Huib you are a man with many talents! :mrgreen:

We built tanks and he sews them! :-D

;-)
User avatar
Peter  Belgium

Moderator Moderator
 
Posts: 22508
Member since:
25 Mar 2008, 18:51

Posted by Bluefalchion on 18 May 2021, 21:56

A master modeler must have many tools in his toolchest and many skills and techniques in his arsenal. huib has proved the proposition once again.
User avatar
Bluefalchion  United States of America
 
Posts: 3575
Member since:
23 Dec 2010, 07:57

Posted by Peter on 18 May 2021, 22:18

Bluefalchion wrote:A master modeler must have many tools in his toolchest and many skills and techniques in his arsenal. huib has proved the proposition once again.

Pst, don't tell but my wife is looking for "HER" toolchest now. And that after her make up box dissepeart. I hope she will not suspect me of taking them away! I really must keep the rock on the entry of my cave on his place! :mrgreen:
User avatar
Peter  Belgium

Moderator Moderator
 
Posts: 22508
Member since:
25 Mar 2008, 18:51

Posted by Bluefalchion on 19 May 2021, 00:14

I just used her old make-up brush to dust off my keyboard and it looks fantastic!
User avatar
Bluefalchion  United States of America
 
Posts: 3575
Member since:
23 Dec 2010, 07:57

Posted by huib on 19 May 2021, 14:07

:yeah: :-D :-D :-D
I agree. A true modeller is always scouring his environment for useful tools and materials, and carefully hiding them away for possible later use (which might never come).
User avatar
huib  Netherlands
 
Posts: 962
Member since:
12 Dec 2015, 15:57

Posted by huib on 19 May 2021, 14:15

The last additions

The model is almost ready. Only a few things left to do.

Image
The ventilation holes need some mesh. I used the teabag approach again.

Image
Glued to the inside using some CA glue.

Image
A bit of painting and weathering.

Image
Glued in place.

Image
A dry branch was cut from the garden to perform as a makeshift unditching beam.

Image
Cut to length and tied with sewing thread.

Image
Glued to the tank. Also the hatches are glued in position. and the turret put in place.

Image
Some subtle chipping applied using a soft graphite pencil. Some smoke marks around the exhausts using soft pastels.

The tank is finished, now a small base.
User avatar
huib  Netherlands
 
Posts: 962
Member since:
12 Dec 2015, 15:57

Posted by Peter on 19 May 2021, 15:37

You are so polyvalent, while modeling cleaning the garden! Hat of for you! ;-) :thumbup:

Nice looking tank! :thumbup:
User avatar
Peter  Belgium

Moderator Moderator
 
Posts: 22508
Member since:
25 Mar 2008, 18:51

Posted by JueHue on 19 May 2021, 16:39

Englisch

You have done a lot of work on the T34. With a little mud on the chains, the chain fault is not noticeable. Worked very well. I'm excited to see how things will continue.
JueHue  Germany
 
Posts: 153
Member since:
25 Dec 2020, 13:01

Posted by Kostis Ornerakis on 19 May 2021, 18:56

Wonderful work so far! :notworthy: :yeah: :-D
User avatar
Kostis Ornerakis  Greece

In memoriam
 
Posts: 1280
Member since:
14 Feb 2016, 18:16

Help keep the forum online!
or become a supporting member

Posted by Egbert on 20 May 2021, 06:33

Fantastic what you can do with the plastic model ...
It all looks super realistic.
User avatar
Egbert  Germany
 
Posts: 597
Member since:
16 Oct 2008, 06:47

Posted by Wiking on 20 May 2021, 15:02

Yes, the t34 hull and all parts around look so realistic, that the low level of the rubber tack from the maker of the kit is visible.

Top work once again.
:yeah:
User avatar
Wiking  Germany
 
Posts: 2825
Member since:
14 Sep 2015, 10:03

Posted by huib on 21 May 2021, 15:06

Thank very much guys, for all kind remarks!

Rasputitsa
It is the spring of 1942 at the Eastern Front. The snow has almost completely melted and has turned the roads into a slimy quagmire, hardly accessible for any vehicle. A battle weary T34, its wintercamouflage almost washed away, is fighting it's way through the mud, using logs for more support. That is the image I'd like to create with this model.

Image
Therefore I did again the trick with the youghurt container, filled with plaster and some additional twigs from the garden.

Image
A very dark brown as a base colour, mixed from gouache paint.

Image
Then lots of drybrushing using different shades of brown.

Image
A gloss varnish to represent the wet quagmire.

Image
Between the logs some reamains of the snow, made from wheat flower from the kitchen, surrounded by some yellow remains of last years grass.

Image
The base painted in antracit

And now to continue with a few figures.
User avatar
huib  Netherlands
 
Posts: 962
Member since:
12 Dec 2015, 15:57

Posted by Peter on 21 May 2021, 15:08

Again a wonderfull and realistic base Huib! Looking forward to your figures! :thumbup:
User avatar
Peter  Belgium

Moderator Moderator
 
Posts: 22508
Member since:
25 Mar 2008, 18:51

Previous pageNext page

Return to Work in Progress