Work in Progress

S-Model 1/72 Hotchkiss H35 early version

Posted by huib on 05 Dec 2020, 16:27

Wiking wrote:Do we will see the model on a base with some French soldiers ?


Like this?
Image

More pics in the Gallery
User avatar
huib  Netherlands
 
Posts: 962
Member since:
12 Dec 2015, 15:57


Posted by huib on 11 Dec 2020, 13:15

S-Model 1/72 Hotchkiss H38/H39 light tank

In addition to the Hotchkiss H35, I also bought a kit of its successor, the Hotchkiss H39 light tank from S-Model.

Image
This is what the box looks like. You have to study it carefully to discover the differences with the H35.

Image
The main sprue, containing al the parts for the tank. And also in this box there are two models.

Image
And a small extra sprue for the optional unditching tail.

Image
The same quite useless PE as in the H35 kit. (I only use the wire cutters)

Image
And the same decal sheet in its original plastic bag.

Image
To create more possibiklities I ordered an extra decal sheet for the H35 and H39.

Image
Look, that's much more versatile than the kit decals, including unit signs, tactical numbers and vehicle registration numbers.

Now, with all this material available, what to build? Because it offers a lot of possibilities for different variants from different units.

Image
I decided build a Hotchkiss H39, with the higher engine deck and unditching tail, but with the short barreled gun of the earlier versions, in the quite sobre green and brown livery of the French infantry.

Image
And I decided to do a kit bash between the H35 and H39 kits to produce a late version H35 with the long gun and the unditching tail. For this I need the hull from the H35, but the tracks, wheel, turret and unditching tail of the H39. It will be decorated in a colourful livery of the French cavalry.

Image
Another picture of the H35 late version with long gun and unditching tail.

Now let's build!
User avatar
huib  Netherlands
 
Posts: 962
Member since:
12 Dec 2015, 15:57

Posted by huib on 12 Dec 2020, 13:28

Building

Things go quickly with these little kits.

Image
Turret parts, including the long barrelled gun.

Image
Some detail added to the inside of the turret hatch.

Image
Turrets painted from the inside, assembled and detail added, mainly in the form of lifting hooks to both turret and cupola.

Image
Hulls assembled and extra detail added. These picture show the differences. Left the H35, right the H39. Different models of air intakes on the glacis and another position of the exhaust.

Image
H39 left and H35 right. Notice the different heights of the enfgine decks and the different air vents.

Image
Unditching tails assembled. On each of them a scatchbuilt tub to transport the standard tarp. Made from beer tin aluminium and iron wire.

Image
Tracks and wheels. These later versions of the Hotchkiss have a closed disc as an idler wheel, in contrast to the spoked version of the early model. It is easy working for the modeler, these one piece tracks and wheels. But of course you have to compromise on the looks of the guiding theeth and it took quite some work to sand of the moulding seam from the tracks.

Image
Ready for paint! Left the H39, right the H35.
User avatar
huib  Netherlands
 
Posts: 962
Member since:
12 Dec 2015, 15:57

Posted by Peter on 12 Dec 2020, 17:38

I read that there is some palm involved. Be carefull with that! :thumbup:

And this is a really good show. Two models for the price of one! ;-) :-D :thumbup:
User avatar
Peter  Belgium

Moderator Moderator
 
Posts: 22507
Member since:
25 Mar 2008, 18:51

Posted by huib on 14 Dec 2020, 16:09

Yes, my hobby is necessarily leading to alcohol abuse. Well, as long as it improves my models.... :mrgreen:

Painting

On with the colours:

Image
First both tanks received their base colour: dark bronze green (Humbrol 116).
But from now on these two tanks will turn out very different.

Image
This is the H39 in the unconspicious camouflage scheme of the French infantry. The brown shows too reddish on the picture, but is more chocolate brown in reality.

Image
I've gone wild on the H35, using a four colour pattern on the hull and a three colour pattern on the turret. It looks a bit unorganized in this stage.....

Image
But after lining all the colourpatches using a thin black marker, the idea becomes more clear.

Now on to the decals.
User avatar
huib  Netherlands
 
Posts: 962
Member since:
12 Dec 2015, 15:57

Posted by Peter on 14 Dec 2020, 17:55

Nice! It looks real nice! :thumbup:

And Palm gives you a steady hand! ;-)
User avatar
Peter  Belgium

Moderator Moderator
 
Posts: 22507
Member since:
25 Mar 2008, 18:51

Help keep the forum online!
or become a supporting member

Posted by GumSmith on 14 Dec 2020, 19:17

Hi huib,
again real good job, like that second camo a lot.

cheers Oke
GumSmith  Germany
 
Posts: 376
Member since:
09 Apr 2009, 16:38

Posted by huib on 16 Dec 2020, 14:41

Thanks, Peter and Oke!

Decals
After a layer of gloss varnish, it's decal time. The decal sheet from the kit, combined with the aftermarket decals create a wealth of possibilities. I created two fictional tanks, but heaviliy inspired on real examples from pictures.

Image
The H39 received turret number 93, and is part of a 1940 French infantry division.

Image
The H35 late version, became a command tank of the 4th Regiment Curassiers, 1st Division Légère Mechanisee.

And now on with some weathering.
User avatar
huib  Netherlands
 
Posts: 962
Member since:
12 Dec 2015, 15:57

Posted by T. Dürrschmidt on 16 Dec 2020, 19:35

Very good work on that tank. I like the appearance of French WW2 tanks very much. The camo schemes look very good. Very good vehicles at their time but used with the wrong tactics….
User avatar
T. Dürrschmidt  Germany
Silver Brush winner
 
Posts: 2230
Member since:
01 Oct 2008, 18:33

Posted by huib on 17 Dec 2020, 18:26

Thank you, T.!

Weathering
On with some weathering. I will deal with the weathering one tank at a time, as I have a slightly different approach for both tanks, due to the different camouflagecolours.

Image
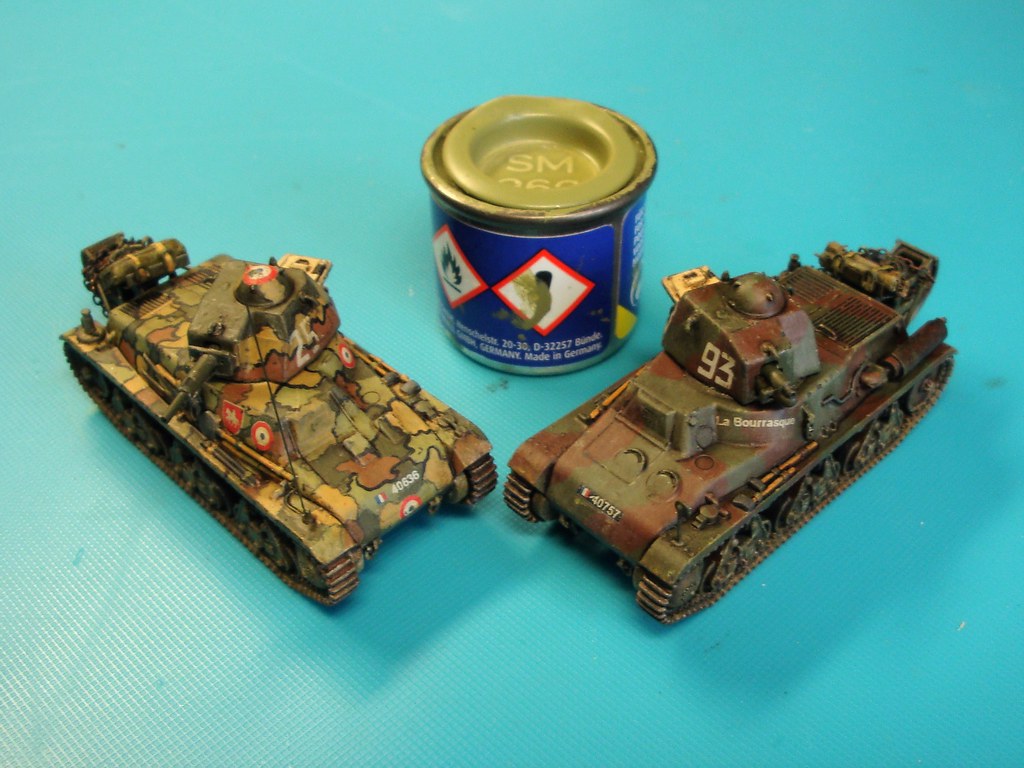
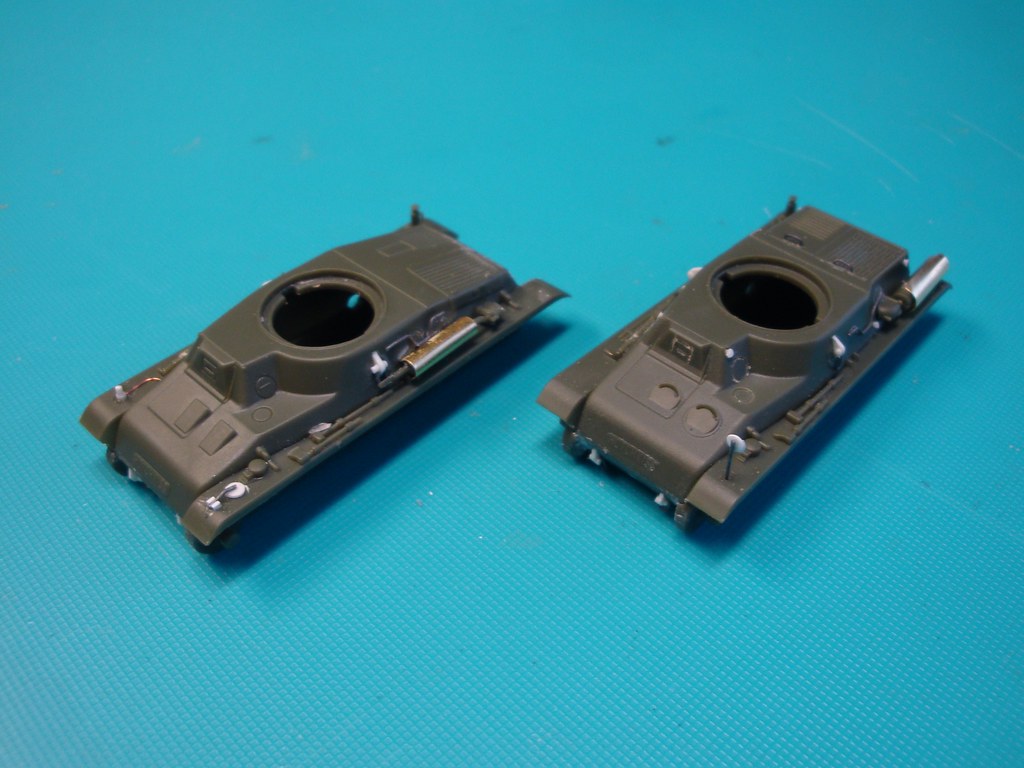
This is the starting point with the H35. The colours are too bright and too constrastful.

Image
That's why I start applying a heavy filter of diluted ochre coloured oil paint. This draws the colours closer together, fades the colours and gives a nice dusty appearance, suitable for the sunny weather in may and june 1940. (Ideal campaining weather!)

Image
After having sealed the filter with an acrylic gloss varnish, a pointwash of diluted dark brown oil painted was applied to create more visual depth on the model. The airvents on the engine deck were painted using black gouache.

Image
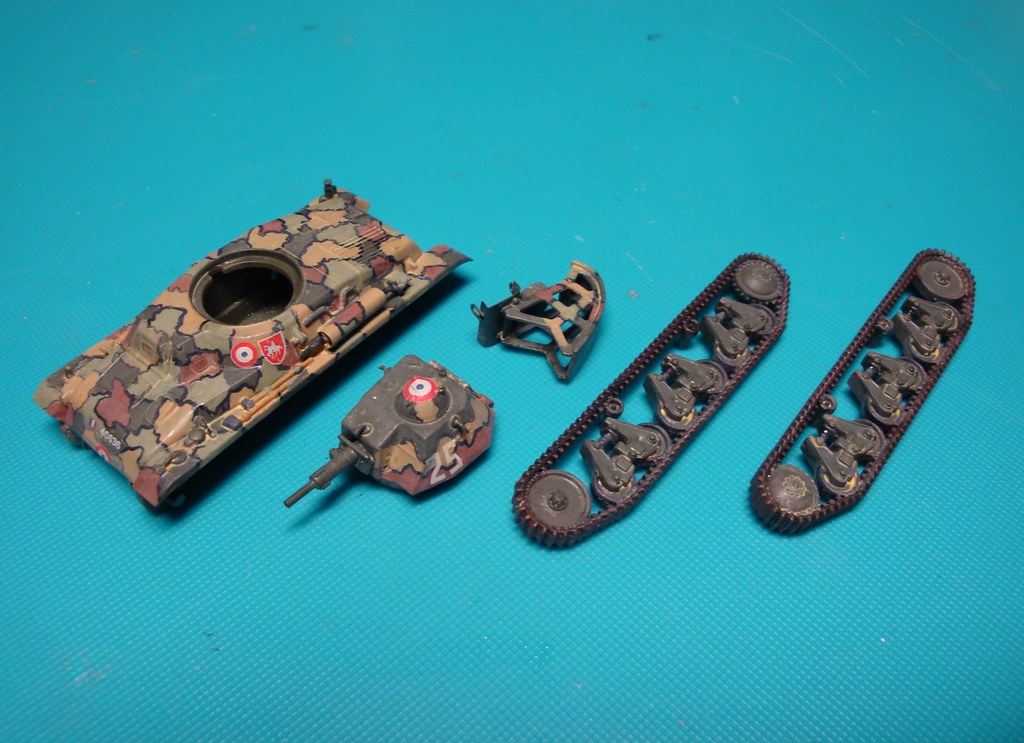
Next step was drybrushing the model, using a light sand colour, and doing some chipping, using a graphite pencil. As a finishing touch some mud was applied on and around the wheels and tracks, using different colours of enamel paint. Everything is sealed with a matt varnish.

So far for the H35, now to continue with the H39:

Image
As the H39 has a much darker camouflage scheme, I used a slightly different approach. I started with applying rain streaks by fading out dots of white oil paint top down using a dry brush.

Image
After a gloss varnish a dark brown point wash is applied.

Image
And black gouache in the air vents.

Image
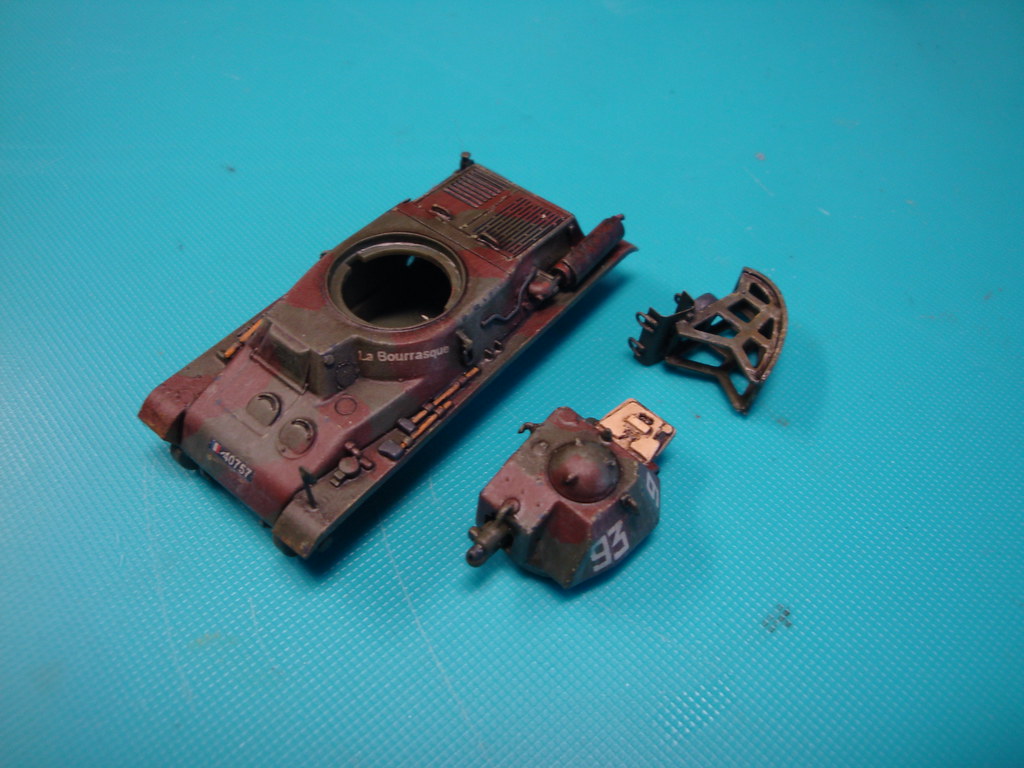
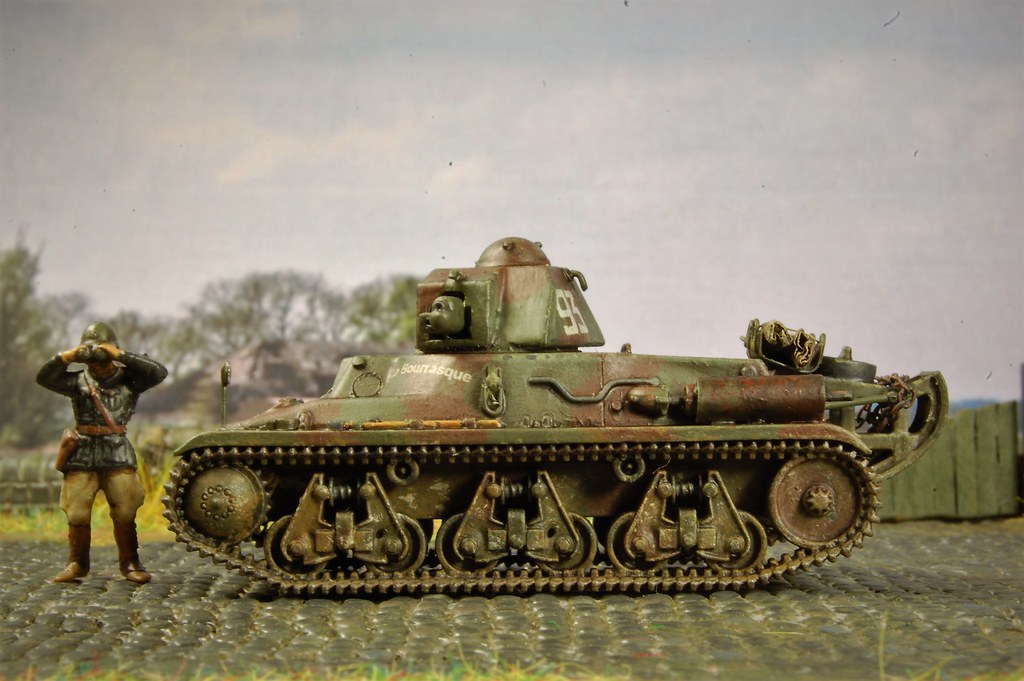
Next step is a drybrush using a light olive green colour, and do some 3D chipping using this olive green and dark gray. I choose this method so the chips will stand out a bit better on the dark base colours. And of course some mud was added.

Image
A picture of the muddied wheels and tracks, that, due to mud and dust, all look more or less the same.

Next step will be the last: final construction and adding some accessoiries.
User avatar
huib  Netherlands
 
Posts: 962
Member since:
12 Dec 2015, 15:57

Posted by Wiking on 17 Dec 2020, 18:50

Your output of Hotchkiss start to give the German high command some serious headache !
User avatar
Wiking  Germany
 
Posts: 2825
Member since:
14 Sep 2015, 10:03

Posted by Peter on 18 Dec 2020, 23:24

So far, so good Huib! I like it all the way! :thumbup:
User avatar
Peter  Belgium

Moderator Moderator
 
Posts: 22507
Member since:
25 Mar 2008, 18:51

Posted by huib on 03 Jan 2021, 14:14

Thank you, Wiking and Peter!

Final construction and last details

The last steps for the little Hotchkiss tanks.

Image
Tracks and wheels glued in position. I used some tools to line up the tracks during the curing of the glue.

Image
Meanwhile some tarps were made from paper tissue and sewing thread.

Image
The paper was moistened using diluted white glue, rolled up and tightened with a piece of thread.

Image
Painted and weathered.

Image
Also two towing chains and an antenna were prepared.

Image
The tarps attached to the trench crossing tail and fastened with belts from modellers tape.

Image
The trench crossing tails attached to the tanks. As last parts the stabilising rods were added, still unpainted.

Image
The rods are painted and weathered, and the chains attached.

Image
The same with the H39.

Image
The vulnerable antenna as a finishing touch.

Image
Finished! Final pictures soon.
User avatar
huib  Netherlands
 
Posts: 962
Member since:
12 Dec 2015, 15:57

Posted by Peter on 03 Jan 2021, 20:28

They look fantastic Huib! :thumbup:
User avatar
Peter  Belgium

Moderator Moderator
 
Posts: 22507
Member since:
25 Mar 2008, 18:51

Posted by huib on 05 Jan 2021, 18:15

Thanks Peter!

Final Pictures:

Image

Image

More pics in the Gallery
User avatar
huib  Netherlands
 
Posts: 962
Member since:
12 Dec 2015, 15:57

Previous page

Return to Work in Progress