
Work in Progress
Antietam 17th September 1862
Man you are respecting every tiny detail...It is great to watch how you make everything...Plus you follow the historical accounts...
-

Emperor - Posts: 1392
- Member since:
01 Jun 2012, 09:48
why haven't I been following this thread more assiduously? Some brilliant stuff here, the inventiveness is very inspiring!
-
Captain Sibourne

- Posts: 332
- Member since:
02 Feb 2014, 09:12
Please accept my apologies.
In my senility I omitted a construction picture to explain the technique.
Plastic sprue is melted over a flame until it is soft.
Then you pull both ends gently to stretch the plastic to the thickness required.
Let the plastic cool otherwise you will have a painful finger decoration.
Best wishes,
Chris
-
C M Dodson
- Posts: 2568
- Member since:
01 May 2015, 18:48
I've tried similar softening techniques with hot water, but it never seems to be quite hot enough - using fire though seems better but could ruin the detail of miniatures. Guess I'd only ever do this with sprues.
-
Santi Pérez likes this post. •
- Reply
-

CliosPaintingBench
- Posts: 800
- Member since:
14 Jan 2020, 06:46
Help keep the forum online!
or become a supporting member
I was doing some research and came across this ‘War of Rights’ promotional video that sets out the terrain for Antietam.
The detail is superb although there are a number of mistakes, ie the Otto Farm , opposite the Sherrick Farm has disappeared.
Nevertheless, good stuff for terrain dressing ideas.
https://www.youtube.com/watch?v=f0yV1Nbx4uU
Happy viewing,
Chris
The detail is superb although there are a number of mistakes, ie the Otto Farm , opposite the Sherrick Farm has disappeared.
Nevertheless, good stuff for terrain dressing ideas.
https://www.youtube.com/watch?v=f0yV1Nbx4uU
Happy viewing,
Chris
-
C M Dodson
- Posts: 2568
- Member since:
01 May 2015, 18:48
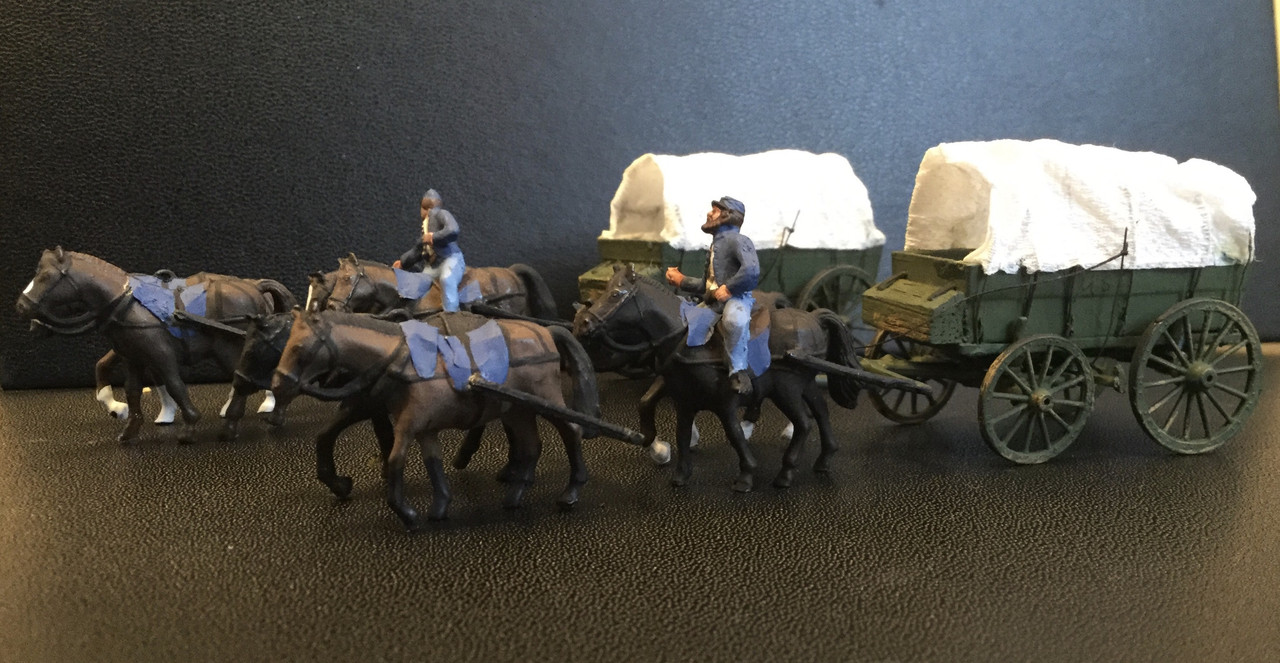
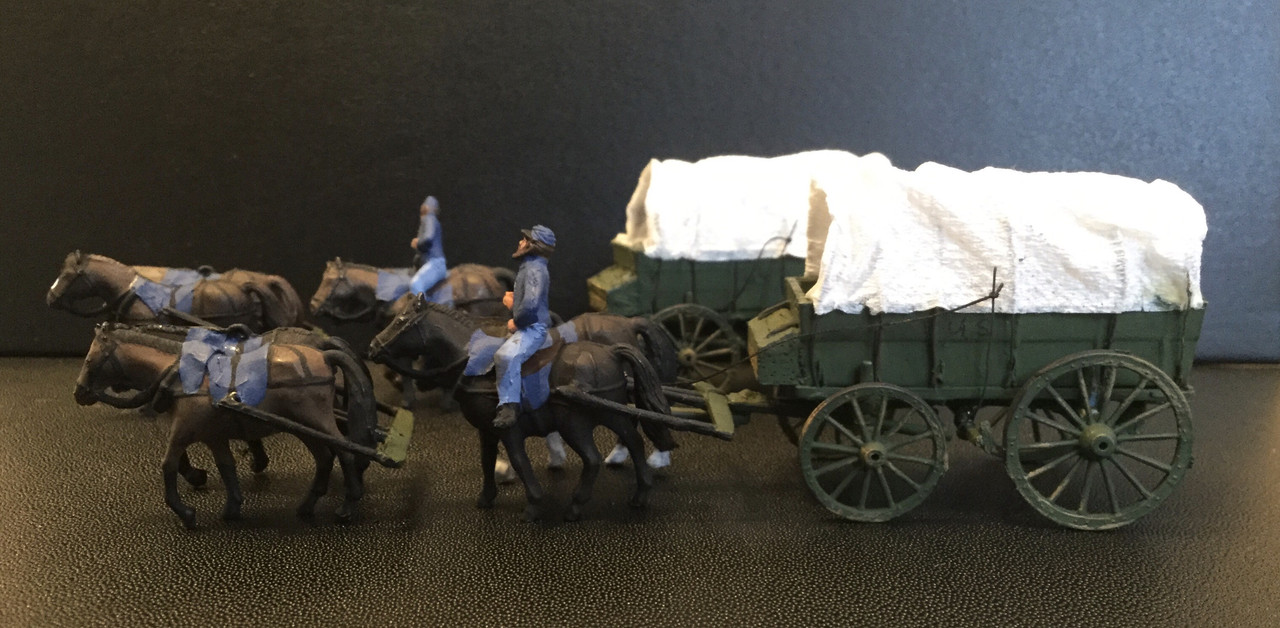
Wagons roll
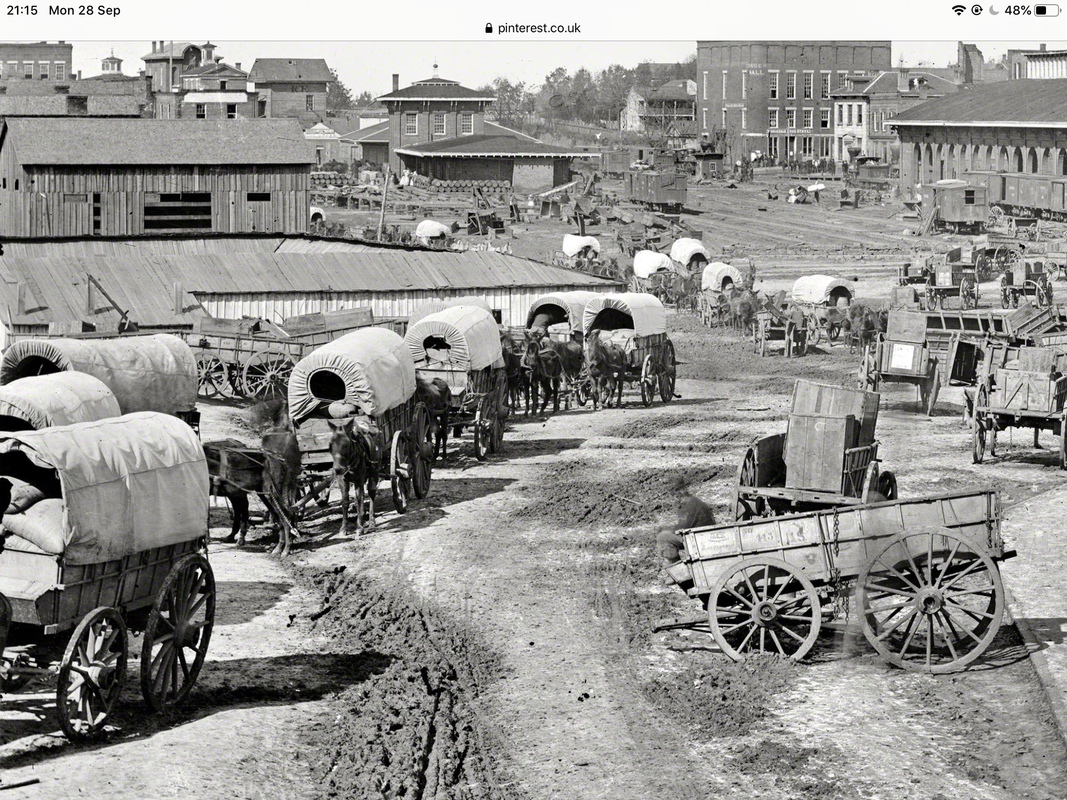
The Civil war armies used wagons by their thousands in order to transport munitions, foodstuffs and necessaries from the railheads to the battlefields.
Whilst the Confederates used anything to hand including captured US stock the principal US vehicle was a purpose built wagon, authorised in 1855 and produced with various modifications until 1865.
The vehicle weighed 2000 pounds and could carry a similar weight.
Originally designed for use with four horses or mules this specification was later upgraded to six animals.
An interesting point is that the teamster rode the inside rear mount and was not positioned on the vehicle ala John Wayne etc.
Here is a drawing I found showing the standard army wagon and it’s principal features.
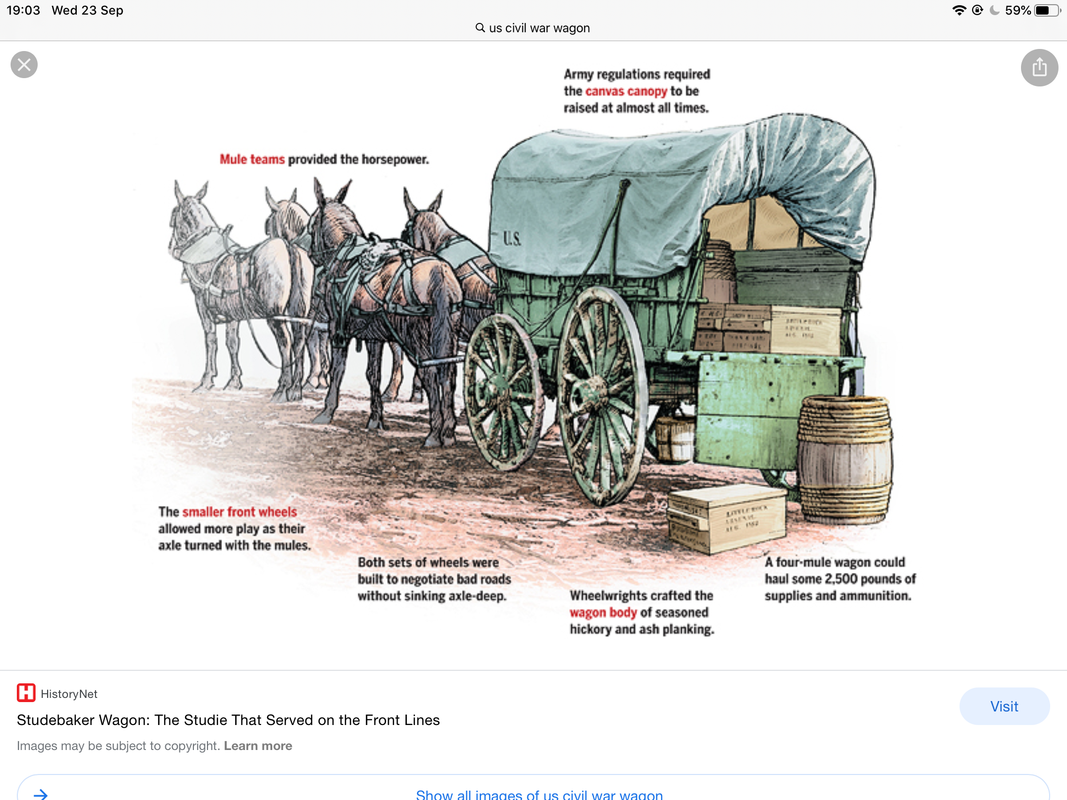
These contemporary Pictures illustrate the wagon.
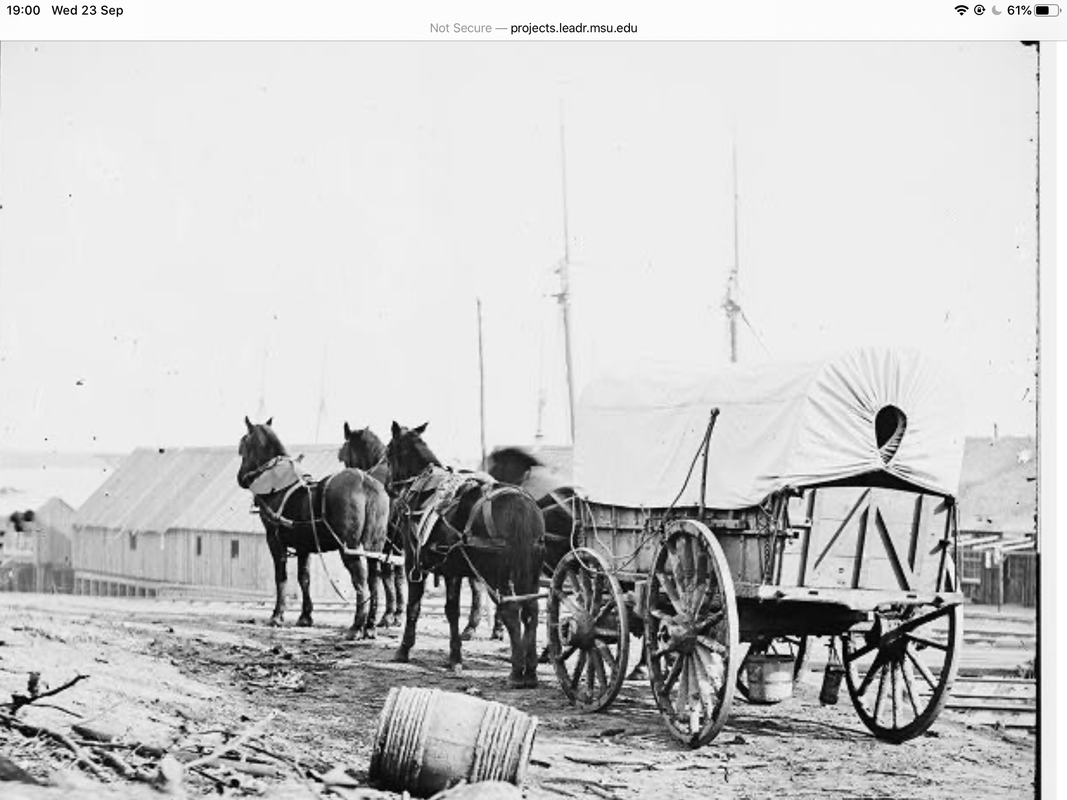
Here is the basic uncovered wagon.
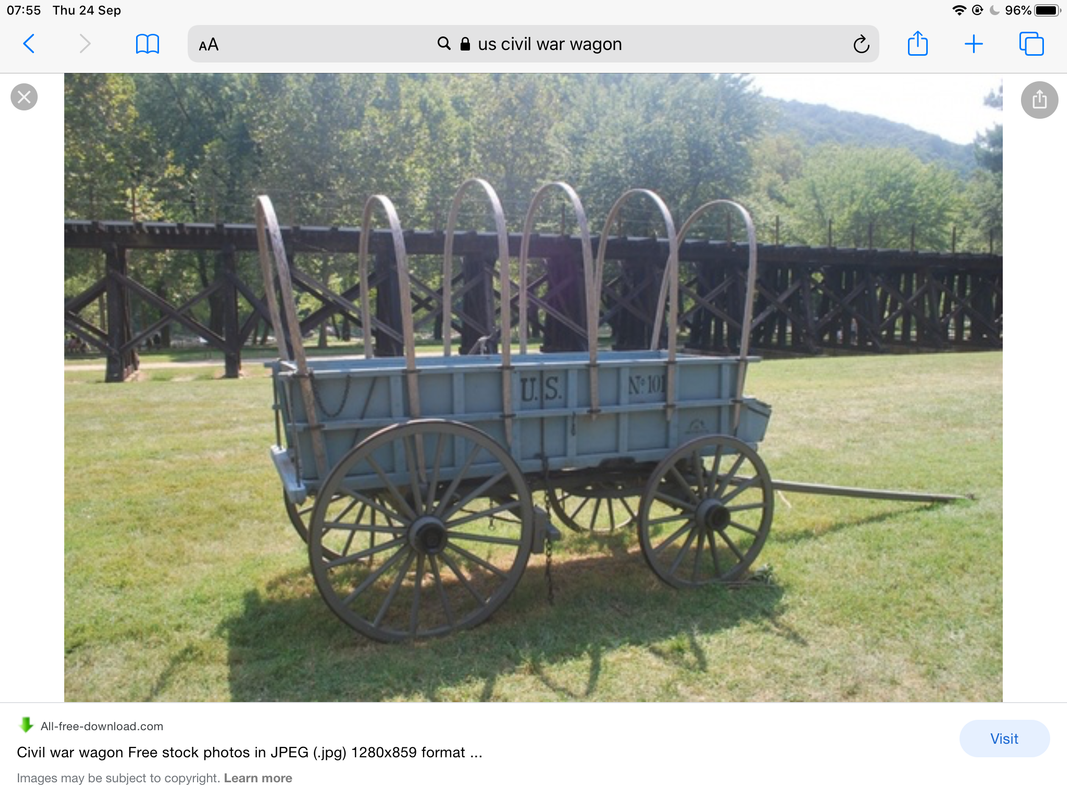
Jacklex miniatures do a very nice wagon with mules but it is not cheap so I decided to utilise the IMEX wagons rather than build from scratch.
I firstly used cardboard to represent the tailboard detail.
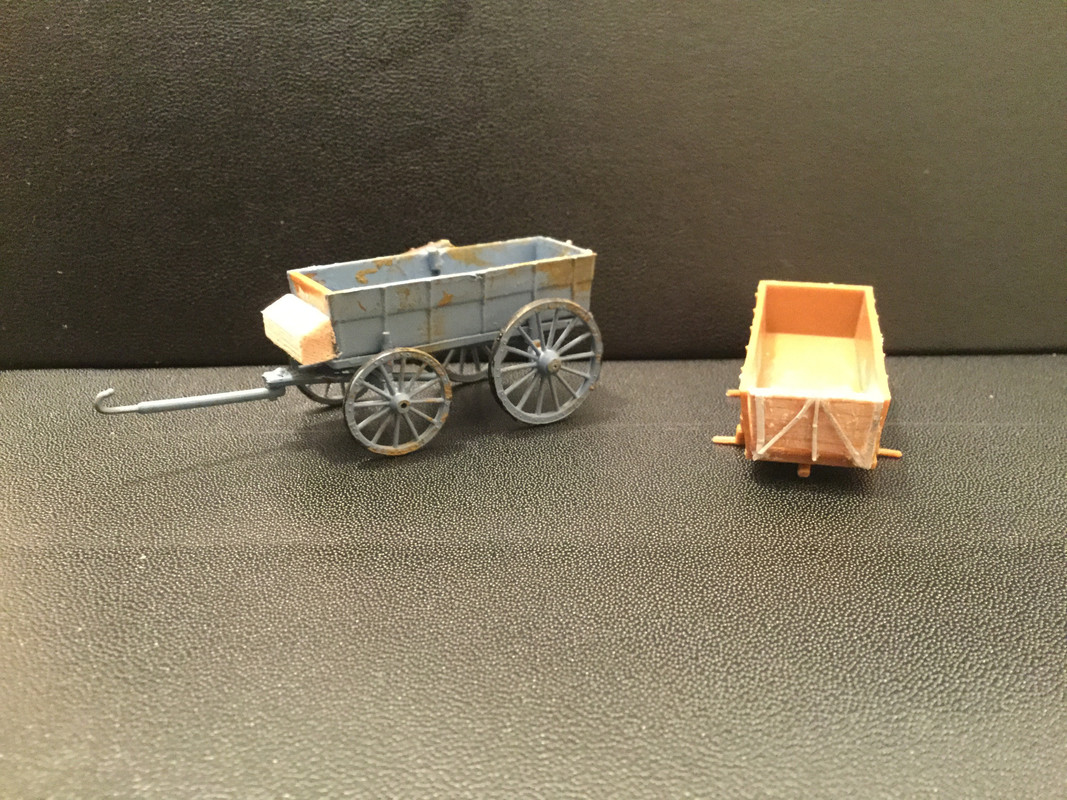
I constructed the front tool box from balsa with card hinges.
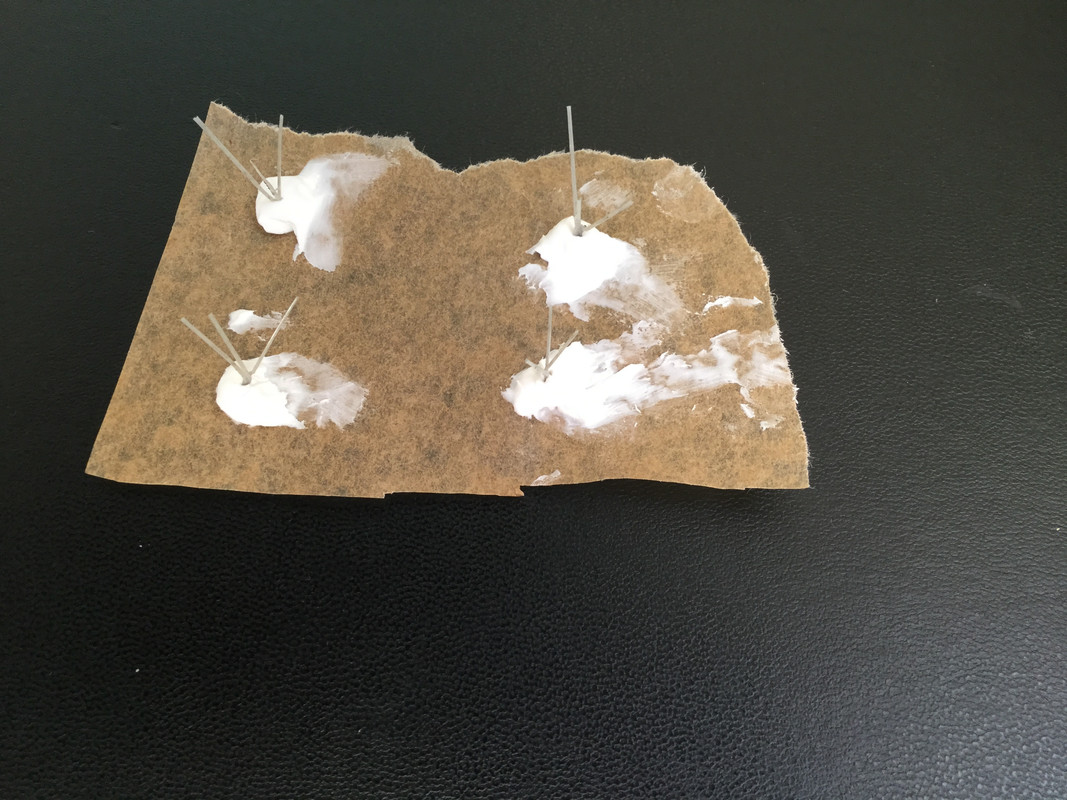
The hooped structure I was going to build with card as the originals used wooden hoops.
However, picture wire works well as it can be easily bent to shape.
To provide the accommodation holds for the hoops I heated a needle, held by pillars over a gas flame and then inserted it in the base.
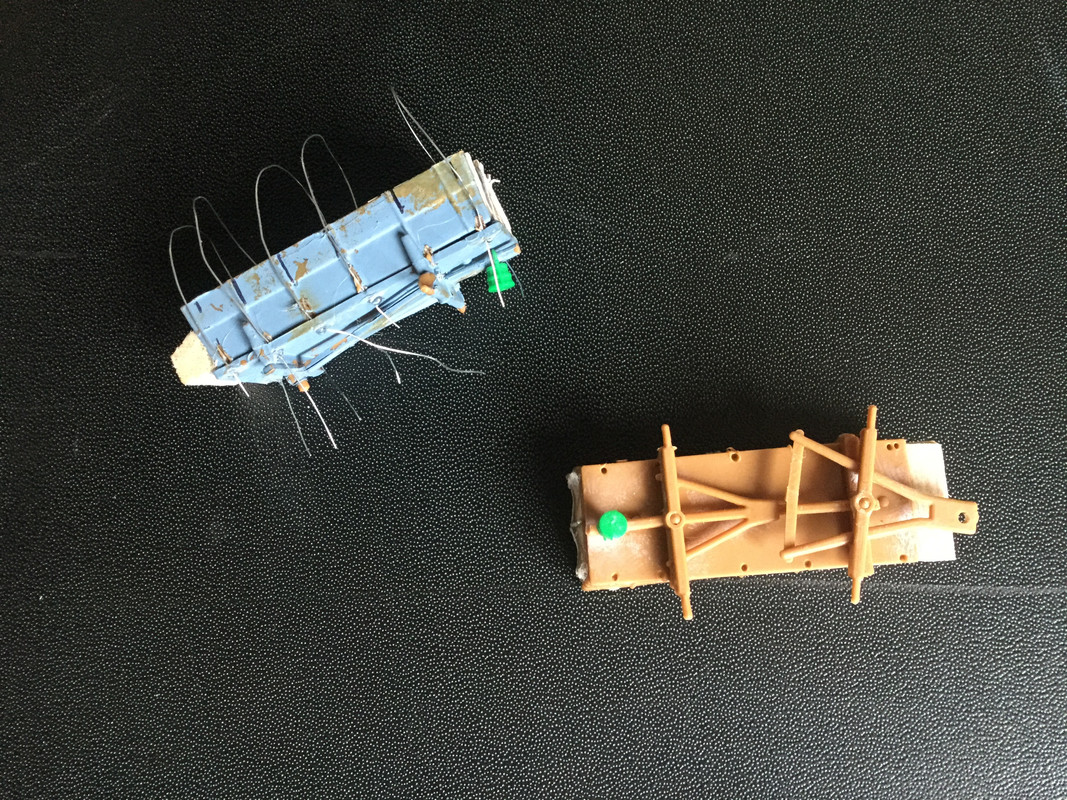
Once completed the brake system was made out of balsa.
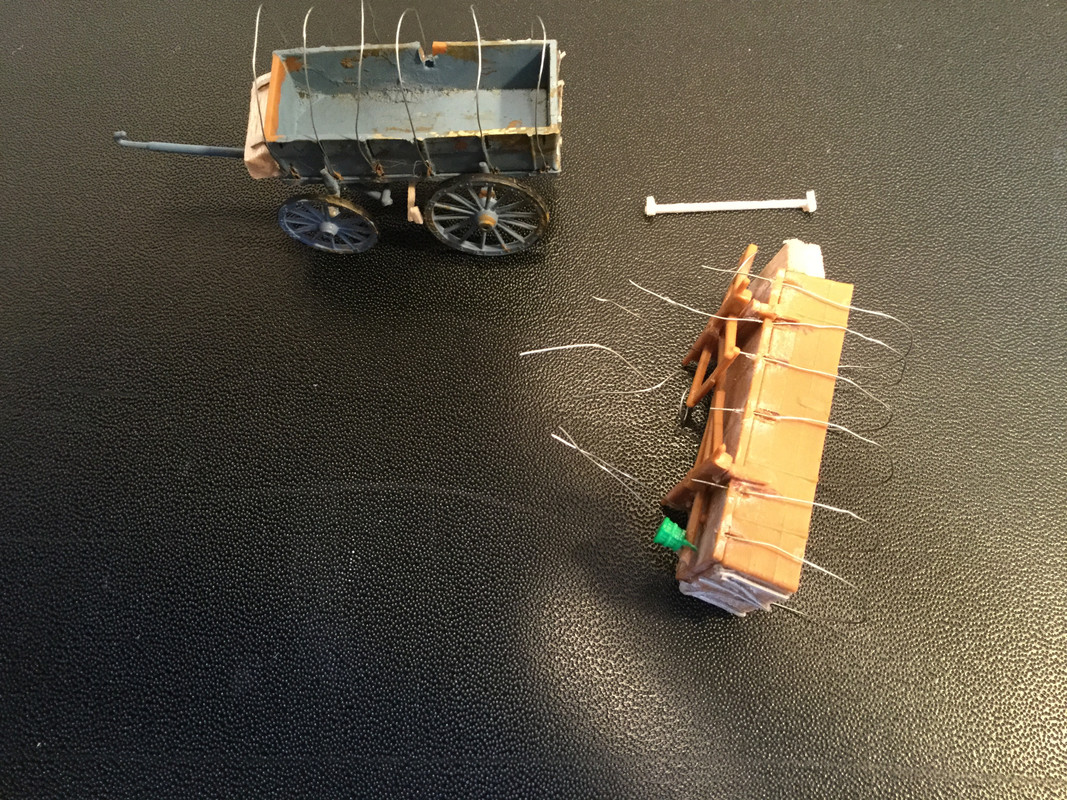
Toilet paper cut to size completes the canvas which these vehicles were uniformly equipped with as I found tissue to be too uniform in texture.
I was going to paint the canvas’s but I think they look good ‘au natural’.
The horse team in this instance, are from the Revel and Imex sets with tissue covers and Hat Austrian trails.
A web site suggested that the bodywork should be a light blue with Venetian red wheels. My research suggests that the monochrome pictures indicate a uniform colour. Mr Adkin in his Gettysburg companion has them in green as per my initial picture so green it is.
The camera has revealed a few bits that need attention but I think they have the ‘feel’ of the period.
Incidentally I found a fascinating link on Civil war logistics .
All you need to know about kitting out,supplying and feeding a civil war soldier!
https://transportation.army.mil/History ... icle_1.pdf
Fascinating stuff.
Chris
The Civil war armies used wagons by their thousands in order to transport munitions, foodstuffs and necessaries from the railheads to the battlefields.
Whilst the Confederates used anything to hand including captured US stock the principal US vehicle was a purpose built wagon, authorised in 1855 and produced with various modifications until 1865.
The vehicle weighed 2000 pounds and could carry a similar weight.
Originally designed for use with four horses or mules this specification was later upgraded to six animals.
An interesting point is that the teamster rode the inside rear mount and was not positioned on the vehicle ala John Wayne etc.
Here is a drawing I found showing the standard army wagon and it’s principal features.
These contemporary Pictures illustrate the wagon.
Here is the basic uncovered wagon.
Jacklex miniatures do a very nice wagon with mules but it is not cheap so I decided to utilise the IMEX wagons rather than build from scratch.
I firstly used cardboard to represent the tailboard detail.
I constructed the front tool box from balsa with card hinges.
The hooped structure I was going to build with card as the originals used wooden hoops.
However, picture wire works well as it can be easily bent to shape.
To provide the accommodation holds for the hoops I heated a needle, held by pillars over a gas flame and then inserted it in the base.
Once completed the brake system was made out of balsa.
Toilet paper cut to size completes the canvas which these vehicles were uniformly equipped with as I found tissue to be too uniform in texture.
I was going to paint the canvas’s but I think they look good ‘au natural’.
The horse team in this instance, are from the Revel and Imex sets with tissue covers and Hat Austrian trails.
A web site suggested that the bodywork should be a light blue with Venetian red wheels. My research suggests that the monochrome pictures indicate a uniform colour. Mr Adkin in his Gettysburg companion has them in green as per my initial picture so green it is.
The camera has revealed a few bits that need attention but I think they have the ‘feel’ of the period.
Incidentally I found a fascinating link on Civil war logistics .
All you need to know about kitting out,supplying and feeding a civil war soldier!
https://transportation.army.mil/History ... icle_1.pdf
Fascinating stuff.
Chris
-
C M Dodson
- Posts: 2568
- Member since:
01 May 2015, 18:48


 Moderator
The wagons look great including the canvas tarps!
Years ago i made paper card wagons with Hat Wheels. BB
Years ago i made paper card wagons with Hat Wheels. BB
-
Beano Boy

") Supporting Member (Gold)
Supporting Member (Gold) - Posts: 8086
- Member since:
03 Sep 2013, 14:45

Thanks for all the infos about the wagons. And congrats to your own constructions!
-

MABO
- Supporting Member (Gold)
- Posts: 9146
- Member since:
12 May 2008, 18:01
The mark of a master is attention and detail to the more mundane and overlooked elements. Many of us will skimp on logistics since wargaming puts a lot of pressure to paint fighting units. These wagons look fantastic, awesome job on replicating the real thing. Thanks to your inspiration I am currently painting some dead and wounded conversions. Thank you also for sharing not just your pictures but fully describing the process which is a great learning tool for anyone interested. I eagerly await the battle itself - Bessiere
-
Bessiere

- Posts: 1115
- Member since:
23 May 2019, 15:50
Despatch rider
Thank you to everyone for their kind words which are most appreciated.
I noticed this super piece of modelling from the Gerschite in Miniturian forum as part of Salaberry’s Napoleonic project.

The sheer dynamism of the subject is in my opinion brilliant.
Therefore I thought some chopping should be attempted to see if I could get something similar.
A poor Itallieri US cavalryman was selected and by chopping his leg off and rotating it I got the look I was after.
Unravelled picture wire provides new reins and the stirrups.
A little greenstuff fills the poor chap’s crotch.
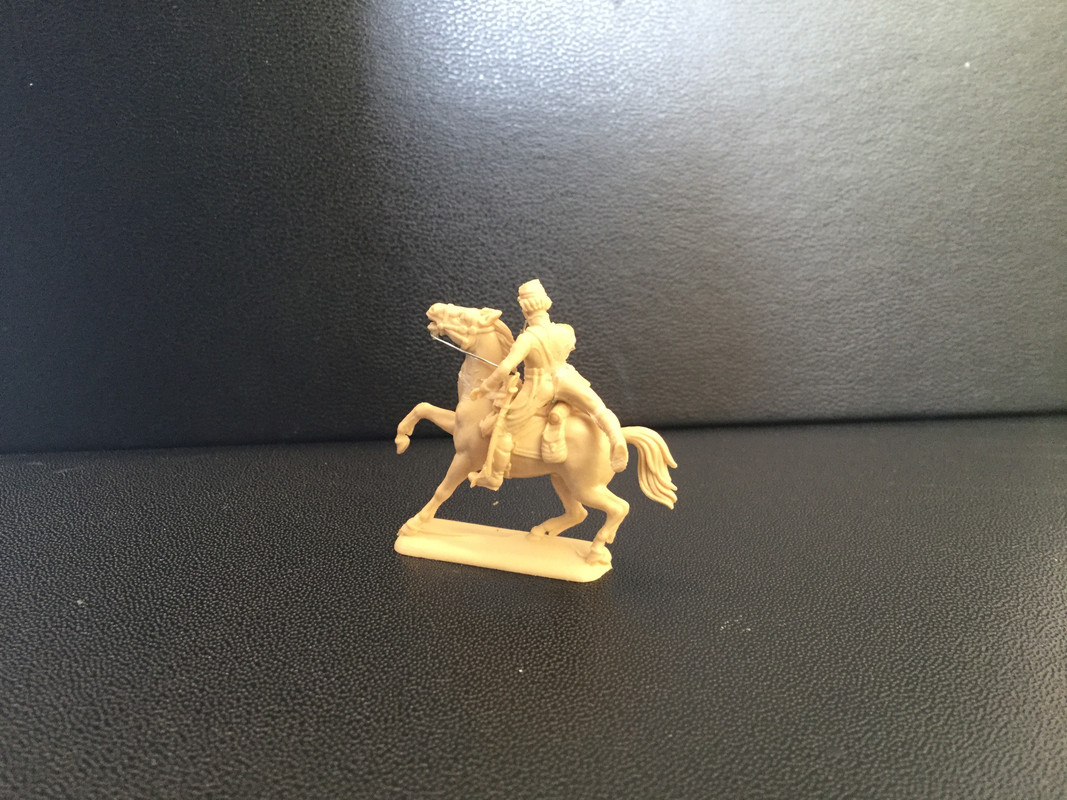
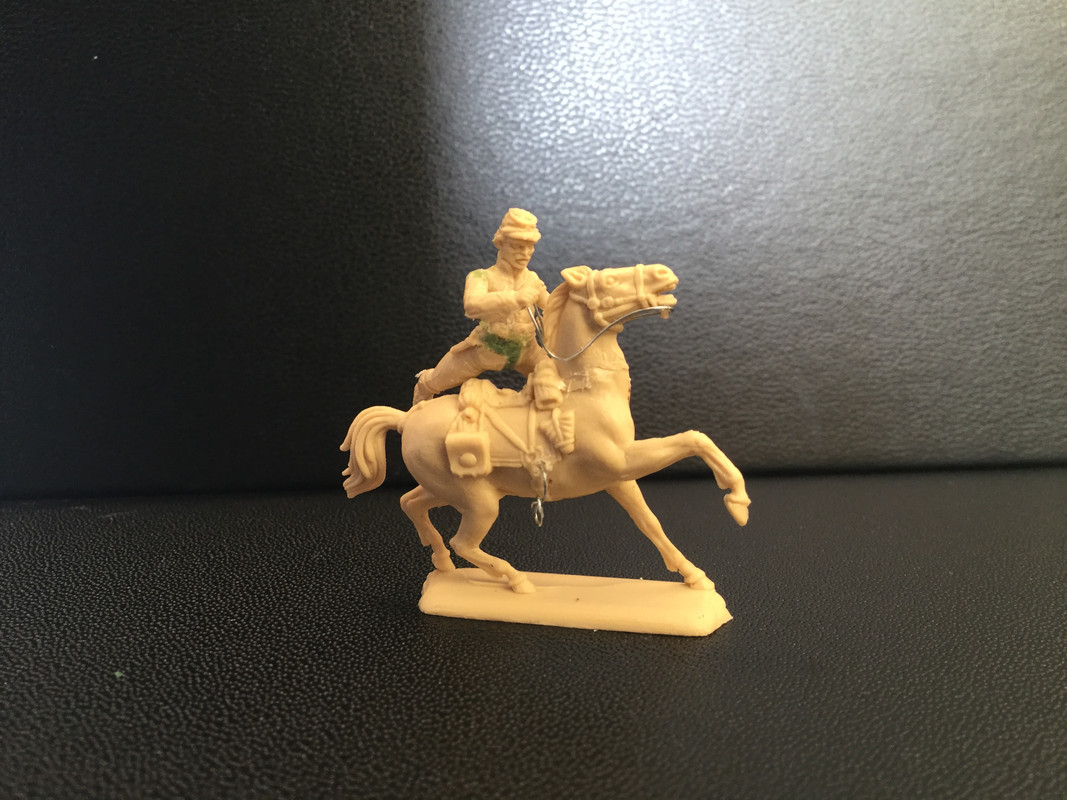
Hopefully, he will look the part after painting.
Best wishes,
Chris
Thank you to everyone for their kind words which are most appreciated.
I noticed this super piece of modelling from the Gerschite in Miniturian forum as part of Salaberry’s Napoleonic project.
The sheer dynamism of the subject is in my opinion brilliant.
Therefore I thought some chopping should be attempted to see if I could get something similar.
A poor Itallieri US cavalryman was selected and by chopping his leg off and rotating it I got the look I was after.
Unravelled picture wire provides new reins and the stirrups.
A little greenstuff fills the poor chap’s crotch.
Hopefully, he will look the part after painting.
Best wishes,
Chris
-
C M Dodson
- Posts: 2568
- Member since:
01 May 2015, 18:48
-
MABO
- Supporting Member (Gold)
- Posts: 9146
- Member since:
12 May 2008, 18:01
Help keep the forum online!
or become a supporting member
He will speak in a quite falsetto voice. Don't think I want to be one of your toy soldiers. but it's good work.
-
Santi Pérez likes this post. •
- Reply
-

Susofrick
- Supporting Member (Gold)
- Posts: 7678
- Member since:
19 Feb 2008, 12:10
Many thanks to Sala for his help with the ADC idea.

I have now completed Hooker’s First Corps and have commenced work on Mansfield’s Second Corps.
This Corps included a great many recruits with very limited training.
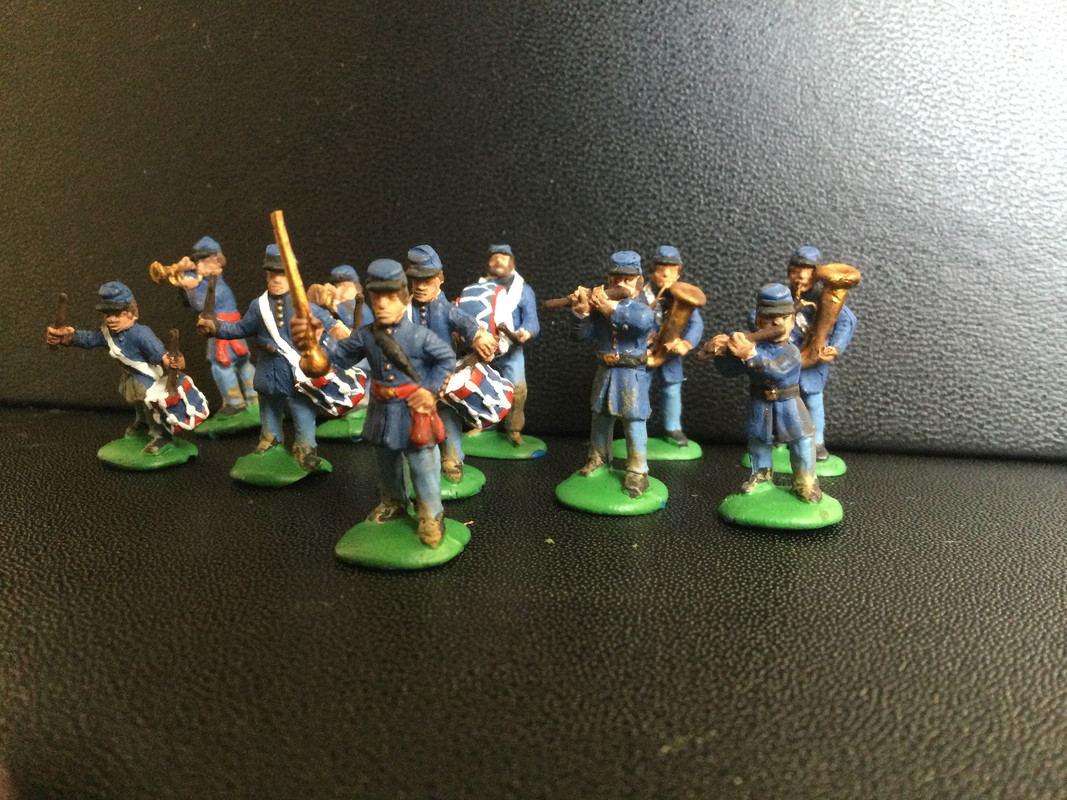
I felt that a little martial music might cheer them on.
Having done a spot of research I carved up the Stretlets offering and added a bass drummer with a drum from greenstuff and stretched sprue drumsticks.
The brass instrument of choice was the saxhorn it seems.
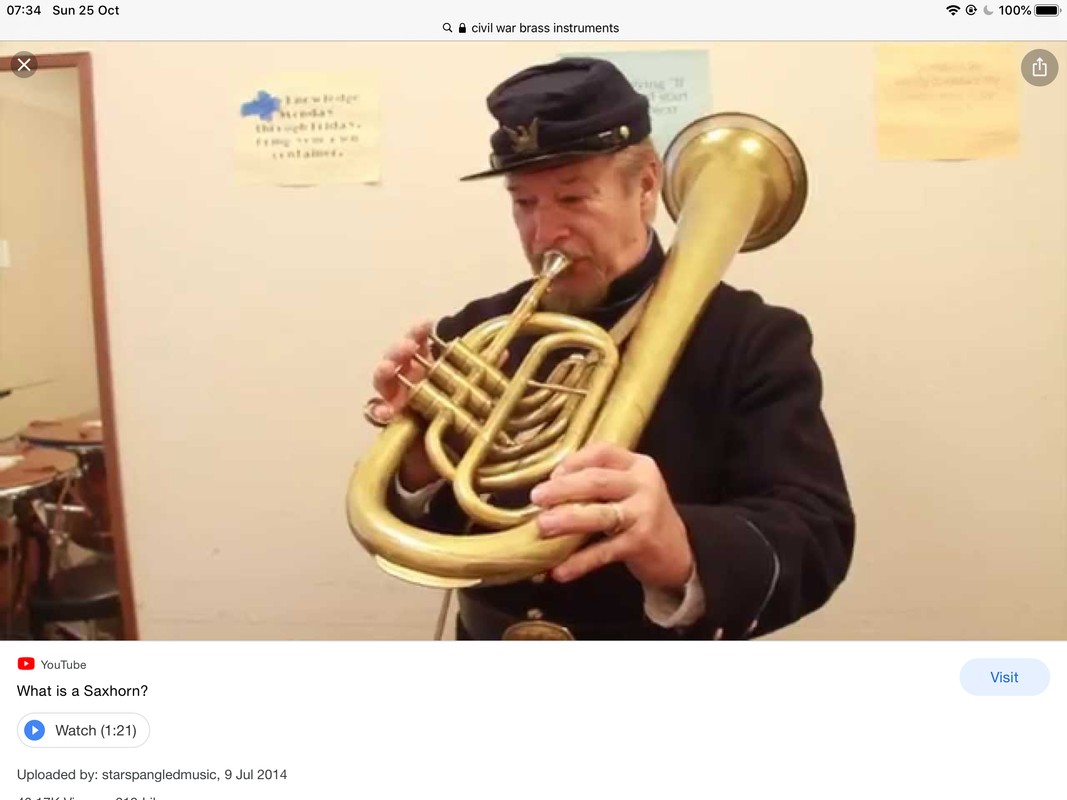
I used thin wire for the pipe work with greenstuff for the bell section.
Itallieri flag bearers heavily mated with US cavalry arms made up the players.
 q
q
They are not perfect but I think they will pass muster in the field.
Gentlemen, ‘When Johnny comes marching home’.
1/2/3/4........
https://www.youtube.com/watch?v=4tIsXLyZcWI
Lots to do.
Chris
I have now completed Hooker’s First Corps and have commenced work on Mansfield’s Second Corps.
This Corps included a great many recruits with very limited training.
I felt that a little martial music might cheer them on.
Having done a spot of research I carved up the Stretlets offering and added a bass drummer with a drum from greenstuff and stretched sprue drumsticks.
The brass instrument of choice was the saxhorn it seems.
I used thin wire for the pipe work with greenstuff for the bell section.
Itallieri flag bearers heavily mated with US cavalry arms made up the players.
qThey are not perfect but I think they will pass muster in the field.
Gentlemen, ‘When Johnny comes marching home’.
1/2/3/4........
https://www.youtube.com/watch?v=4tIsXLyZcWI
Lots to do.
Chris
-
C M Dodson
- Posts: 2568
- Member since:
01 May 2015, 18:48
Reinforcements
I am currently building up Mansfield’s Corps and the arrival of the new Hat figures has allowed me to proceed in style.
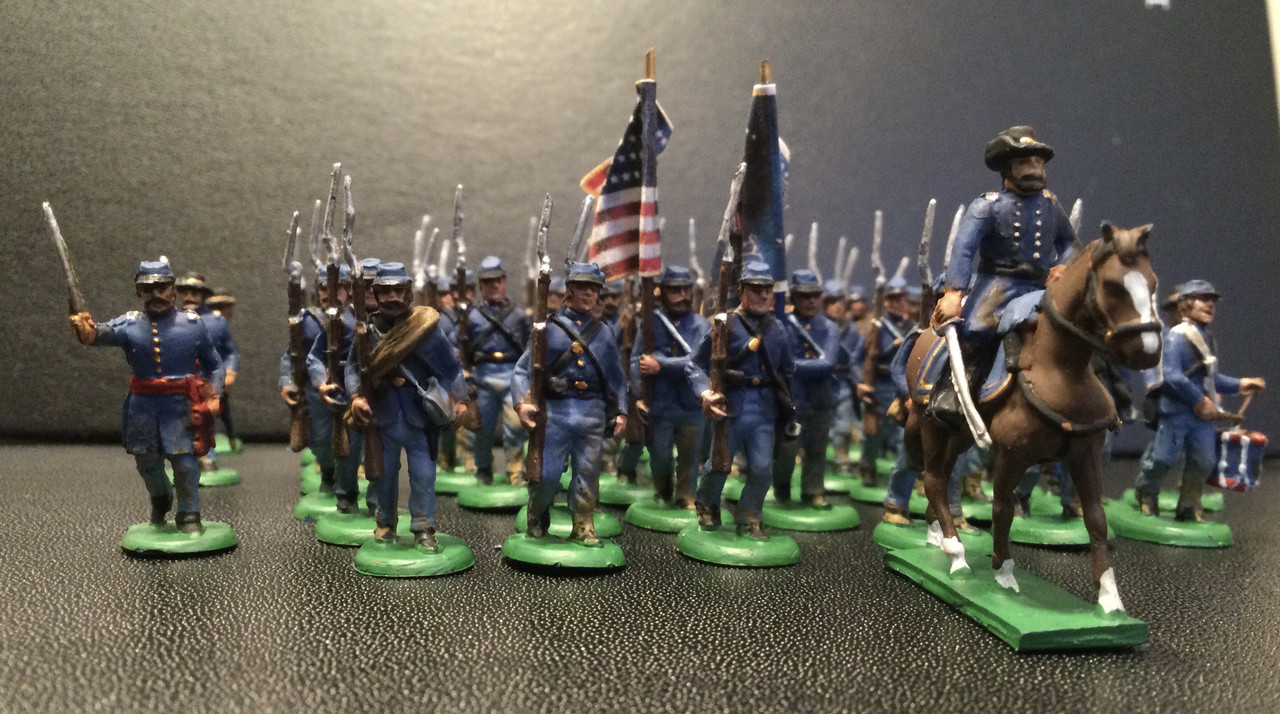
I really like these figures and they are very much in the the Perry style.
I have kept the red sashes for the junior officers as the Corps was predominately inexperienced and yet to learn that symbols of rank equated to special target practise.
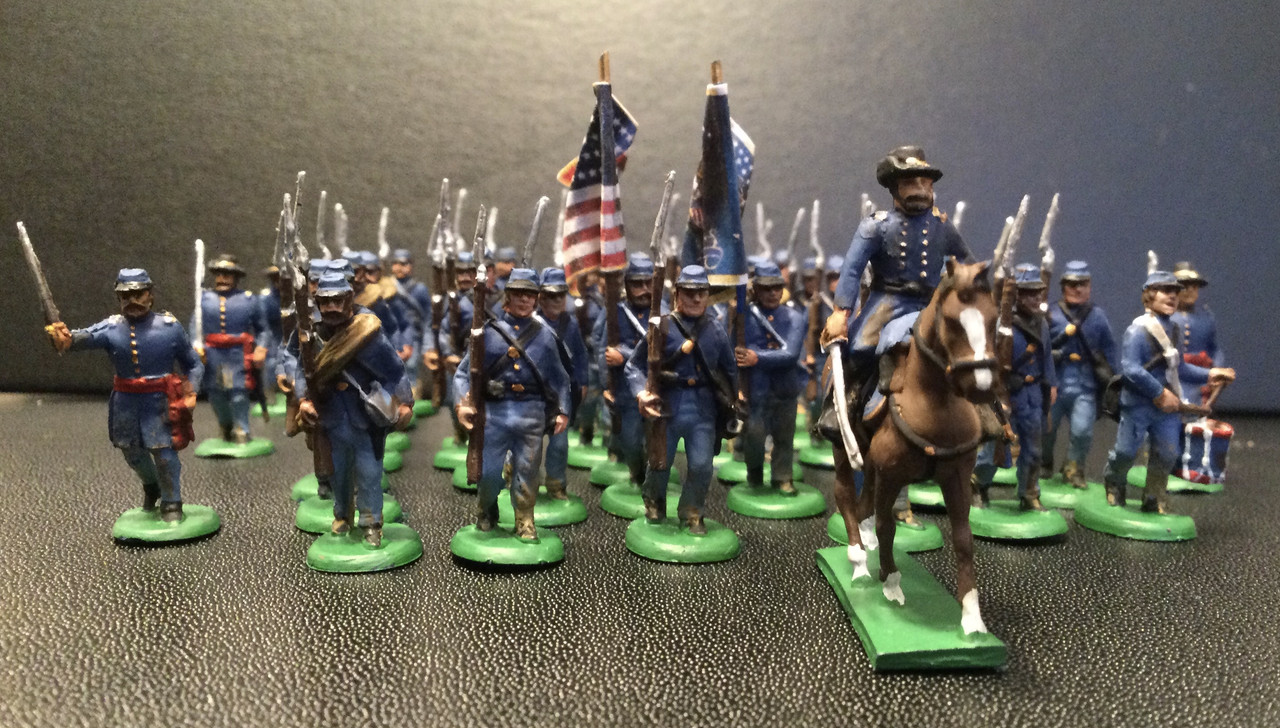
The Hat mounted officer is very small in my opinion so I used an Itallieri fellow for this unit.

My order was troubled by mould flash and the bayonets especially are resistant to paint even after washing.
This is a huge disappointment but I will try priming /PVA to get a better adhesion.
On to Richmond!
Lots to do.
Chris
I am currently building up Mansfield’s Corps and the arrival of the new Hat figures has allowed me to proceed in style.
I really like these figures and they are very much in the the Perry style.
I have kept the red sashes for the junior officers as the Corps was predominately inexperienced and yet to learn that symbols of rank equated to special target practise.
The Hat mounted officer is very small in my opinion so I used an Itallieri fellow for this unit.
My order was troubled by mould flash and the bayonets especially are resistant to paint even after washing.
This is a huge disappointment but I will try priming /PVA to get a better adhesion.
On to Richmond!
Lots to do.
Chris
-
C M Dodson
- Posts: 2568
- Member since:
01 May 2015, 18:48