Work in Progress

Tyre 332 BC

Posted by Cryns on 25 Jan 2017, 11:40

For learning how to build a merchantvessel and especially how to mold and cast it in several parts, I build a small ship first, based upon the 14th century BC bronze age Uluburun shipwreck that was found at the southern Turkish coast near Kas. Here is a full size replica:

Image

The ship is 1100 years older than my subject! But the hull structure does not differ much from the classical period.

Image

It is interesting to notice the differences with later ships:
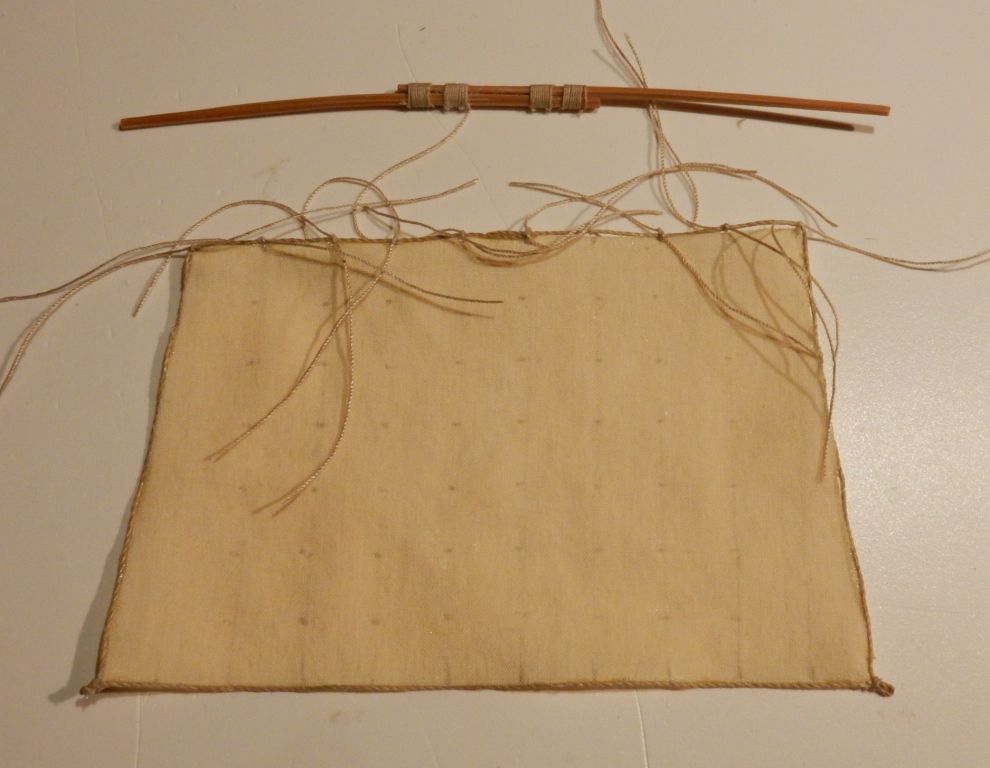
1) A wooden boom along the foot of the sail
2) The high suspending of the steering oars with the top serving as a counter weight to the oar blade
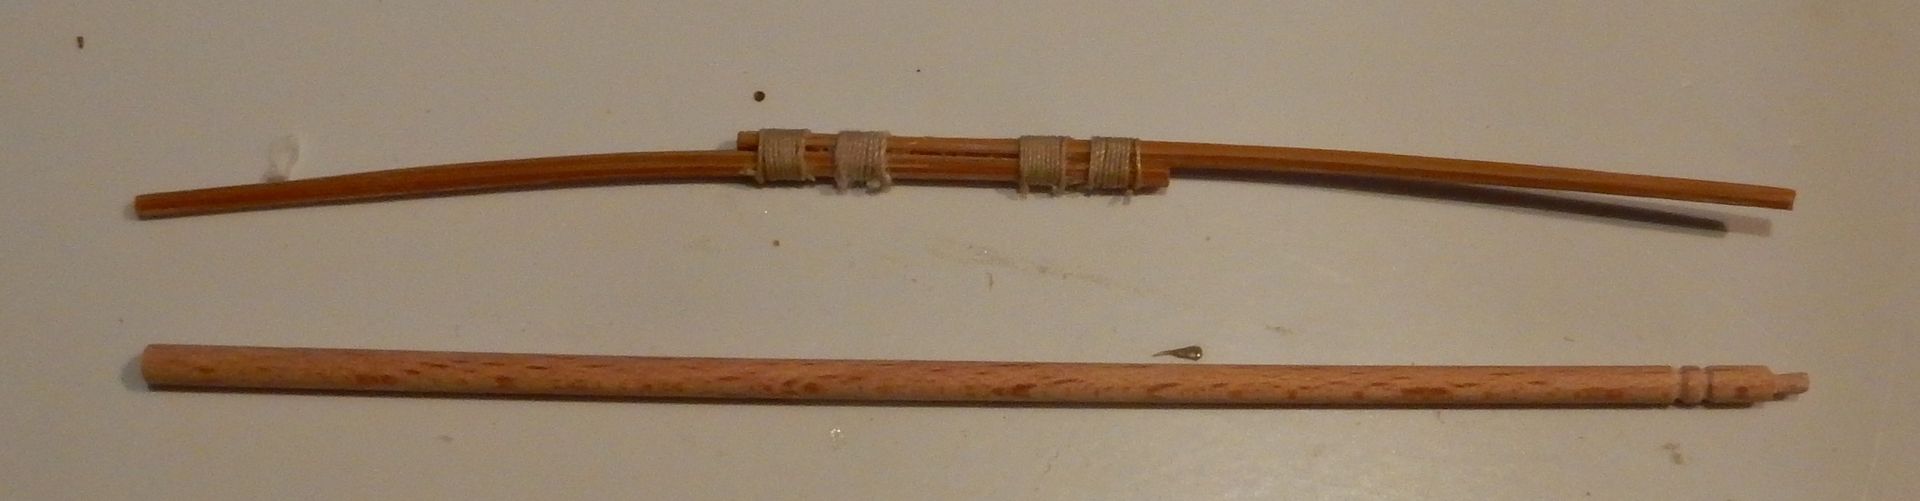
3) A high mast top for several cable-lifts one above the other
All of these features find their origin in Egyptian shipbuilding.

For the Tyre project I will change these bronze age items into iron age ones to correct the historical image of the model.
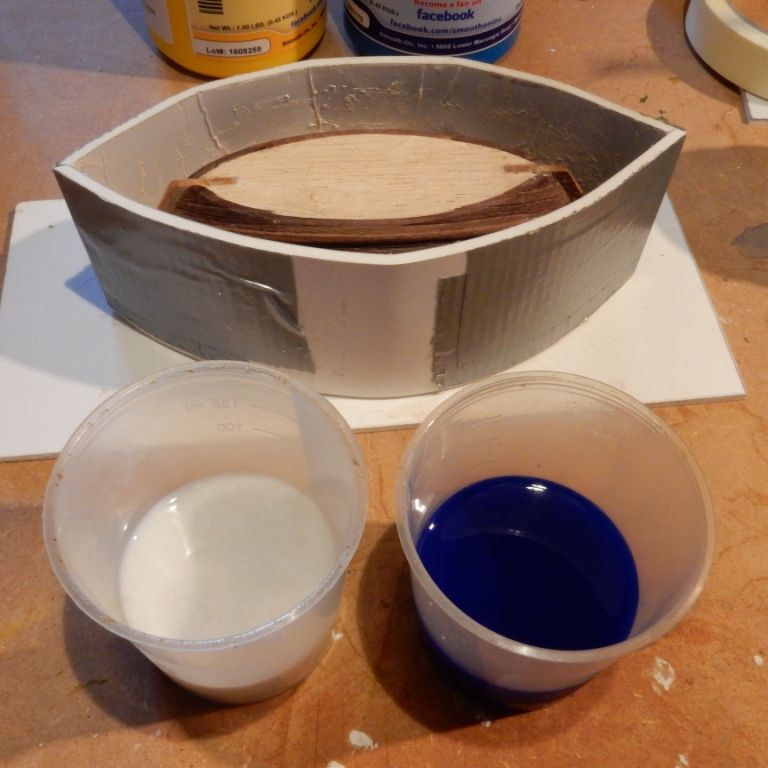
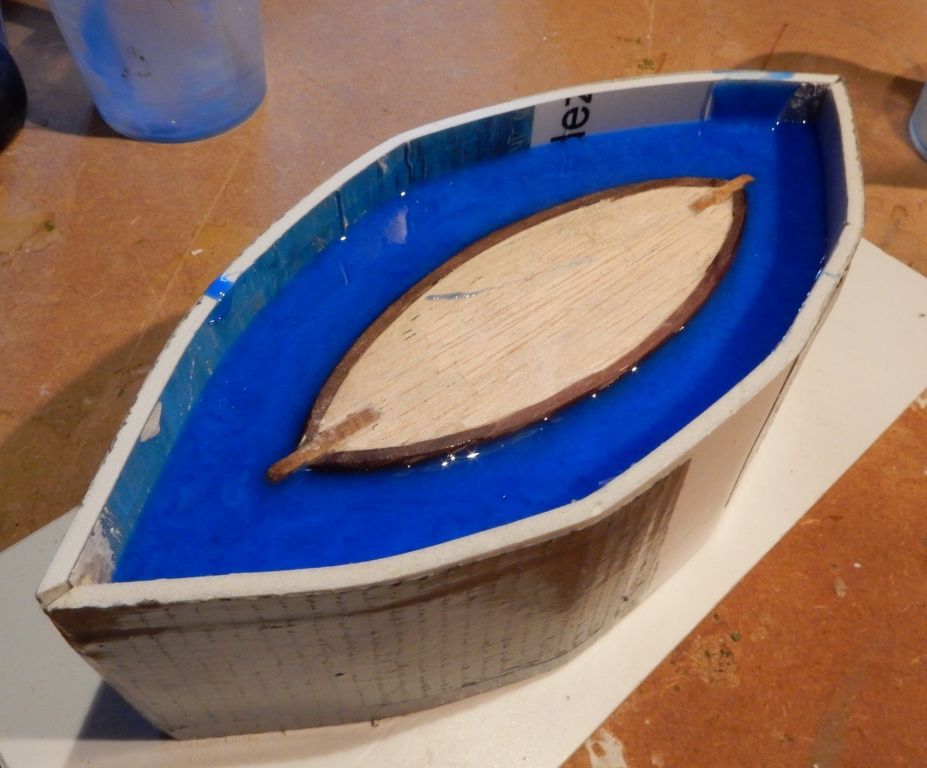
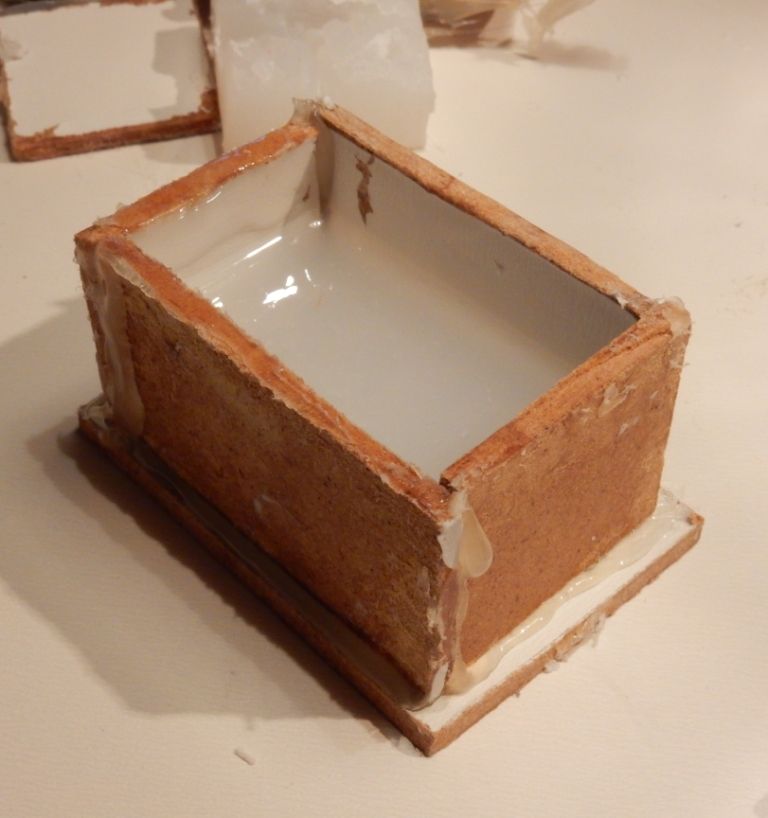
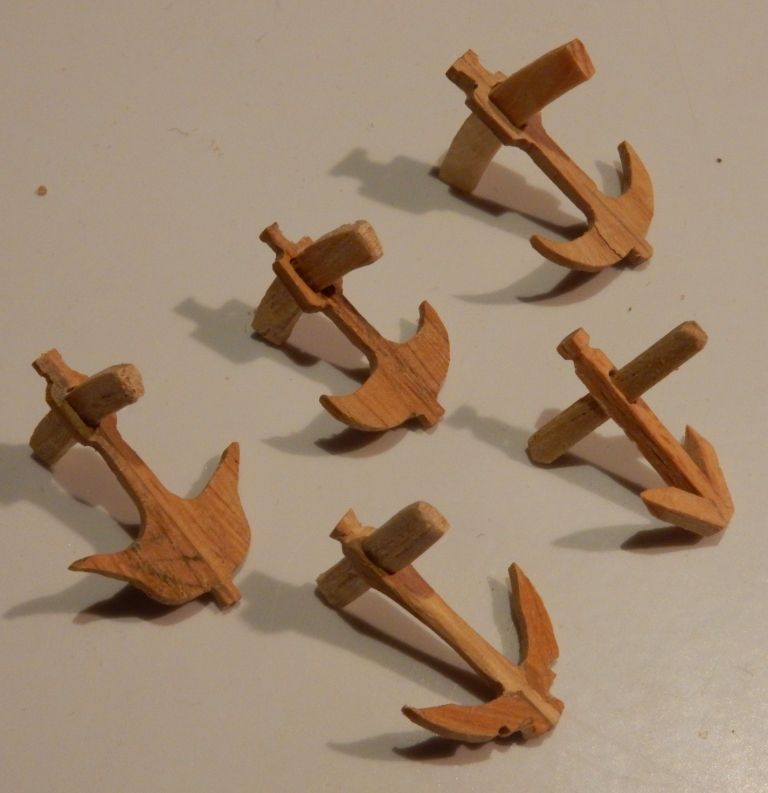
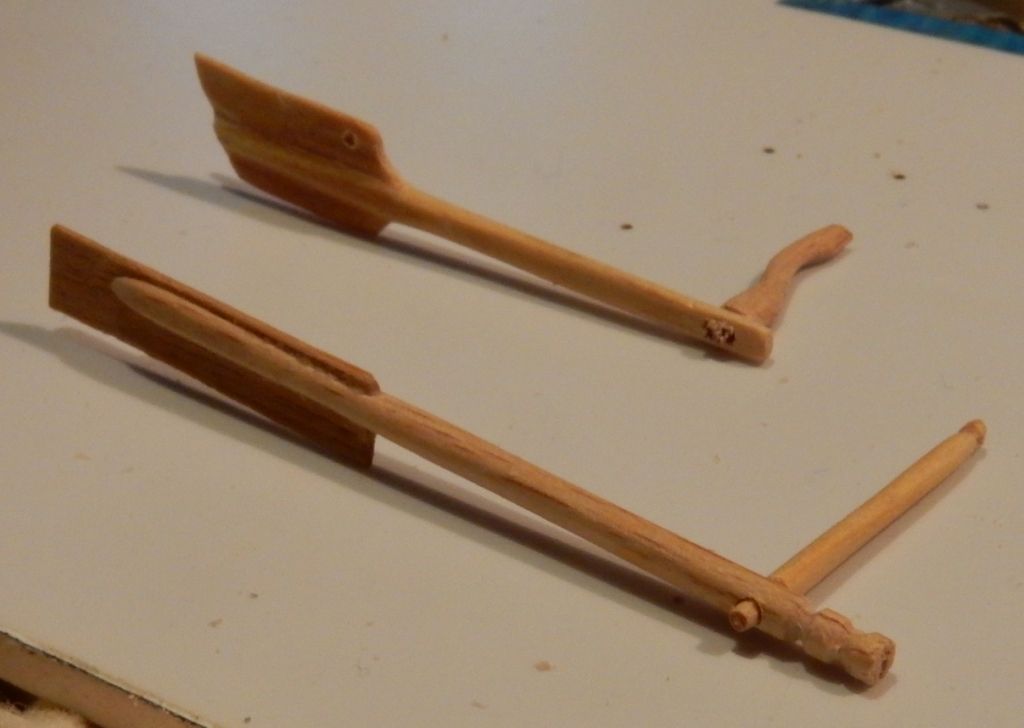
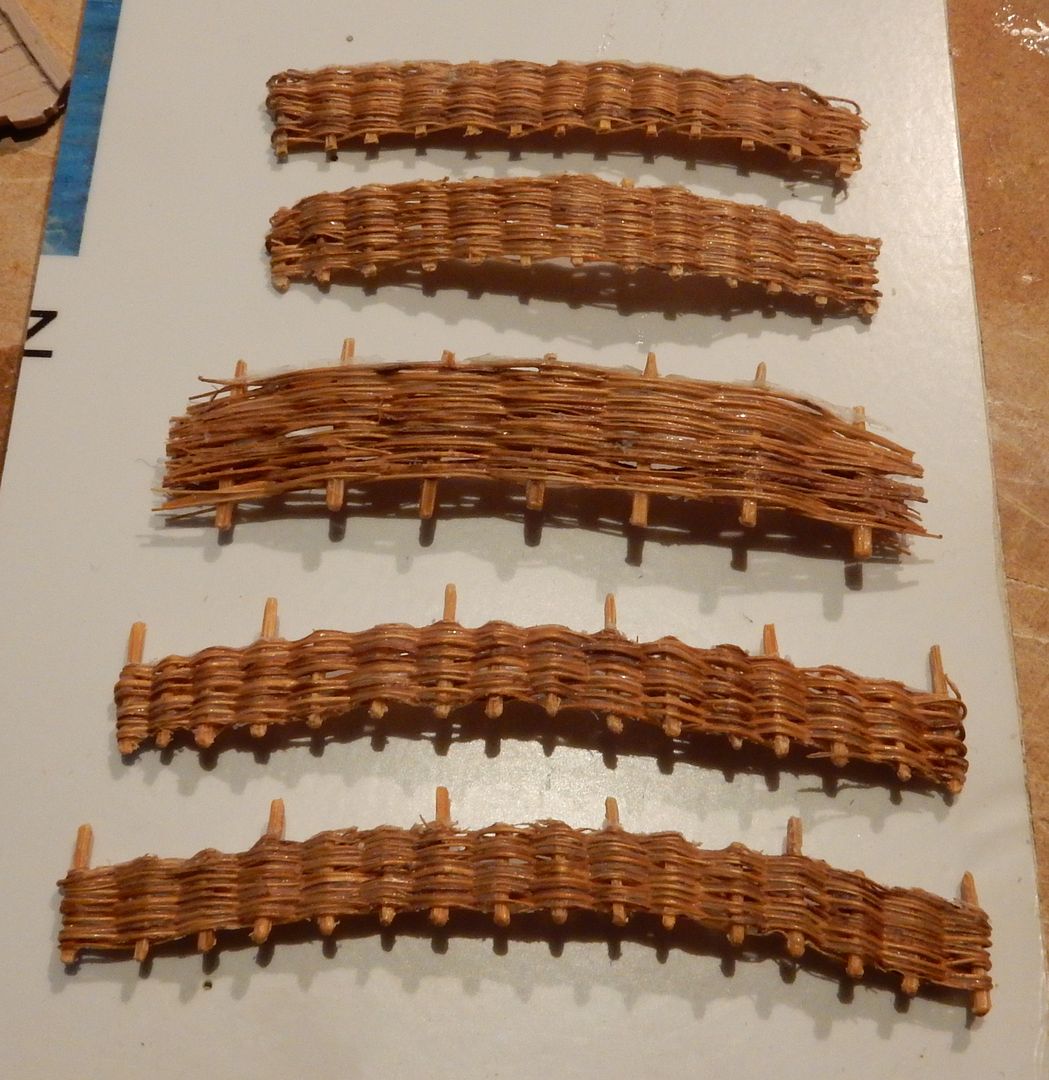
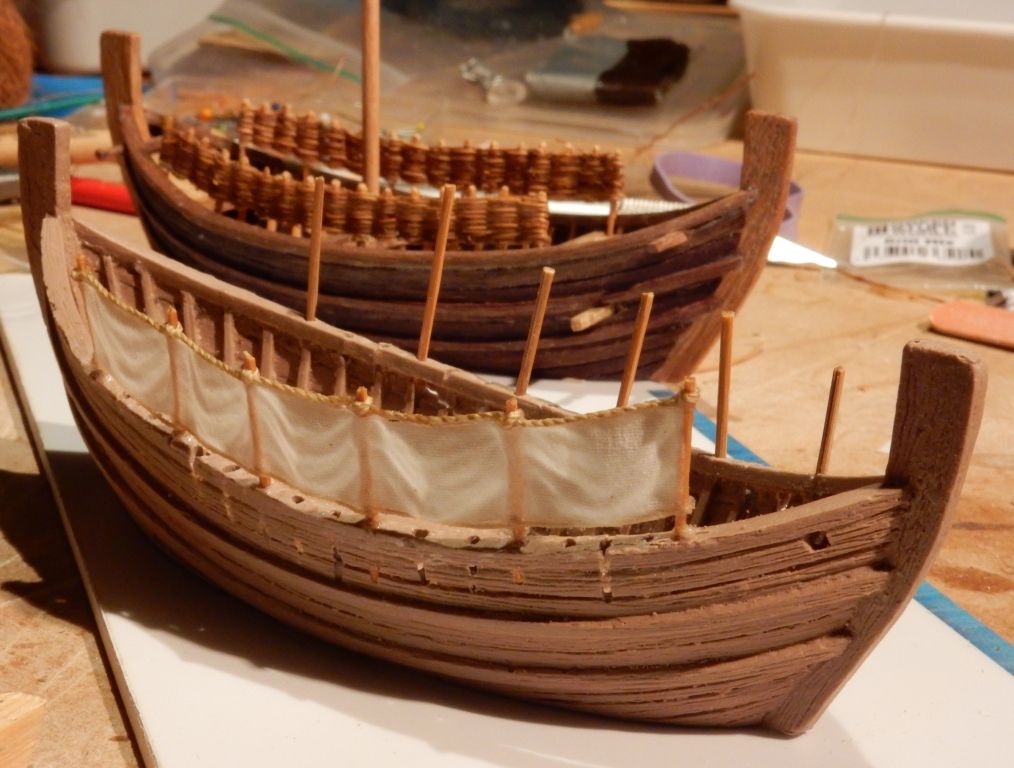
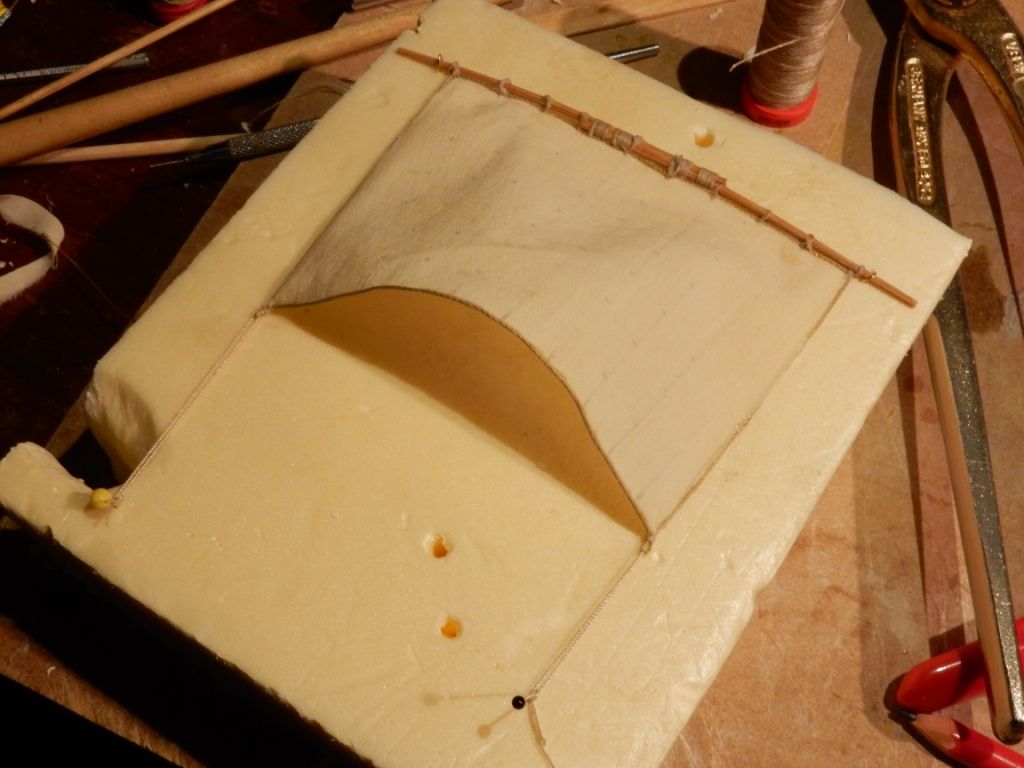
A scale replica:

Image

Building a boat for the gaming table is easyer because no proper hull is needed. A flat piece of plywood makes a strong and simple base to start with.

Image

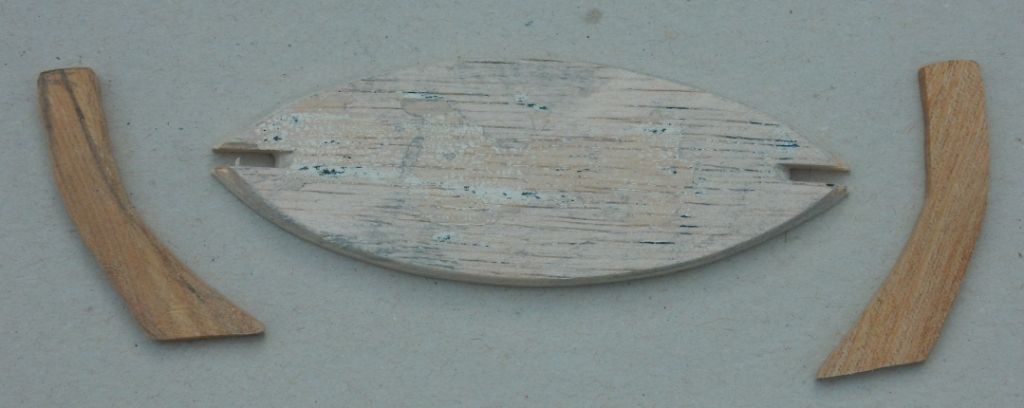
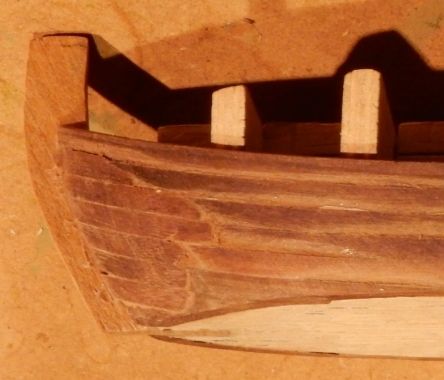
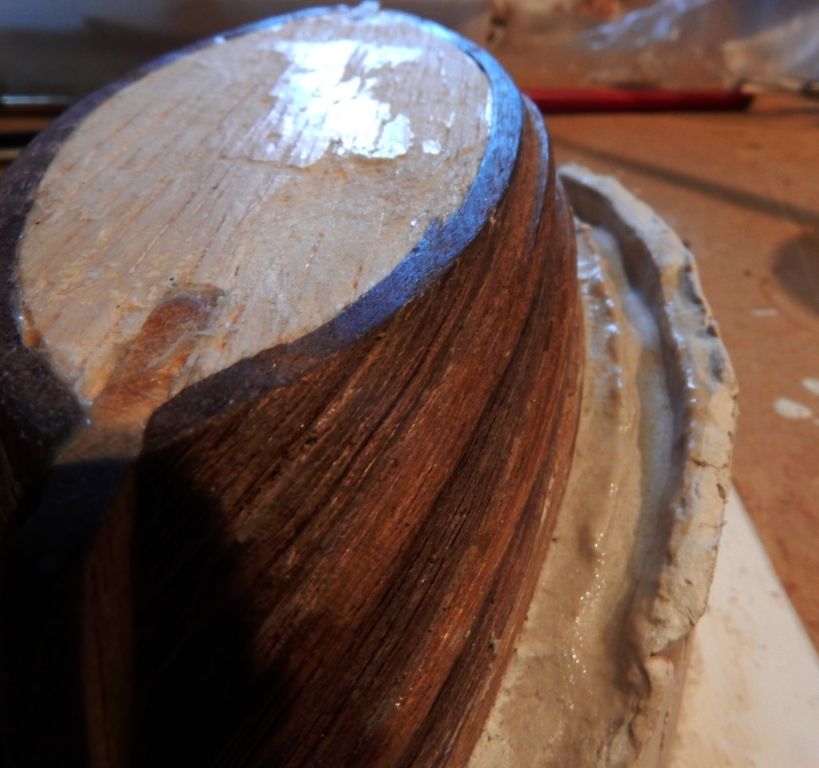
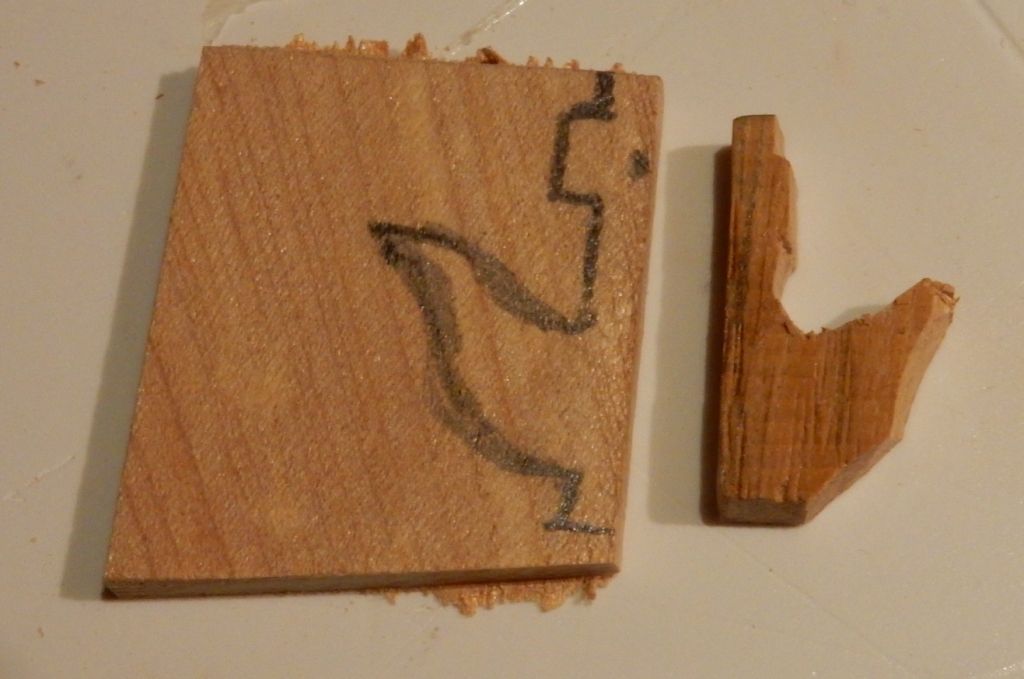
For heavy, strong curved parts like stem and stern I use very hard wood that does not break easy. I do not saw these but cut them with a knive in shape.

Image

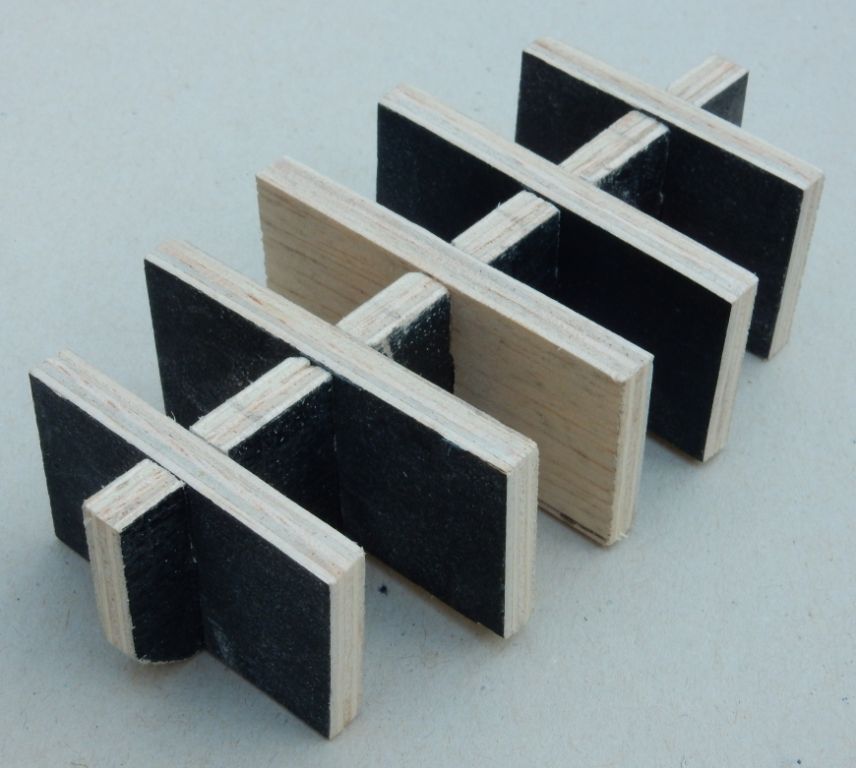
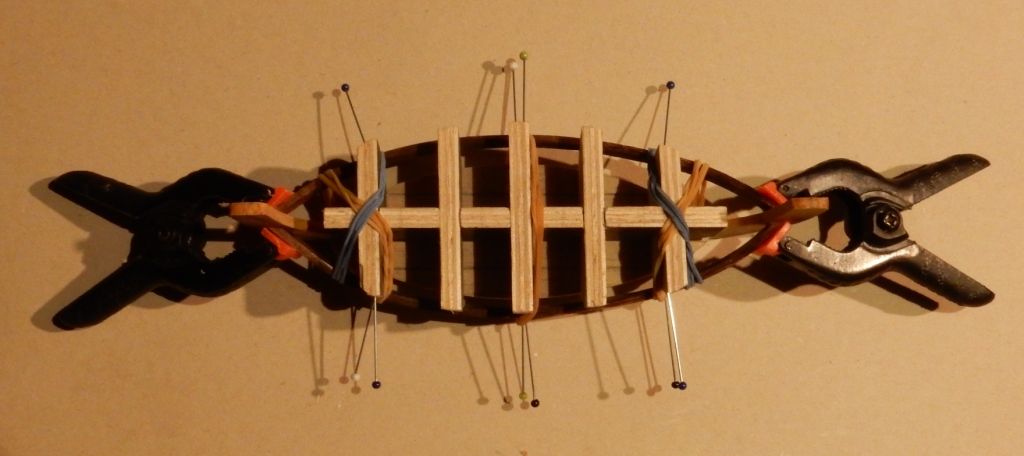
For the temporary inner frame I used a very thick balsa plywood (painted black because I found it in a trashcan.)

Image

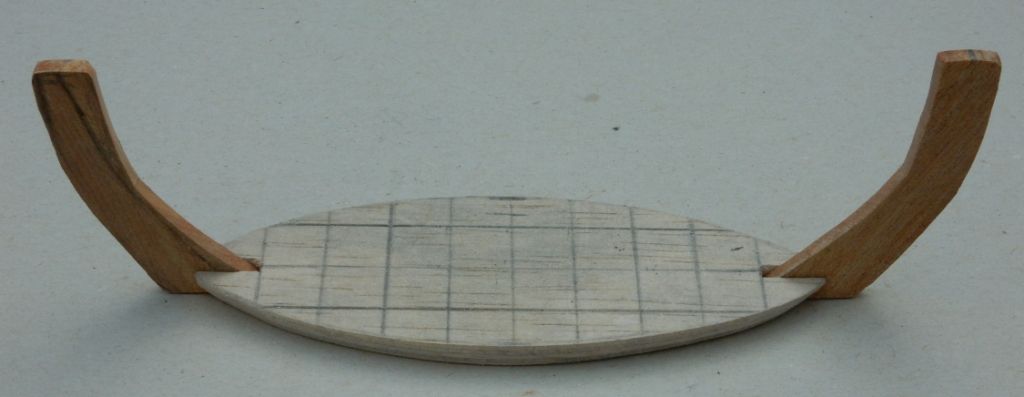
My other, first boat had a very thin plywood frame but the advantage of the heavy one is multiple: it has more stability at the joints and its easy to drive pins into the sides to hold the hull boards in place.

Image

The frame is fastened to the ships base by a few drops of white glue only, so it can easily be removed after the hull is ready.

Image

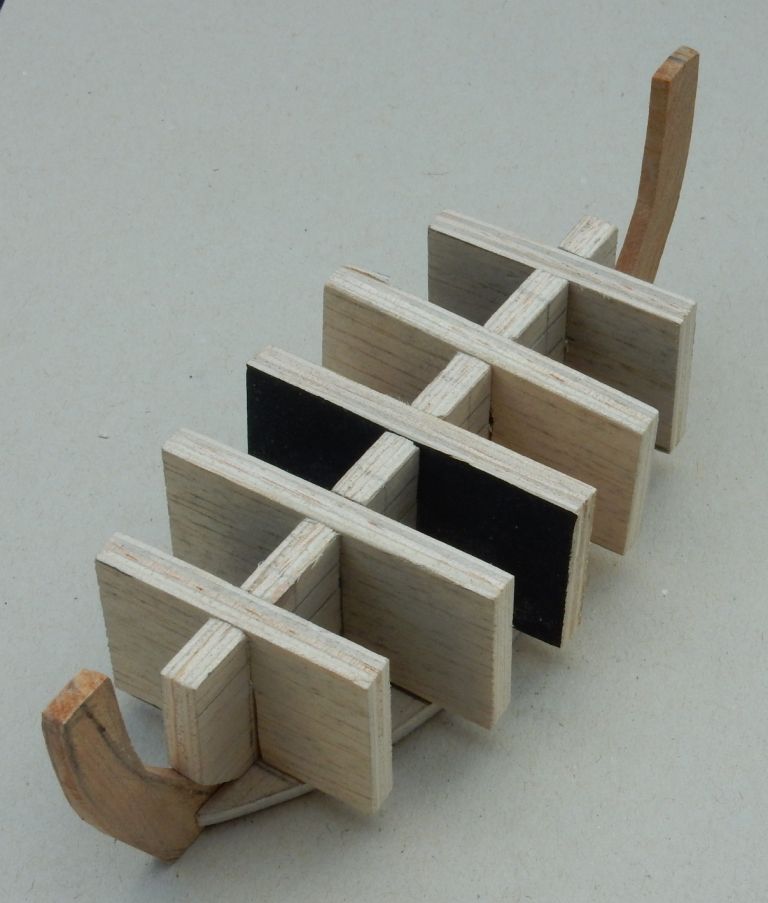
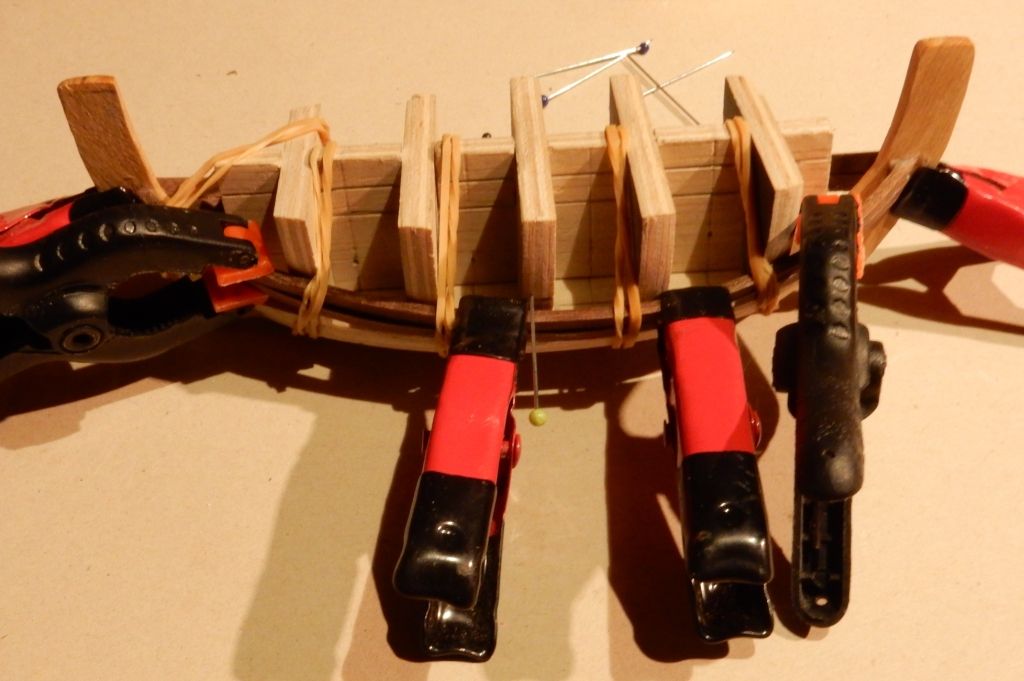
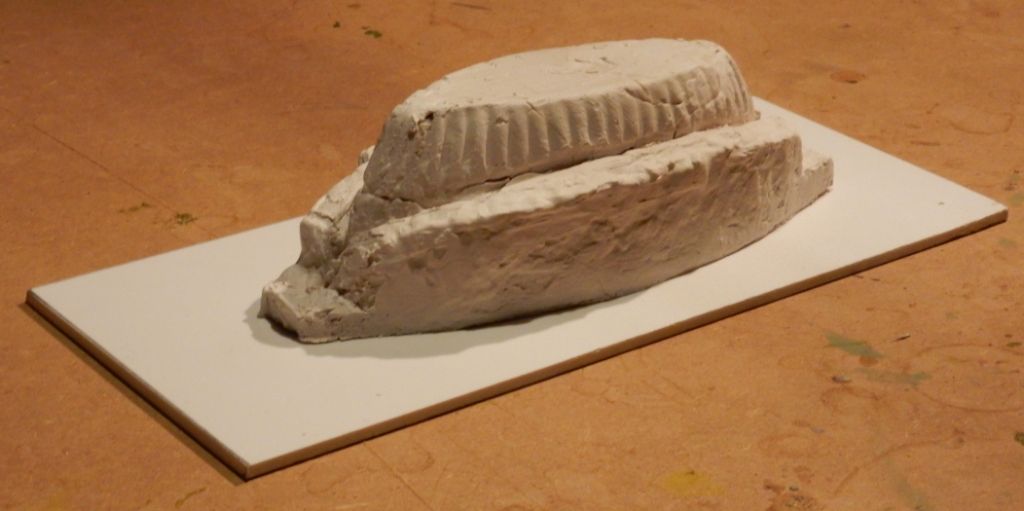
The frame is sanded into the right shape.

Image

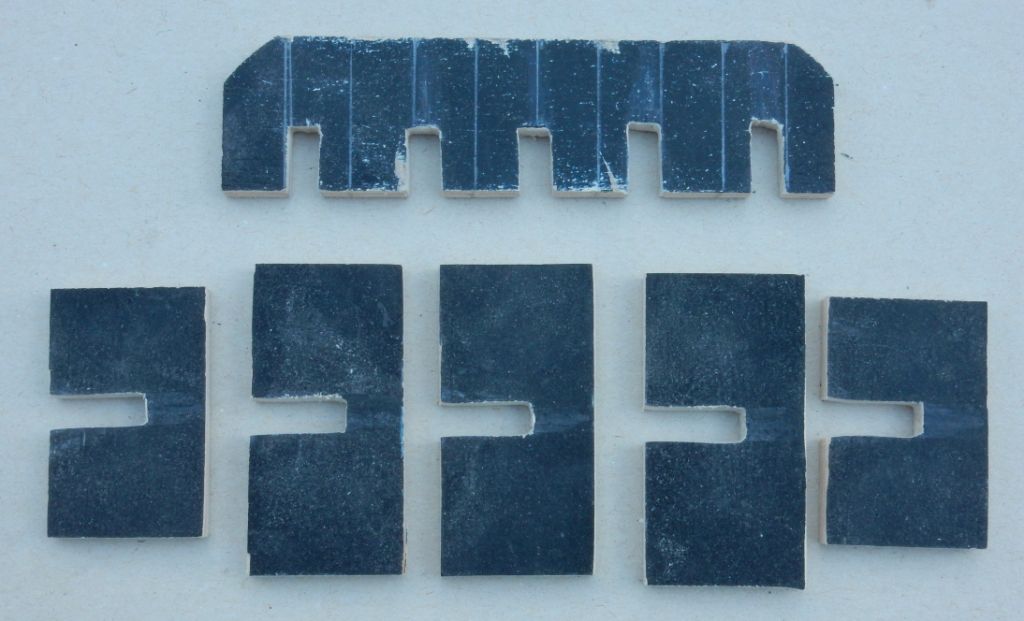
For hull boards a relatively thick wood is used so the shape of the hull can be corrected later on by sanding.

Image

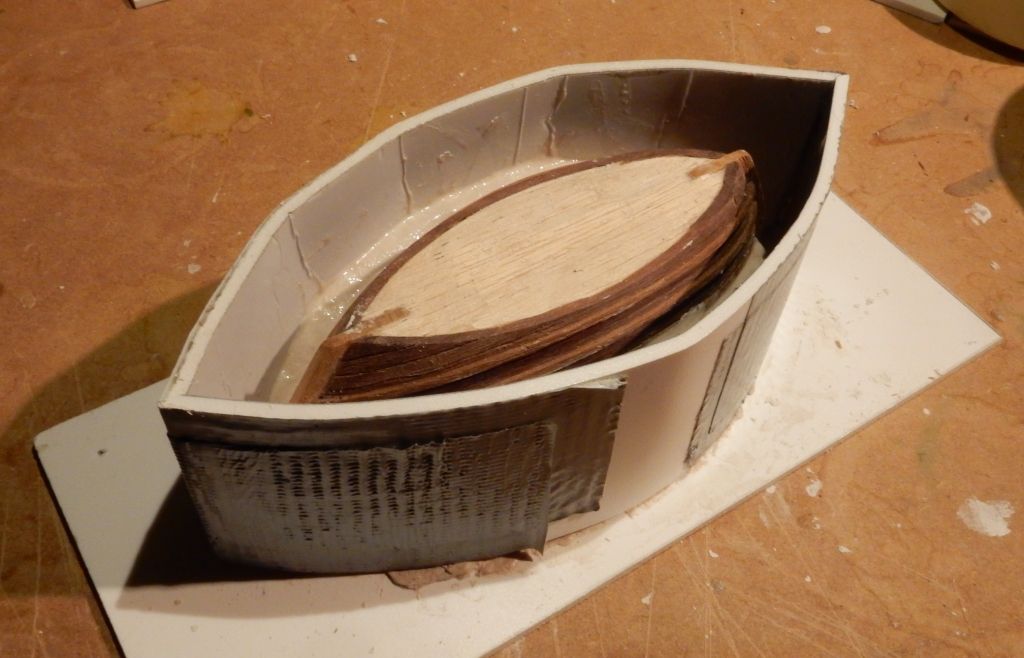
The boards are glued to stem and stern only. Thats why the pins are needed, to keep them in position.

Image

The way of building is just like the ancients did it: hull first, the inner ribs will be added later on. So at this stage the hull boards have to be glued onto the other.

Image

I have to be carefull all the time not to glue the boards accidentally to the frame because this will destroy the hull when removing the frame.

Image

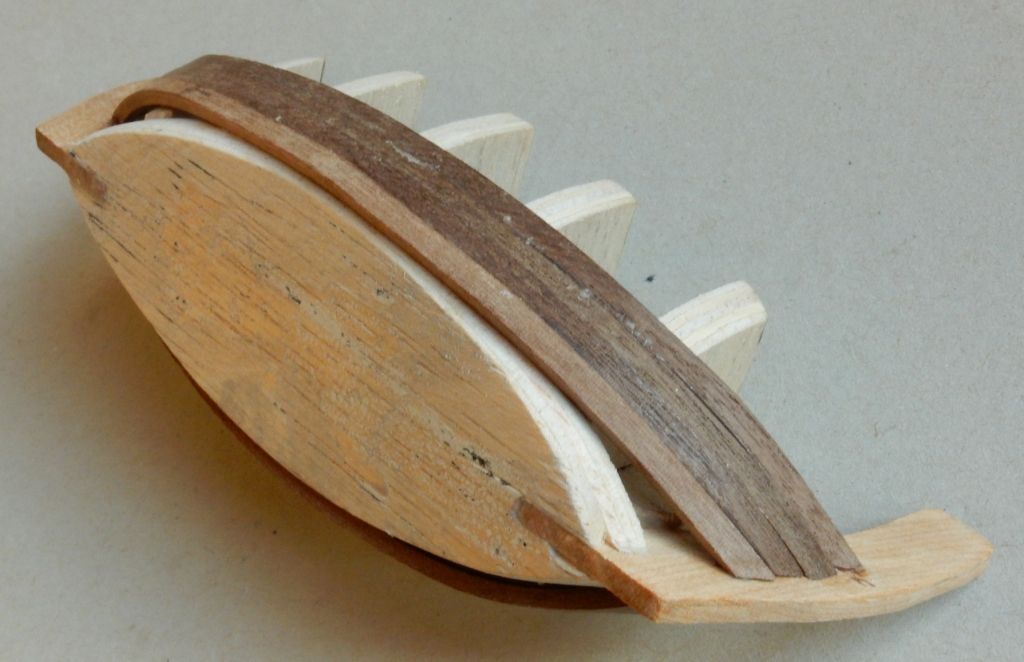
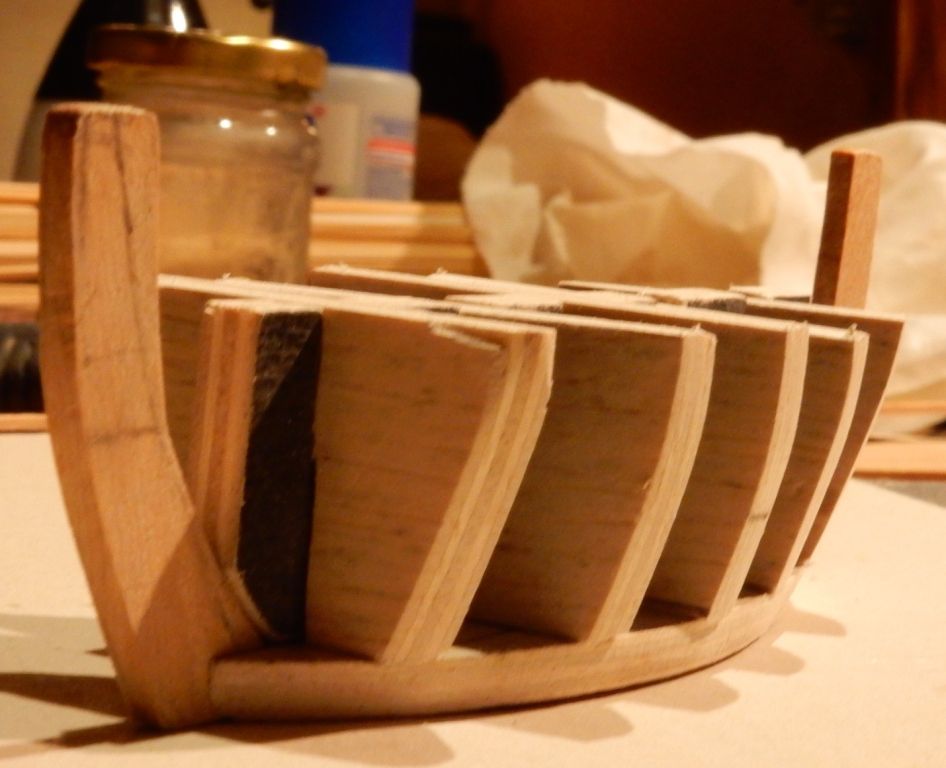
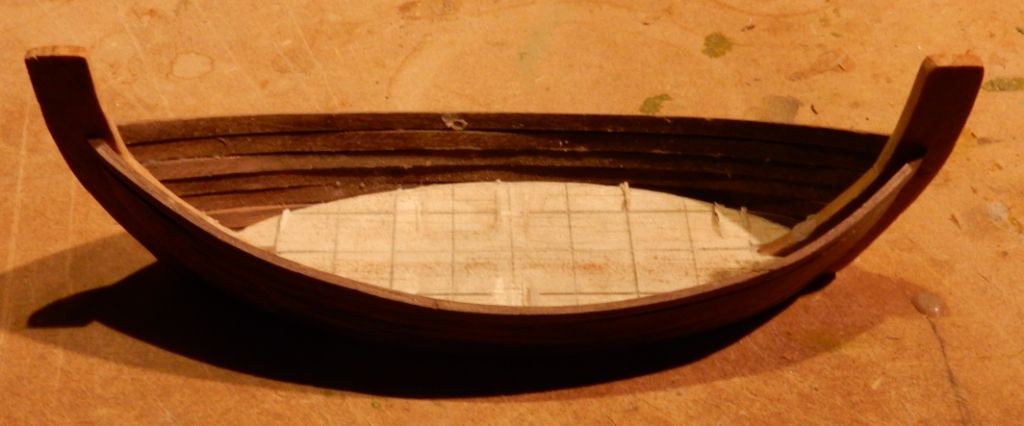
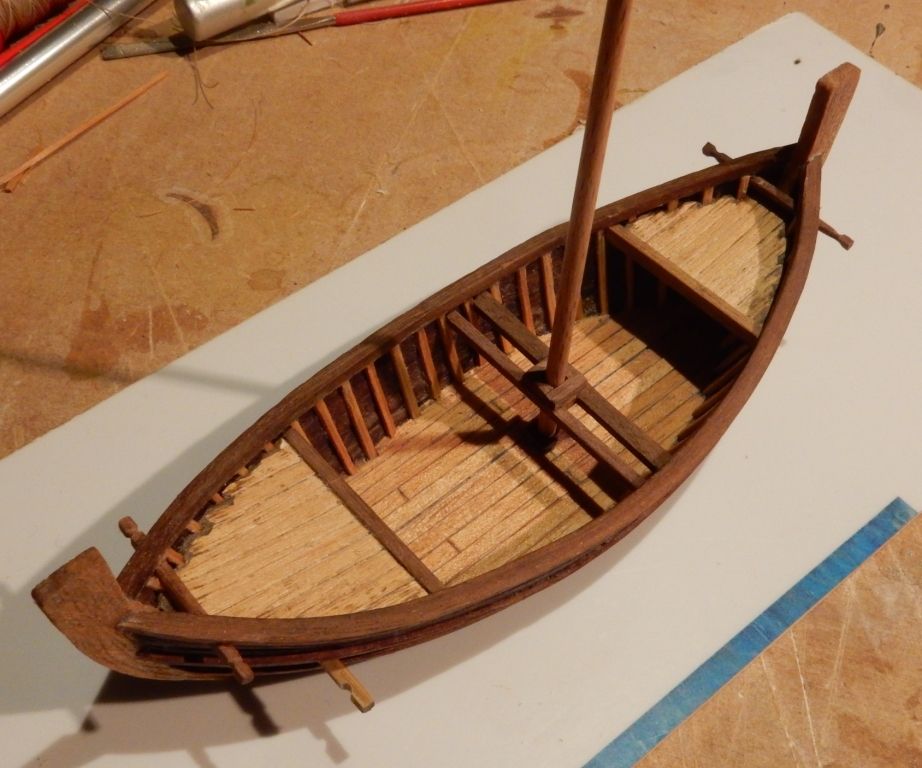
To the contrary to ancient boatbuilding and also to modern modelkit plans, because of my flat bottom, I started with attaching top boards first and ended up with lower boards last. This picture makes clear why:

Image

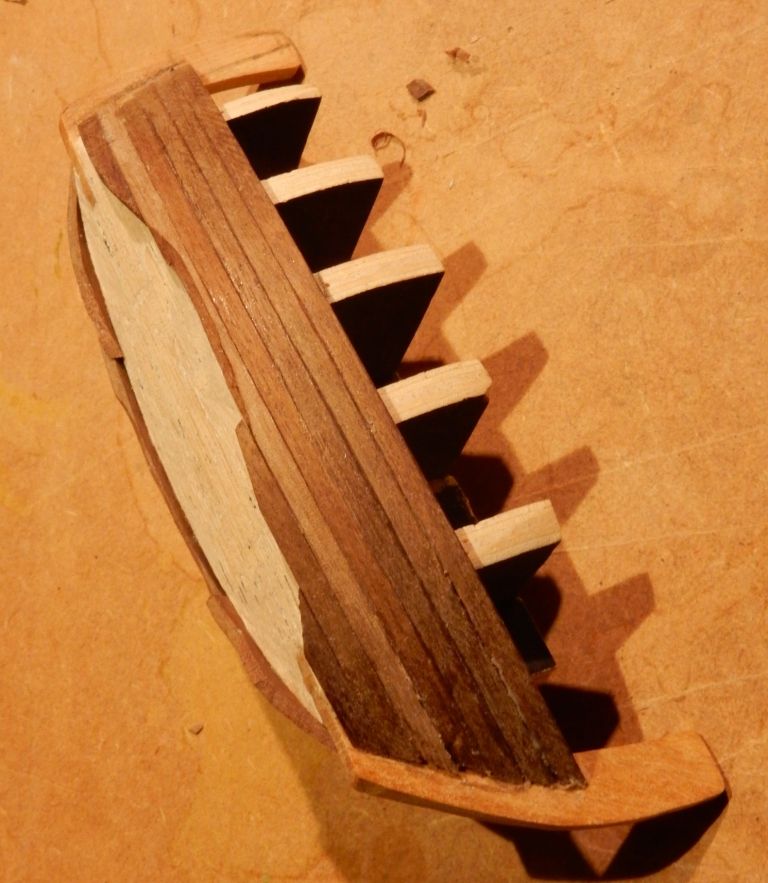
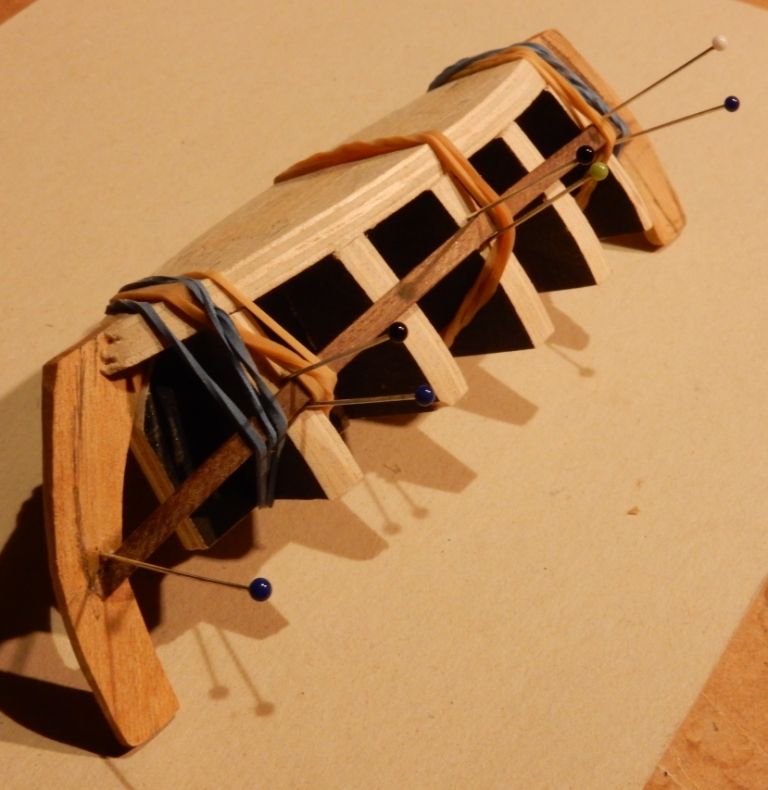
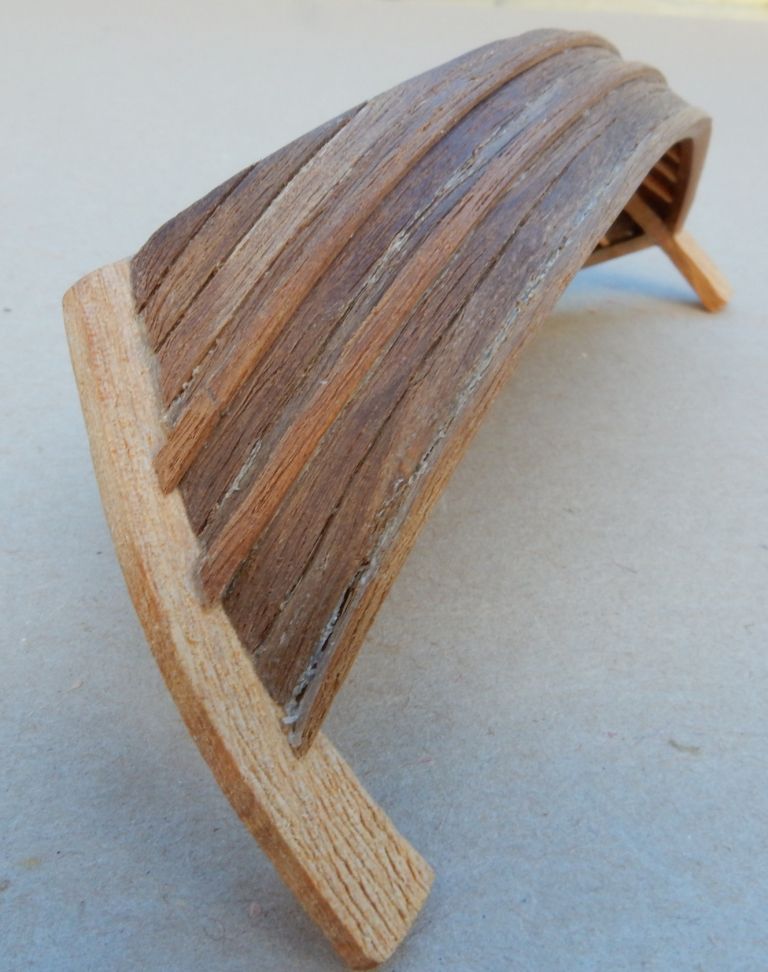
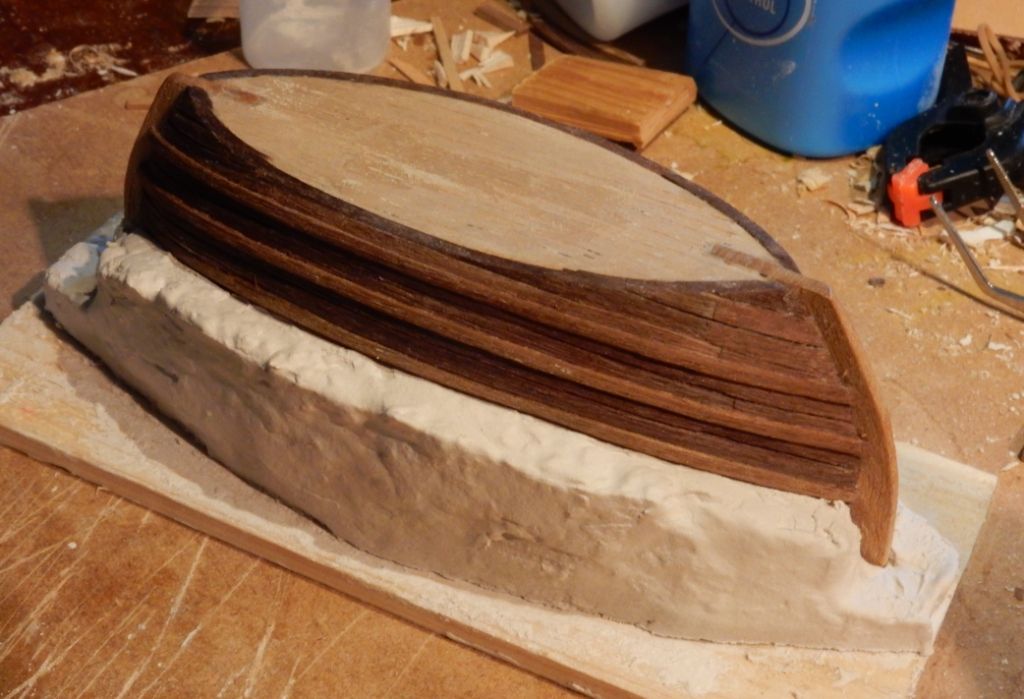
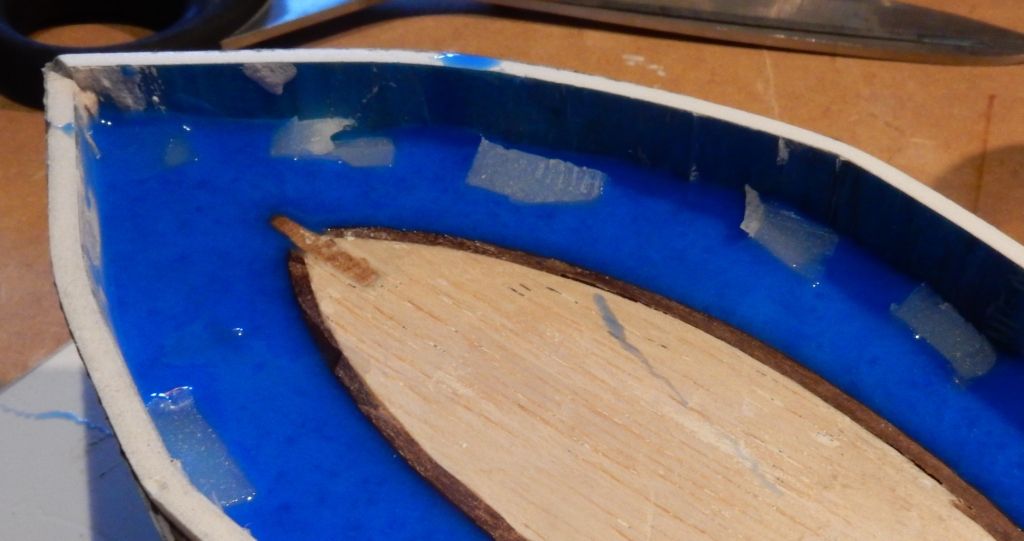
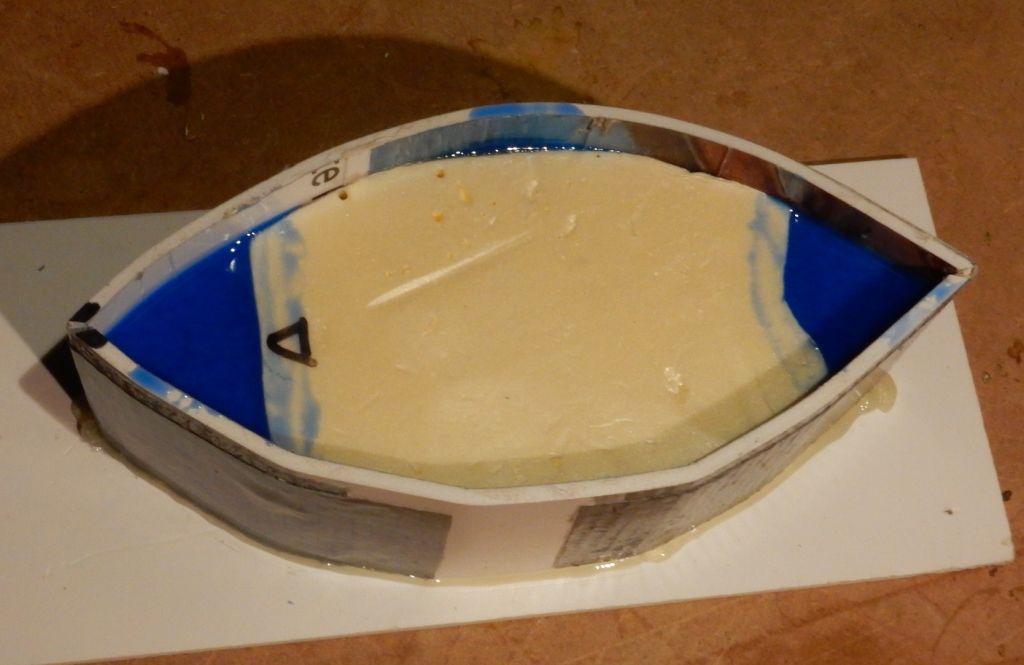
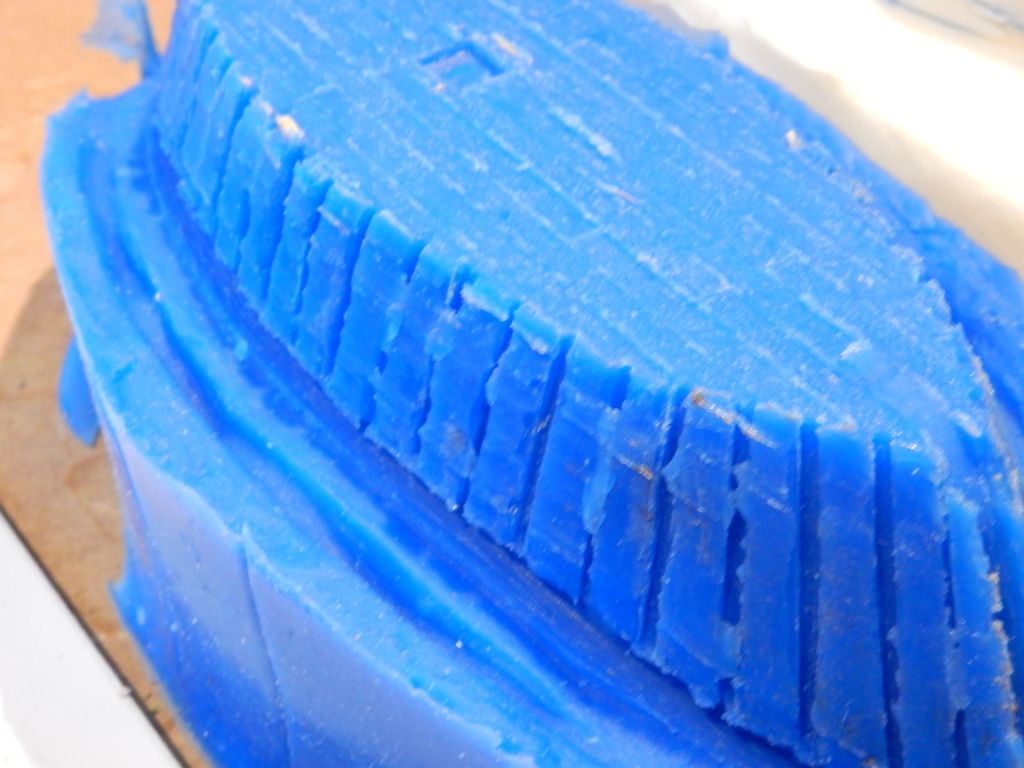
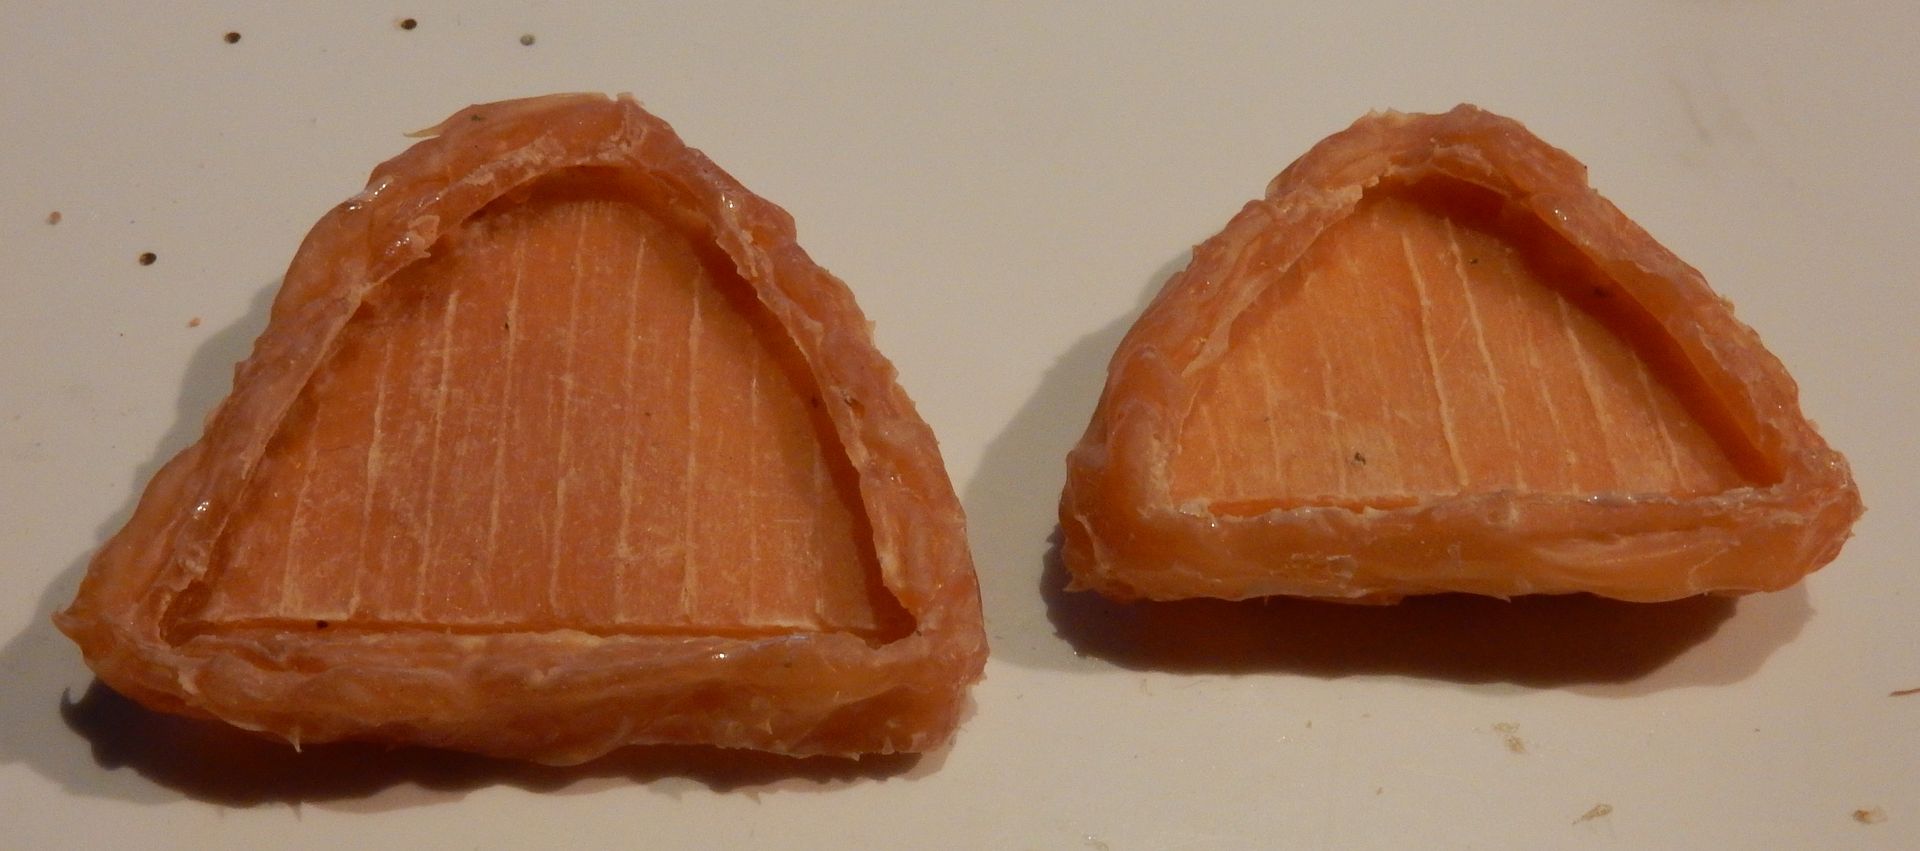
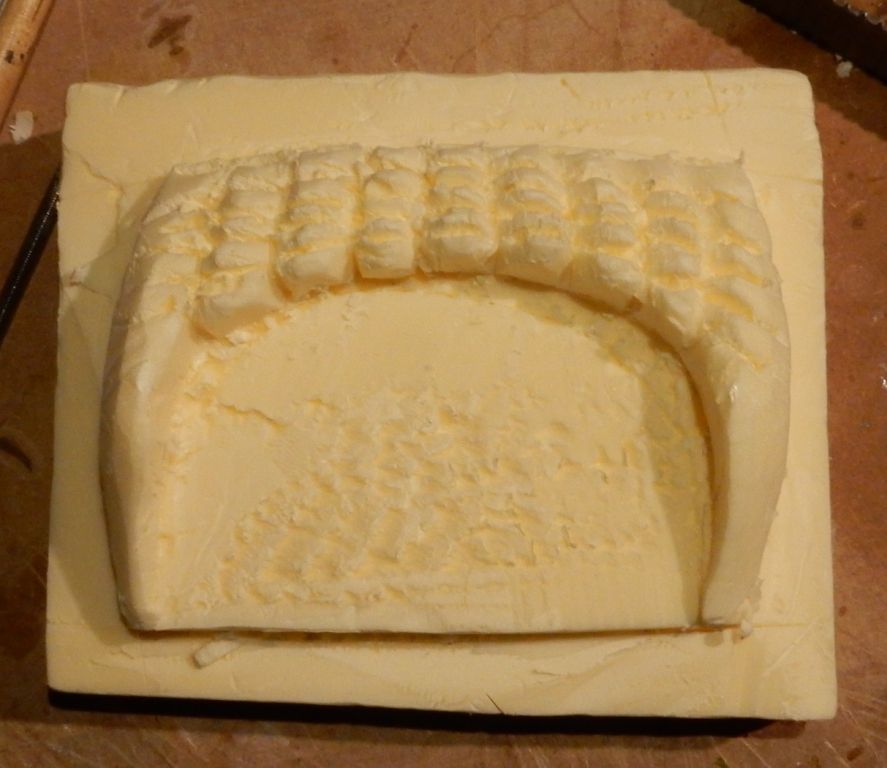
At both ends the hull appeared to have deviations when it was finished. To correct this I added a second layer of boards over the hull and sanded them into the right shape.

Image

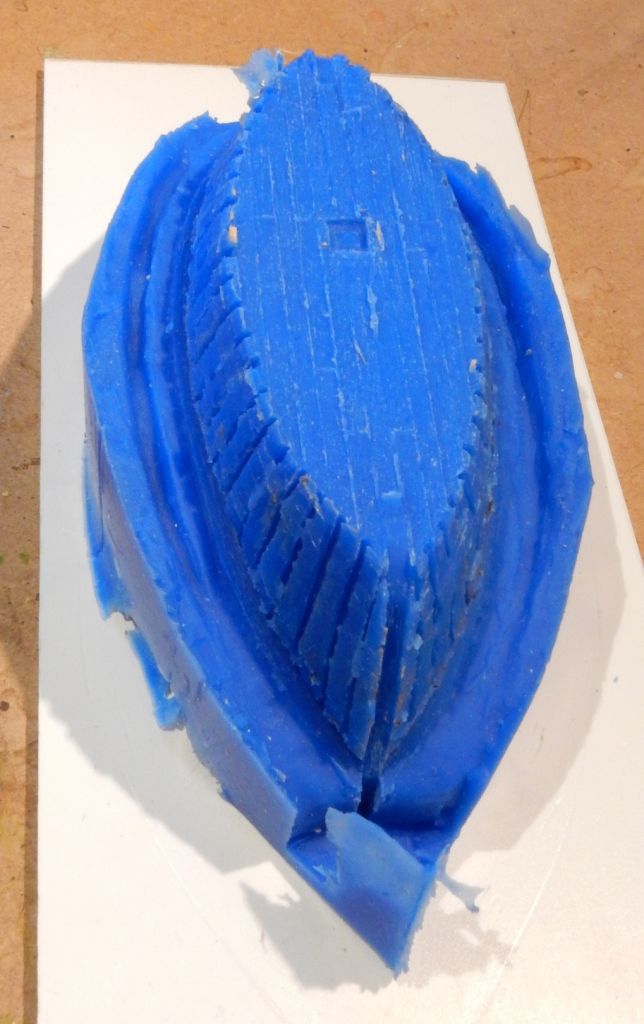
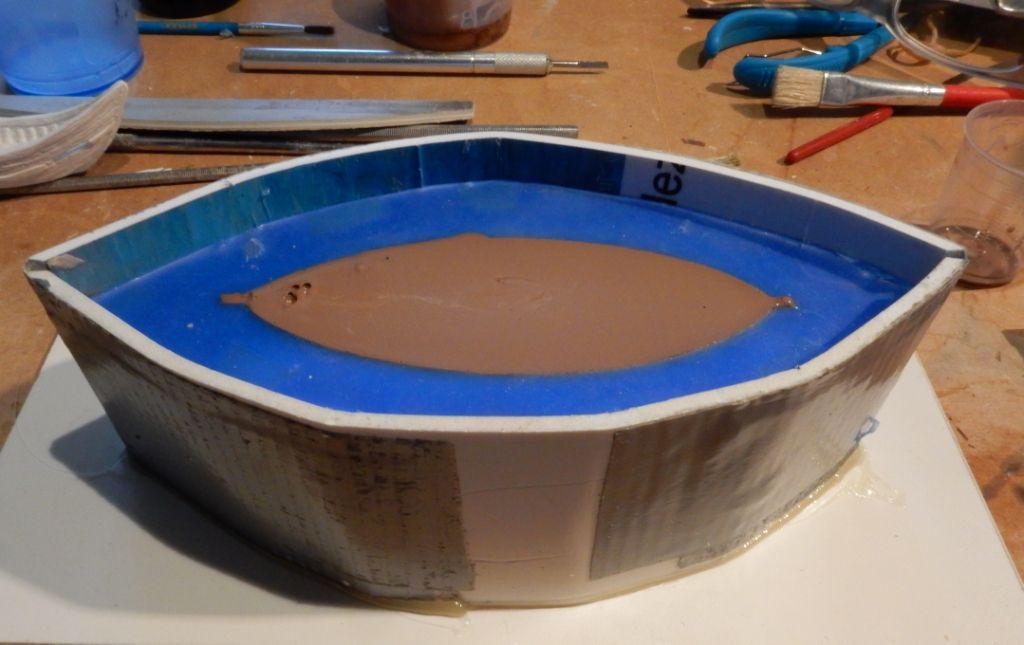
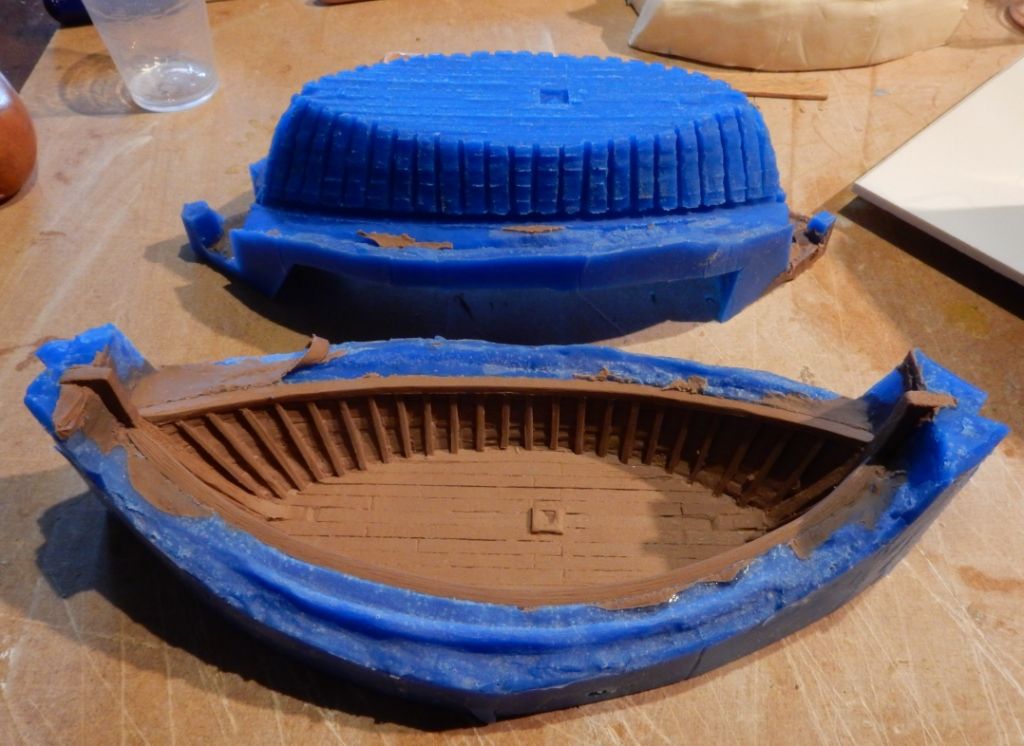
Regrettably this will be seen for ever in the copies of the hull too, because mold and casting will show every detail.

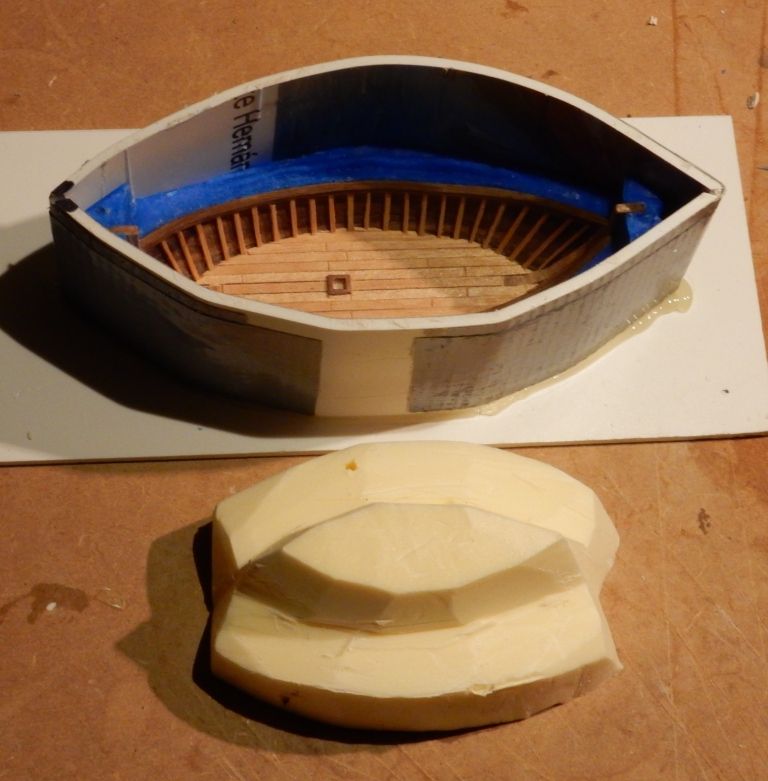
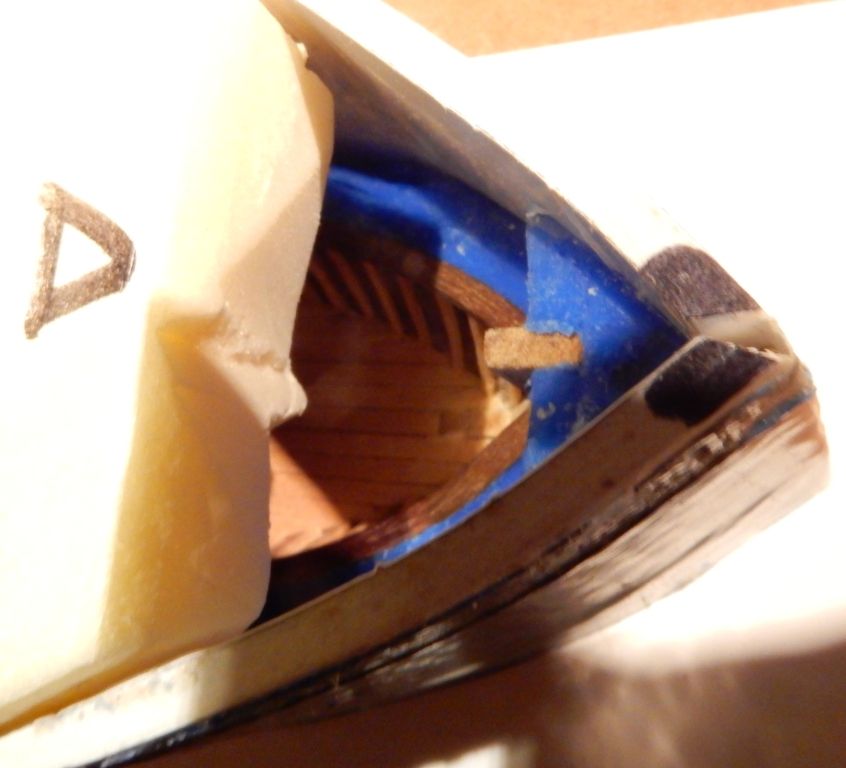
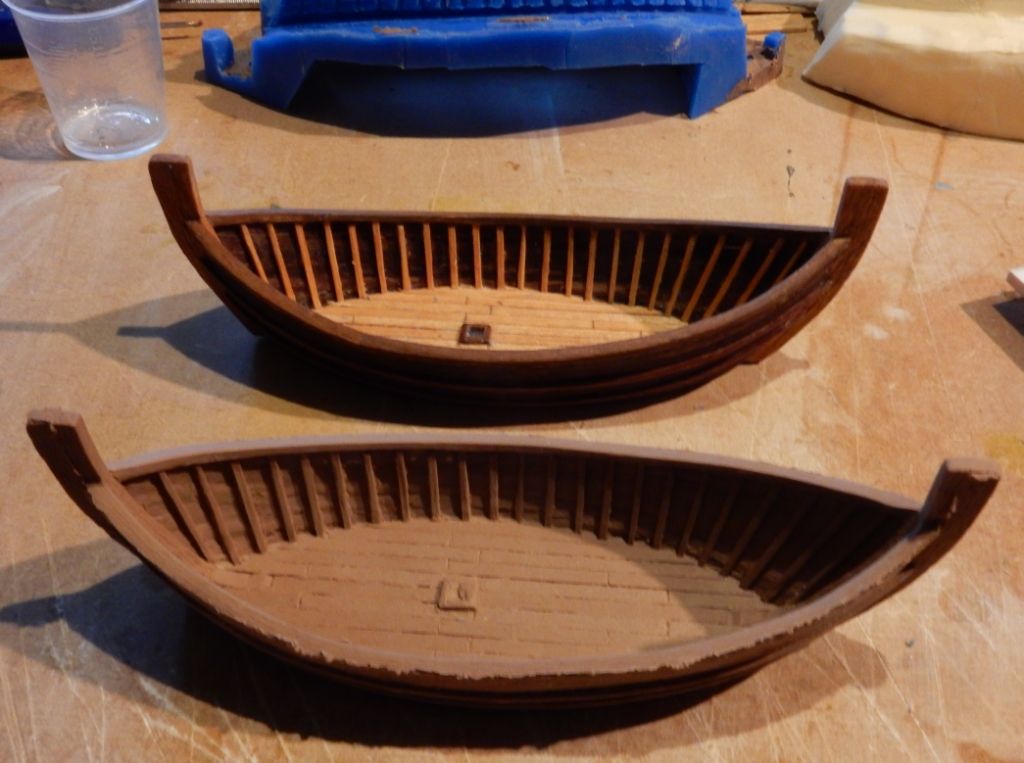
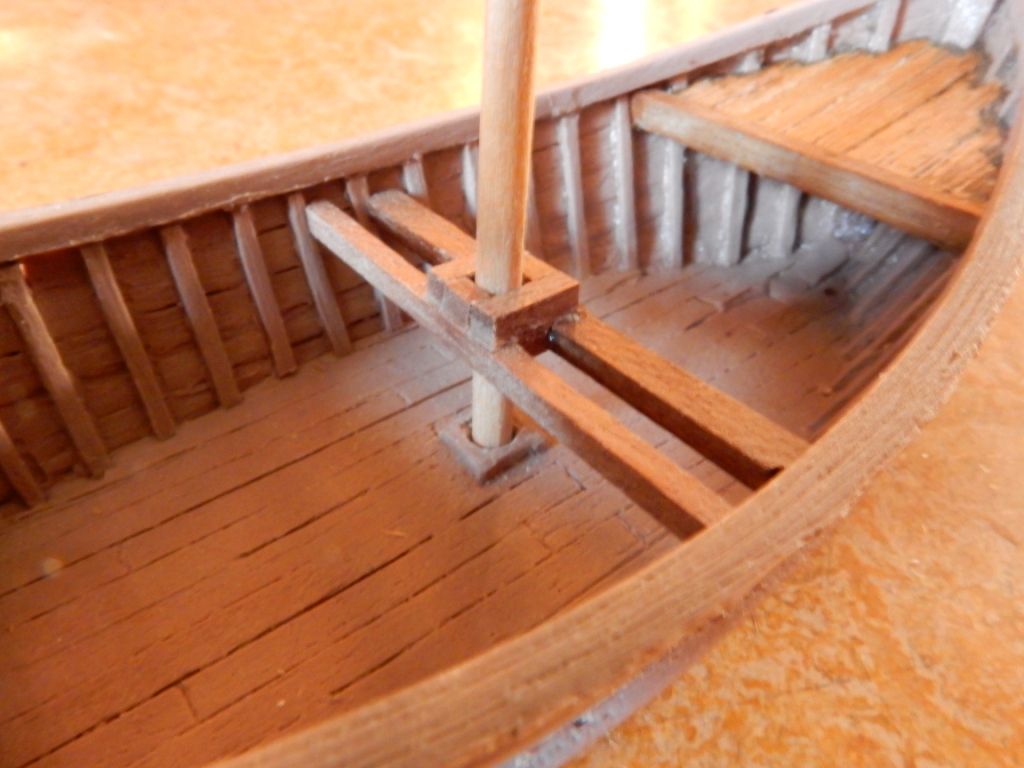
The inside of the hull is very raw and has to be sanded with a grinding machine.

Image

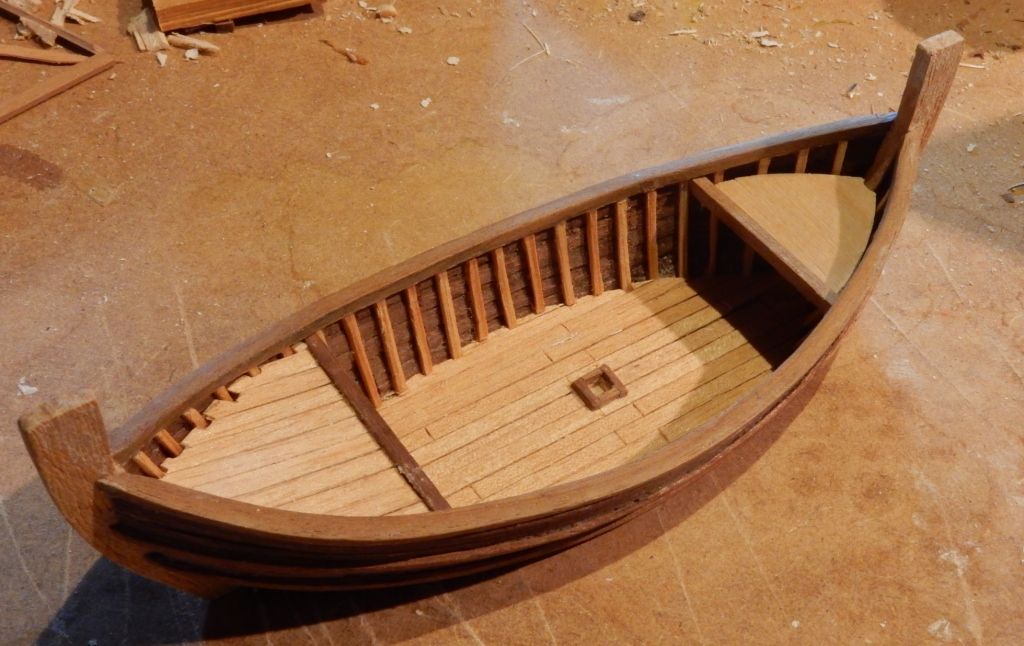
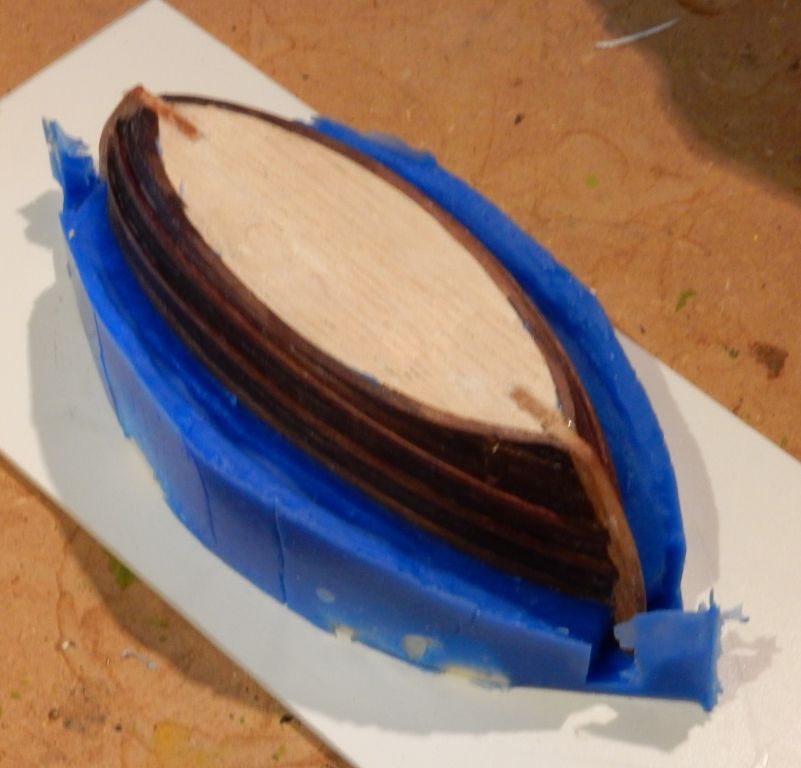
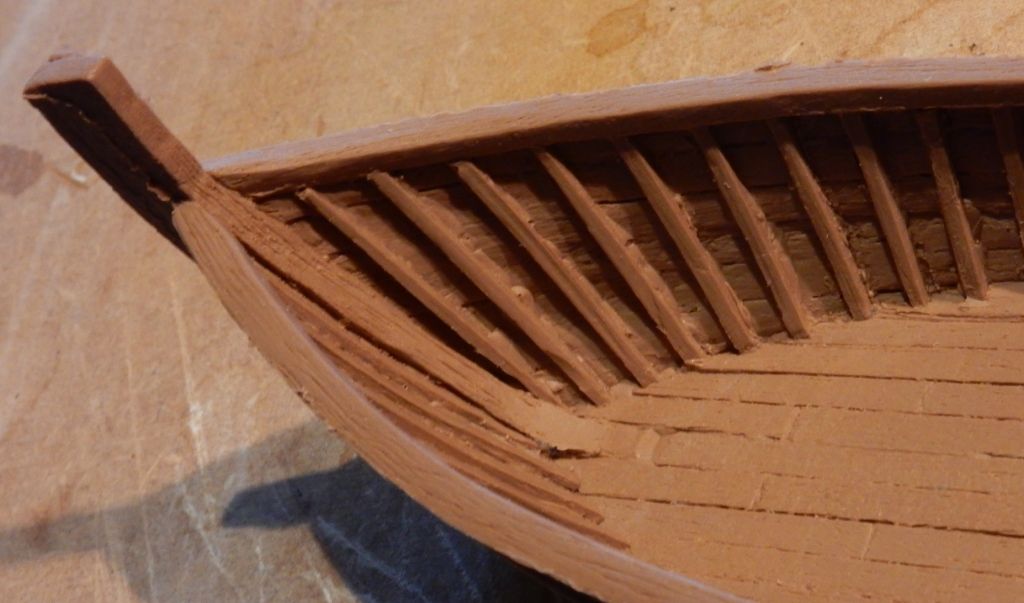
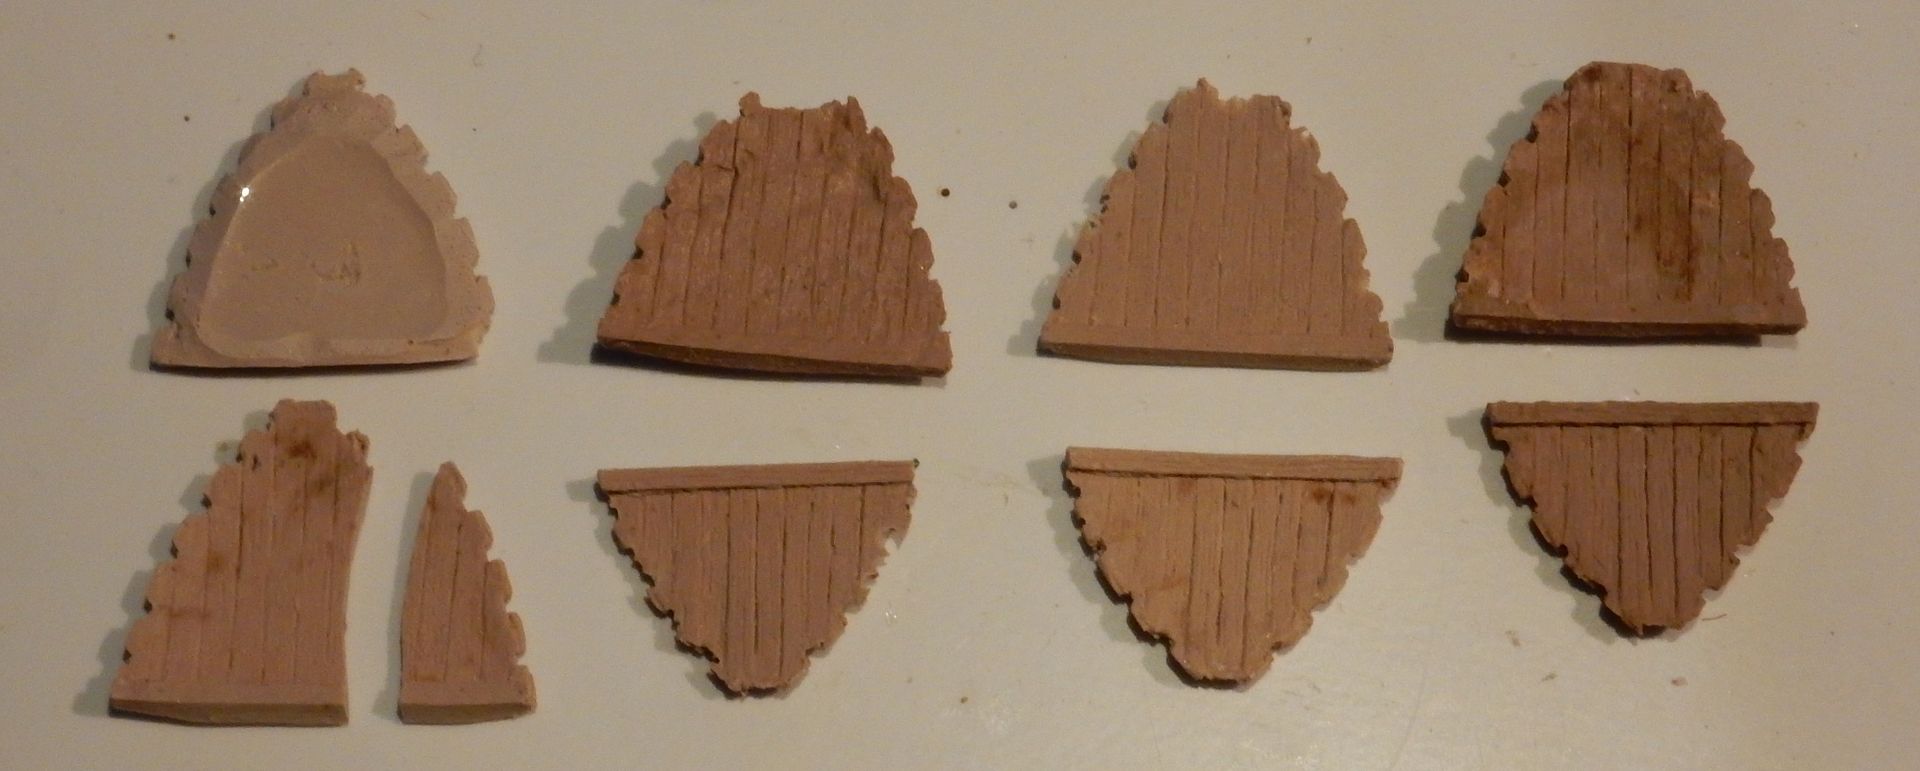
Top boards, inner and outer ribs are added.

Image

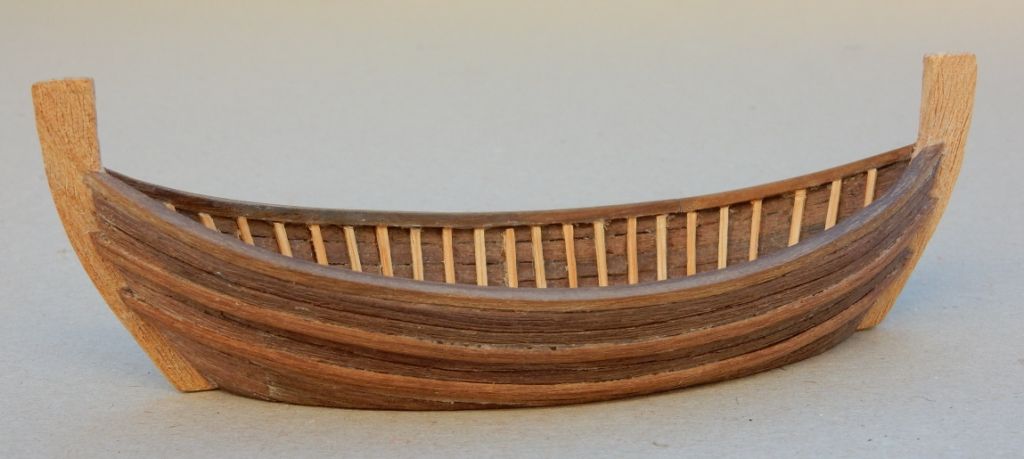
A bottom deck and a mast foot: both of these are concessions to reality because of the flat bottom.

Image

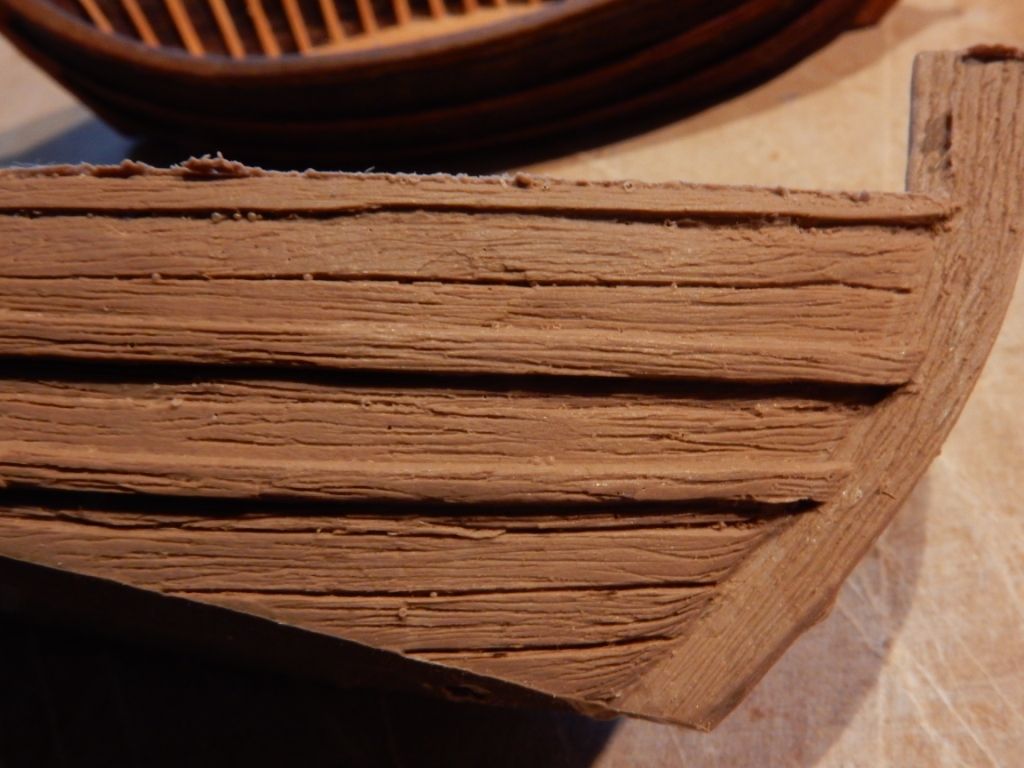
Because of intensive sanding the wood veins are lost so I made them again in an artificial way by scratching them into the structure of the wood. This is why the use of wood is preferred in stead of plastic or cardboard. Redoing the veins would not be necessary for a wood-only model. But my aim is to reproduce the veins in resin to make painting of the copies more easy.

Image

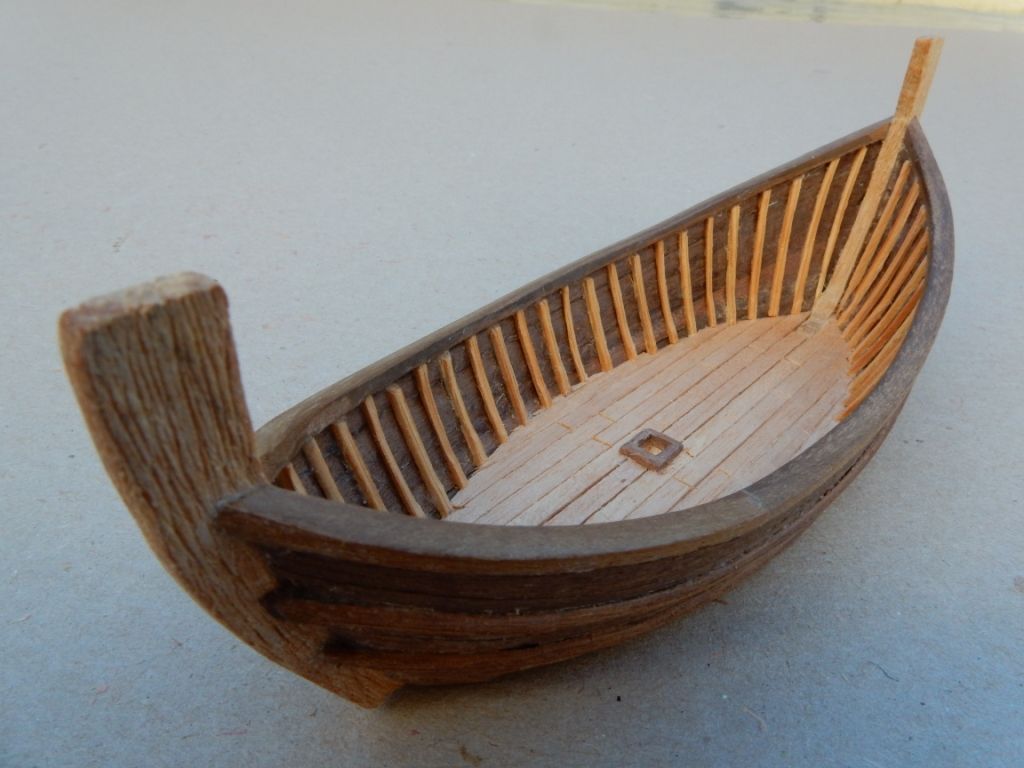
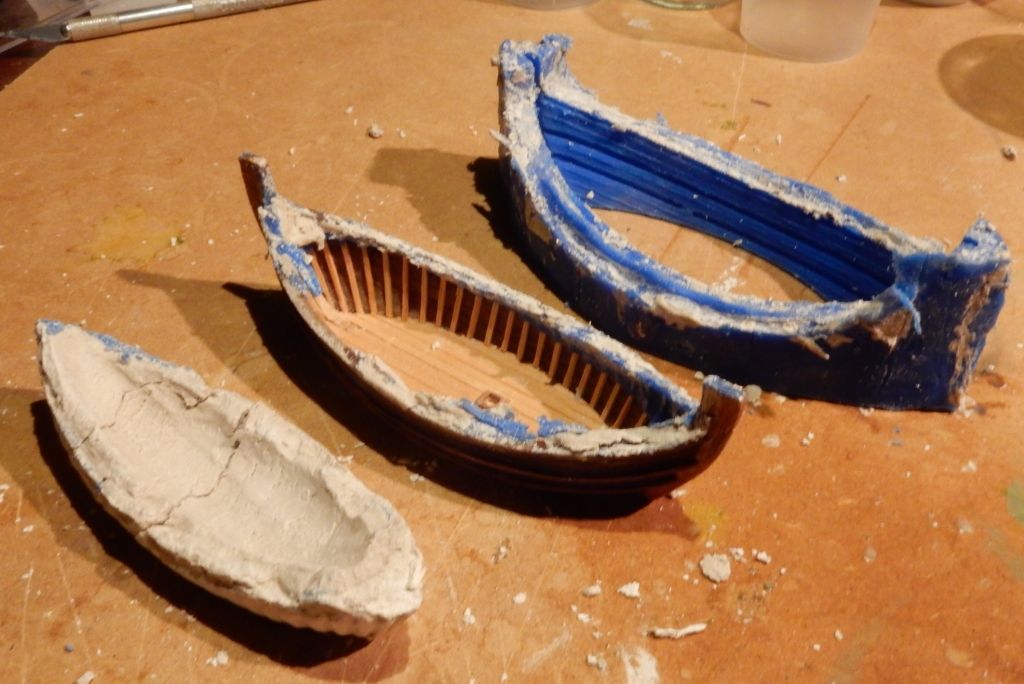
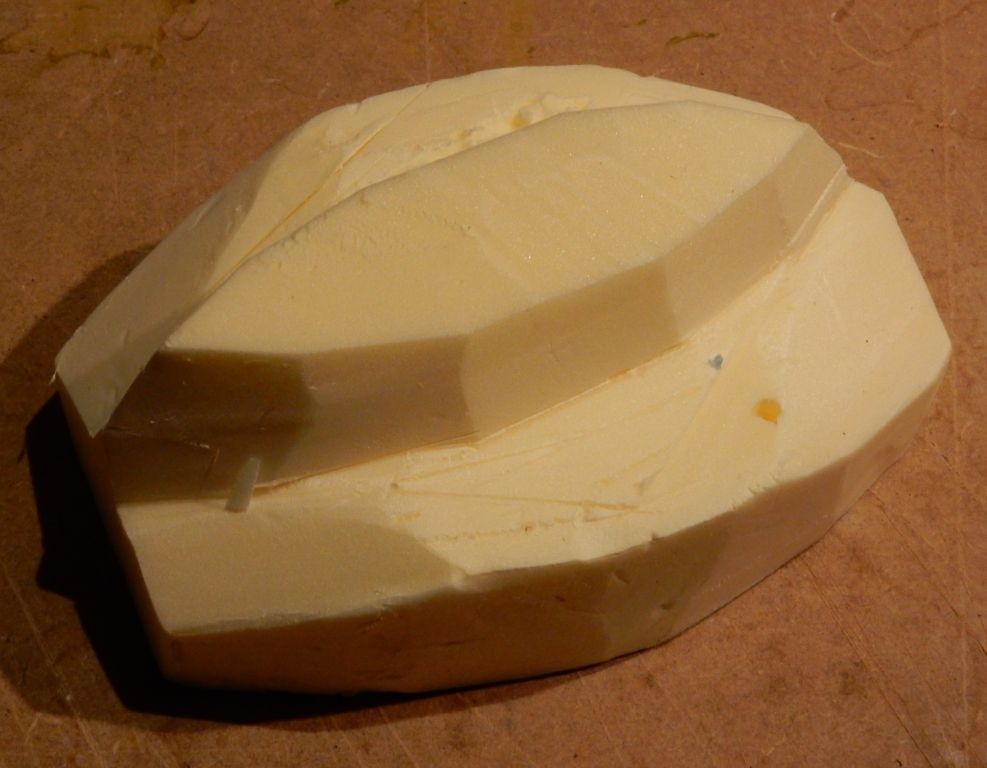
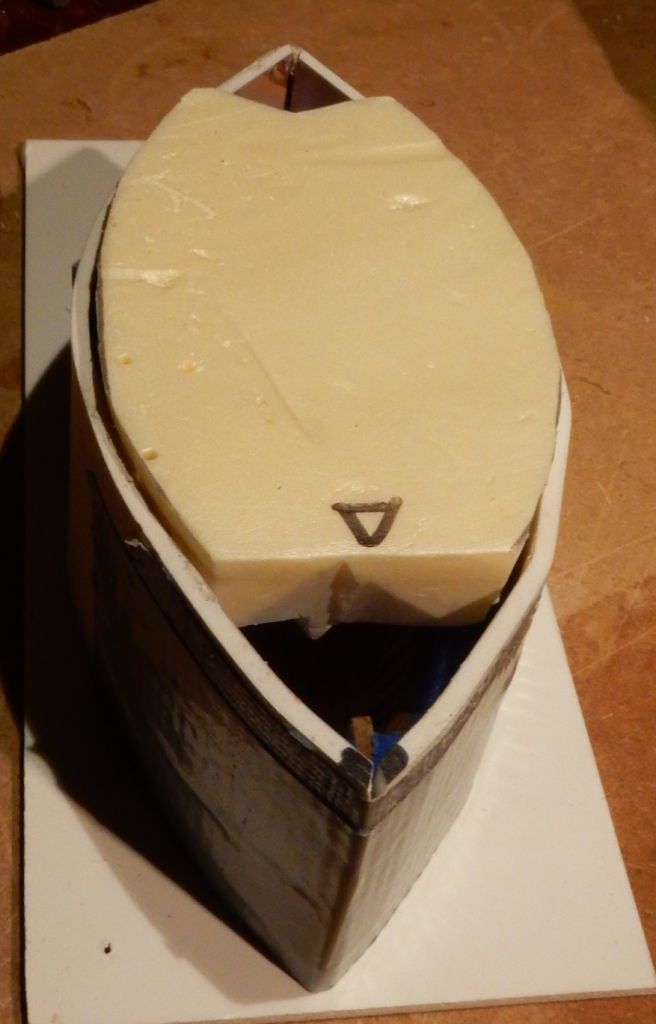
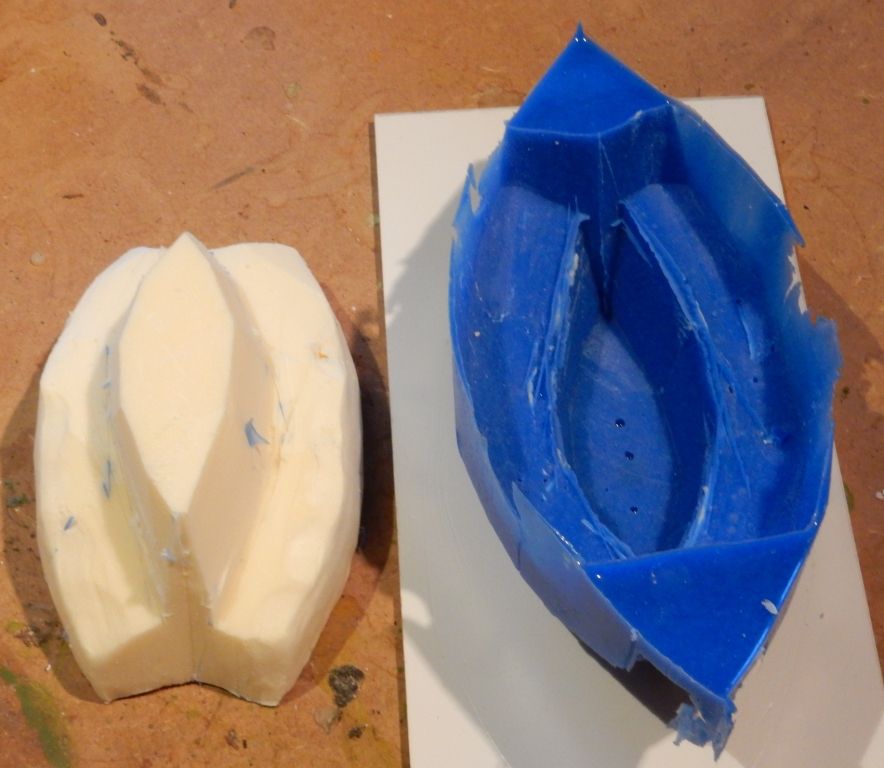
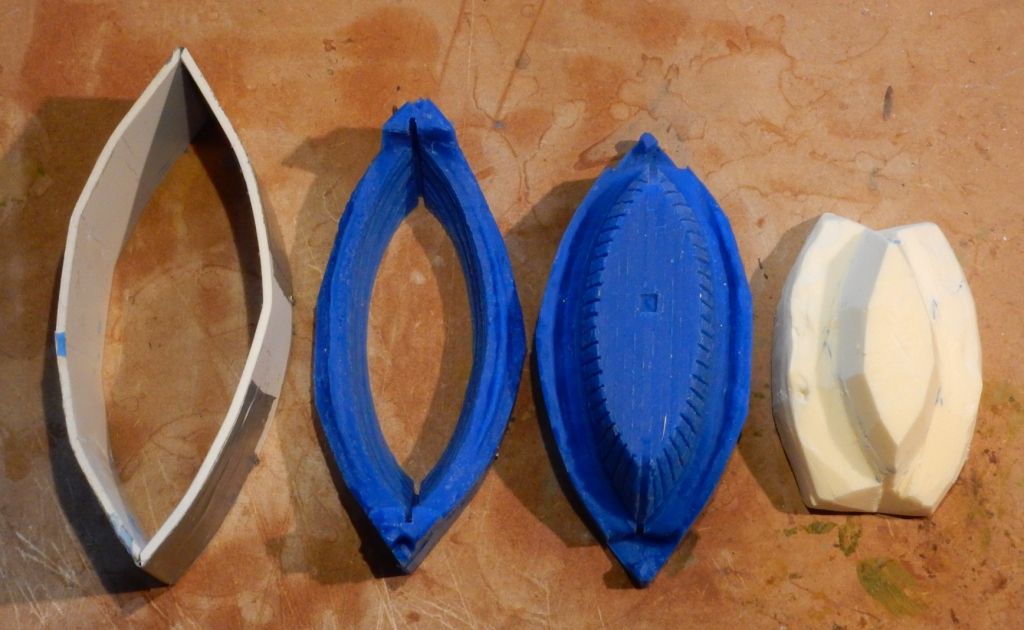
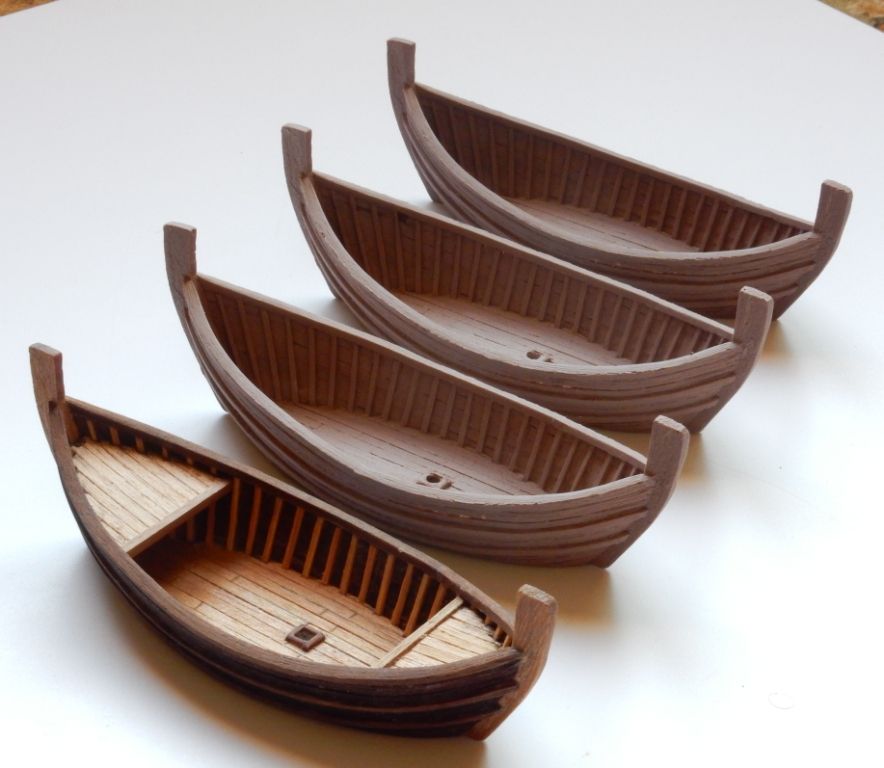
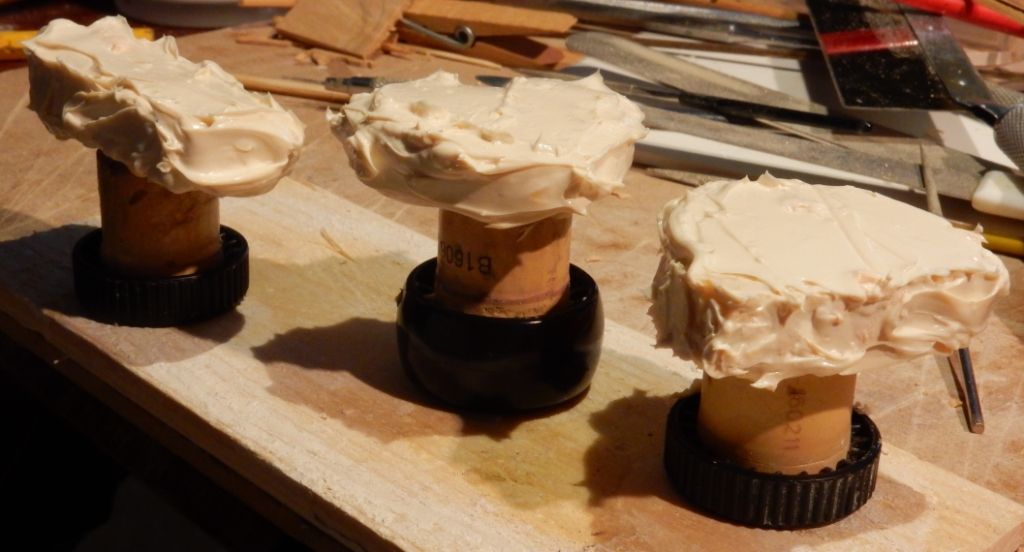
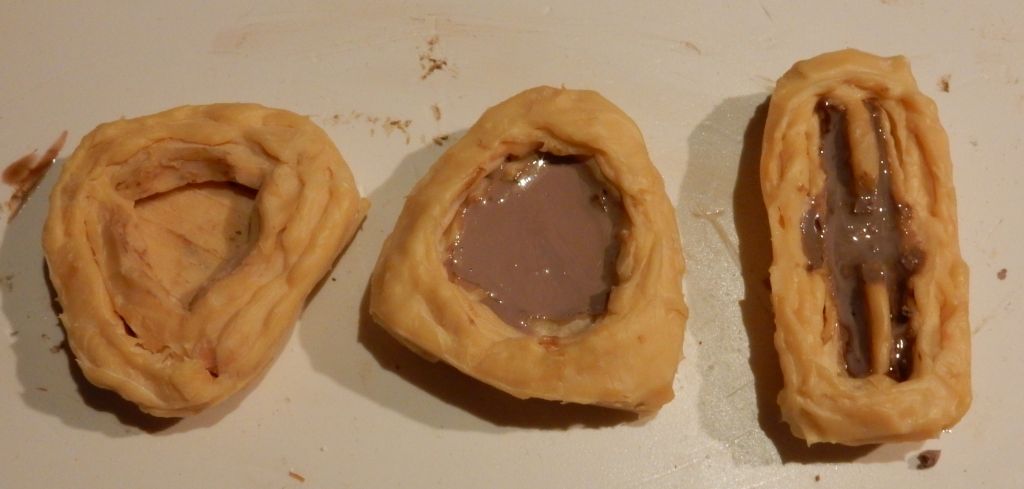
Making front and aft deck separate from the hull to make casting possible

Image

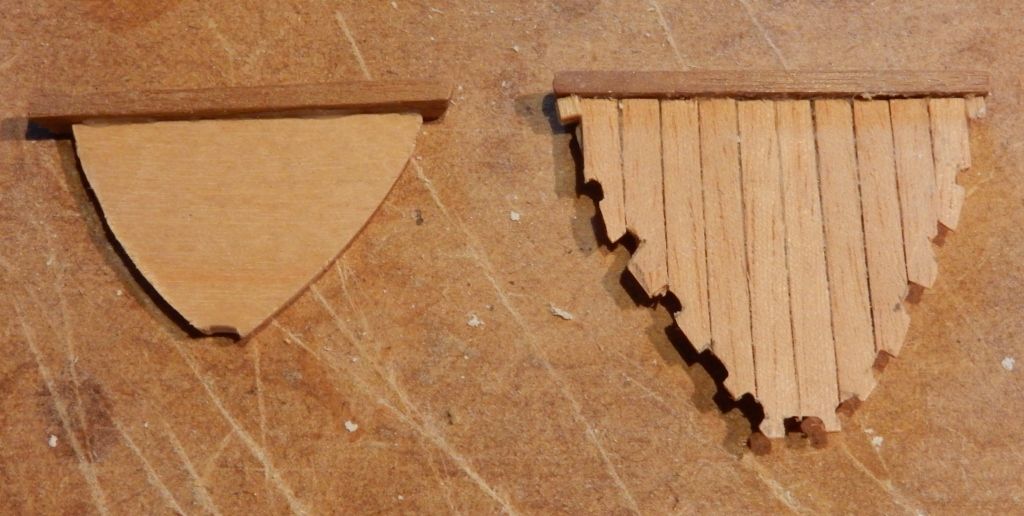
Because of the ribs in the hull this is a very difficult task that needs lots of corrections. I finally need putty to fix the shape and fill the openings.

Image

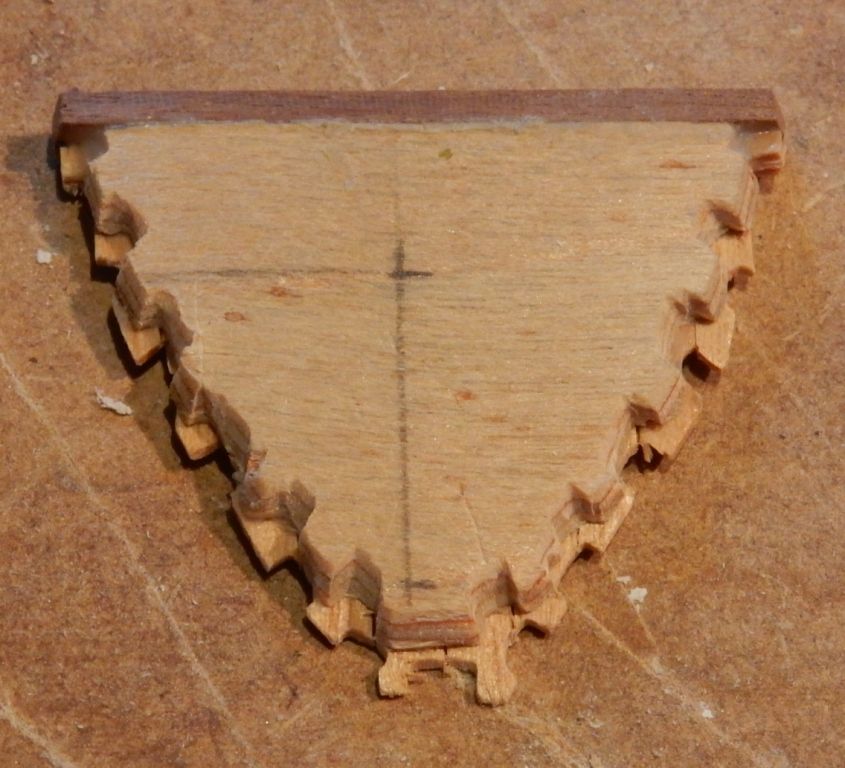
If the decks should have been casted together with the hull there will be to large undercuttings: or massive resin blocks costing a lot of sesin and leaving no open space under those decks.

Image

to be continued...
User avatar
Cryns  Netherlands

Supporting Business Supporting Business
 
Posts: 1254
Member since:
11 Nov 2015, 15:33


Posted by Kostis Ornerakis on 25 Jan 2017, 13:48

Splendid work :thumbup:

Mr. Cryns wrote:The way of building is just like the ancients did it: hull first, the inner ribs will be added later on. So at this stage the hull boards have to be glued onto the other.

Here to say that naval museum of Chania Crete reconstructed the Minoan ship.
They did it the same way you described.
The ship's name is Minoa and she, with Olympias and the reconstruction of the Keryneia ship, accompanied the Olympic flame at the port of Piraeus, 2004.
Unfortunately the Ministry of Culture did not consider the project Minoa scientifically substantiated, but the ship since pilot traveled by her own means in Athens, it is now in a sheltered area in Chania.
Image

I hope it helps for your project. :-D
User avatar
Kostis Ornerakis  Greece

In memoriam
 
Posts: 1280
Member since:
14 Feb 2016, 18:16

Posted by Peter on 25 Jan 2017, 20:28

Nice ship so far! :thumbup:

When can we move the animals in Noe? ;-)
User avatar
Peter  Belgium

Moderator Moderator
 
Posts: 22509
Member since:
25 Mar 2008, 18:51

Posted by Beano Boy on 26 Jan 2017, 00:05

The Creativity of building first the "Patterns' then the Moulds then Castings taken as an end result", and your Presentation is all Wonderful here as I glance many a look upon them. I therefore congratulate Mr.Cryns and every one else in this joint enterprise. :thumbup:
I would suggest putting a Waterproof Raincoat of Copyright protection upon all your Master Patterns & Moulds,if you plan to release boats upon the fresh morning tide of the open Market Place.Unique Marks on these works,known only to yourself is advised too.It is The Craft similar to Stone Masons of Old. BB
Beano Boy  England
Supporting Member (Gold) Supporting Member (Gold)
 
Posts: 8086
Member since:
03 Sep 2013, 14:45

Posted by sberry on 26 Jan 2017, 08:55

Ah, resin copies, that sounds good! I really would like to buy one of these.
User avatar
sberry  Germany
 
Posts: 933
Member since:
12 Mar 2010, 20:37

Posted by Cryns on 27 Jan 2017, 11:35

Thanks for your enthousiasm Kostis, Peter, BB and sberry!

Kostis Ornerakis wrote:naval museum of Chania Crete reconstructed the Minoan ship.

Nice. And what a beautyful picture! The sunlight reflecting on the hull. And the fog or smoke above the watersurface. Of course I know this type of ship from the fresco's from Thera (San Torini) but I did not know the Cretan people build a replica of this.

Kostis Ornerakis wrote:Keryneia ship

That one will be the next shipmodel I like to build and produce. It is supposed to be exactly form the period of Alexander the Great.

Beano Boy wrote:Copyright protection upon all your Master Patterns & Moulds

Thanks for reminding me again. Can anybody tell me if there is an official way to protect the copyright of a model? I think in the 'Piracy topic of Alex' gasmask men' there was some information about that.

Beano Boy wrote:Unique Marks on these works,known only to yourself is advised too

Of course I can engrave my name in the bottom of all parts but that can easily be removed. I think the woodveins in the planking are a better way to recognise an illegal copy in the future.

Peter wrote:move the animals in

I will cast a gangboard sufficient for elephants (and bears!) especially for you :-D

sberry wrote: I really would like to buy one of these.

Thanks for your interest. Since you wrote this I can not stop thinking, when working on this kit, about what Mr. Berry will think of the quality of my castingwork as soon as he has the model in his hands in his Berlin studio (or workdesk?).

CASTING THE ULUBURUN SHIPHULL

I decided to cast the ship upside down to make use of the flat bottom as a huge pouring hole and ventilation channel at the same time.

Image

A temporary mold is made of clay.

Image

A fluting it made on both sides to keep both parts of the rubber mold exactly in position.

Image

A casting box made of plastic board and duct tape.

Image

Sealed off with hot glue to prevent it from leaking.

Image

Two component pouring rubber, extra stiff because of the relatively large size of the mold, I wanted to be sure the boards of the mold do not slump and crumple.

Image

A test made clear the wood does not have to be treated with chalcum powder or parting agent because the rubber does not attach to it.
The syllicone rubber is mixed and poured in at prow and stern.
The rubber is very expensive. I mixed not too much. In fact it was just too little.

Image

So I chopped up an old rubber mold.

Image

And added them into the liquid rubber as far as possible from the model surface until the right surface level was achieved.

Image

After six hours drying the rubber was hard but the clay was still moisty.

Image

A lot to clean and wash.

Image

Superimposed relief of the woodveins: at some places it was so excessive I had to remove it with a side cutter.

Image

The outside part of the mold is ready:

Image

To save 70% of rubber for the inner part of the mold, a piece of foam can replace it.

Image

Image

The blue rubber that is still visible after adding the shipmodel and the outer supporting mold is treated with parting agent:

Image

Both foam and plastic board serve as a support molds:

Image

Only a very limited space needs to be filled up with liquid rubber now:

Image

After pouring the rubber, the foam support mold is pressed down until the required surface level of the rubber is achieved.

Image

After another six hours the molds can be separated.

Image

Because of the foam support mold the rubber mold was so thin, I can almost look trough its bottom side.

Image

The hole for the mast foot did not come out well :eh:
The rubber was so fluid while pouring, it crept under the wooden ribs and between the planking.

Image

These excessive rubber bits were removed with sidecutters.

Image

Image

Putting the two mold parts together makes clear how thin the hull will be after casting.

Image

Fast drying resin mixed with brown paint is poured in at prow and stern ends. Except for some bubbles in the bottom, there was no problem with ventilation.

Image

Fifteen minutes later the resin copy of the hull was hard enough to be removed.

Image

Some flesh of course.

Image

Reproduction of the woodveins:

Image

Inside, between the ribs, traces of white glue are reproduced in the copy :eh:

Image

Because of the fast hardening resin a few hours later I already had several copies.

Image

Next step is to cast the decks, additional timbers, mast, steering oars, ladder, anchors, cargo and sail.
User avatar
Cryns  Netherlands

Supporting Business Supporting Business
 
Posts: 1254
Member since:
11 Nov 2015, 15:33

Help keep the forum online!
or become a supporting member

Posted by Ray.Caruana on 27 Jan 2017, 12:36

Wow!! :drool: I really enjoy following your work Mr.Cryns, even though it's not my subject. Just one question if you don't mind...Do you find some time to sleep every now and then? :-D
User avatar
Ray.Caruana  Malta
 
Posts: 279
Member since:
14 Mar 2014, 10:30

Posted by huib on 27 Jan 2017, 14:41

Fantastic and beautiful work, Mr. Cryns! Very skillful. Knowing you, I guess you wil make four quite different ships out of these hulls.
User avatar
huib  Netherlands
 
Posts: 962
Member since:
12 Dec 2015, 15:57

Posted by Ben90 on 27 Jan 2017, 16:21

Looks fantastic, even if the casting wasn´t that easy...
User avatar
Ben90  Germany
Golden Brush Winner
 
Posts: 1509
Member since:
28 Apr 2011, 23:32

Posted by Kostis Ornerakis on 27 Jan 2017, 18:32

Both the rubber and resin you used are fine. The quality of the copies seems to be really high! :thumbup:
User avatar
Kostis Ornerakis  Greece

In memoriam
 
Posts: 1280
Member since:
14 Feb 2016, 18:16

Posted by sberry on 27 Jan 2017, 21:21

Fantastic! Excellent! ... It seems that I'm running out of superlatives concerning this project, because every further step presented here is looking impressive, again and again.
User avatar
sberry  Germany
 
Posts: 933
Member since:
12 Mar 2010, 20:37

Posted by Cryns on 02 Feb 2017, 12:49

Dear Ray, Huib, Ben, Kostis and sberry thank you so much for your replies.

Ray.Caruana wrote:Do you find some time to sleep every now and then?

As long as I do not post my contributions to this forum between 23:00 and 09:00 you don't have to worry about me Ray :-D .

huib wrote: I guess you wil make four quite different ships out of these hulls.

How did you know? :shock:

sberry wrote: I'm running out of superlatives concerning this project

This whole forum is internationally known for its positive superlatives. It will be impossible for anyone of us to come up with a fresh one I think. :-D

Meanwhile I made some new parts for the Uluburun ship hull:

Image

Image

Front and aft decks covered in latex:

Image

This creates open molds for casting one side profiled parts:

Image

The quality of the planking profile is fine but of the overall shape it is not: the decks are deformed because the latex mold does not stay in shape during drying. For a solitary object that would not be a problem. But these decks have to fit exactly into the shiphull. And now they don't. Also the toothed edges break when releasing the cast from the mold even after applying parting agent.

Image

The bottom after cutting some excessive resin:

Image

To prevent deforming I made the molds more heavy...

Image

... but that only increased the problem. Probably because latex shrinks too much. So I have to use the expensive 2 component rubber again, like I did with the amphora cargo last year:

Image

Image

Image

Image

Here you can see the air bubbles in the hand grips of the amphora because of poor ventilation of the mold:

Image

Making anchors by using very hard oak wood. Notice the direction of the woodveins to prevent the shape from breaking during the carving. I think this is how the ancients used the wood too:

Image

Different anchor designs, the stocks are supposed to be made of stone:

Image

Stearing oars:

Image

Mast and composite yard:

Image

Wicker fences to prevent high waves from smashing into the cargo section. I twined these out of bamboo and coconut feebres:

Image

A lot of try and error to find the right technique and proportions:

Image

A better but more expensive way for the ancient shipowners was to protect the boards with canvas sheets. I used an old shirt of mine and stiffened it with white glue which makes it possible to shape and sculpt the fabric a little.

Image

The many holes in the board of the resin copy hull are the result of try and error. By using a copy, I save the original wooden hull from being damaged.

Some waiste foam I found at my street is used to make a mold for the partly raised sail:

Image

Getting the sail in shape:

Image

And a full sail too for variation. The white fabric was colored in tea water:

Image

Image

I will try to create a partly raised shape by stretching and cropping the fabric in stead of pressing it on top of a foam mold:

Image
User avatar
Cryns  Netherlands

Supporting Business Supporting Business
 
Posts: 1254
Member since:
11 Nov 2015, 15:33

Posted by MABO on 02 Feb 2017, 13:34

Very interesting to see, again.
User avatar
MABO  Europe
Supporting Member (Gold) Supporting Member (Gold)
 
Posts: 9146
Member since:
12 May 2008, 18:01

Posted by Kostis Ornerakis on 03 Feb 2017, 01:13

I love both kinds of fences! :love:
User avatar
Kostis Ornerakis  Greece

In memoriam
 
Posts: 1280
Member since:
14 Feb 2016, 18:16

Posted by Wiking on 03 Feb 2017, 05:09

Thank you Mr. Cryns for these superb how to do special again.
I will highly commend the lot of pic for step by step work.
The most useful idea that you show us, for me is the one with the, getting the sail in shape, and the tension of rubber around, again.
:yeah:
User avatar
Wiking  Germany
 
Posts: 2825
Member since:
14 Sep 2015, 10:03

Posted by Kekso on 03 Feb 2017, 09:35

Fantastic work on that merchantvessel. I really enjoy watching it.
User avatar
Kekso  Croatia

Moderator Moderator
Supporting Member (Bronze) Supporting Member (Bronze)
 
Posts: 6840
Member since:
19 Oct 2011, 18:32

Help keep the forum online!
or become a supporting member

Posted by sansovino on 04 Feb 2017, 13:26

Mr Cryns, what an impressive work which you present us in all it different steps. Did you thougth to create a new own manufacture-line or do you your work only for your own pleasure? Some of your figures and ships would receive certainly the interest of consumers - to buy them from you...

How big is your working place when you are producing so many new forms, ships, figures and dioramas? I presume it has to be a garage or still a bigger space to store all materials....
sansovino  Germany
 
Posts: 794
Member since:
27 Mar 2014, 21:42

Posted by praga on 05 Feb 2017, 08:34

It is really a great pleasure to watch you at work. And I always learn new things.
User avatar
praga  
 
Posts: 230
Member since:
04 Oct 2010, 09:26

Posted by C M Dodson on 05 Feb 2017, 10:02

Hello Mr. C.

I thought your galley was good but the construction techniques and ideas shown are superb examples of clever thinking.

Have you considered going into business? The professional looking end product would fly off the shelves.

Best wishes,

Chris
C M Dodson  United Kingdom
 
Posts: 2572
Member since:
01 May 2015, 18:48

Posted by stenfalk on 07 Feb 2017, 20:30

Mr. Cryns, your knowledge of the history is as impressive as your ability to replicate it in three-dimensional models. In the last weeks i've visited the forum only sporadically. It is fascinating how much has happened in such a short time. Especially in this thread.

The new small boats are outstanding. In every shown step i feel your great dedication and passion.

Would be there a fanclub here for you I would join. And to apply me for the chairman. :-D

Think you it's possible to produce one boat more as you need? I would be very interested on a purchase... :eh:
User avatar
stenfalk  Germany

Supporting Member (Bronze) Supporting Member (Bronze)
 
Posts: 537
Member since:
28 Apr 2016, 15:08

Previous pageNext page

Return to Work in Progress